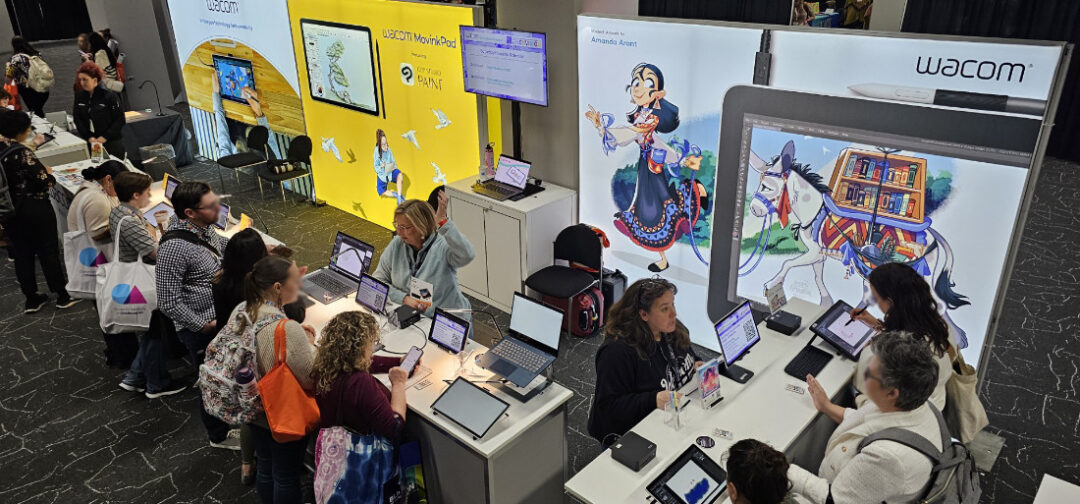
For the Wacom team, NAEA is always a highlight of the year. It gives us the chance to connect with educators we often communicate with through email, meet new teachers discovering digital art tools for the first time, and reconnect with friends we see each year at NAEA or at state art education conferences. The conversations and shared enthusiasm for teaching art are always inspiring.
The Wacom Hero Lab
One of the most exciting parts of our booth this year was the Wacom Hero Lab, a hands-on make and take experience where educators created their own Art Hero trading cards using Wacom tools and CLIP STUDIO PAINT.
Teachers had the option to begin with ready-to-use templates or design their own character from scratch. We were so impressed by how many educators chose to create their own original Art Hero instead of simply coloring the templates. The creativity was flowing throughout the event. We saw capes, imaginative tools, creative superpowers, and unique backstories come to life right in the booth.
Participants also received the Hero Lab lesson plans and classroom templates, which give educators everything they need to recreate the activity with their students. Many teachers shared ideas for adapting the project to different grade levels, media arts classes, or storytelling projects. It was exciting to hear how quickly educators began imagining ways to bring the activity into their classrooms.
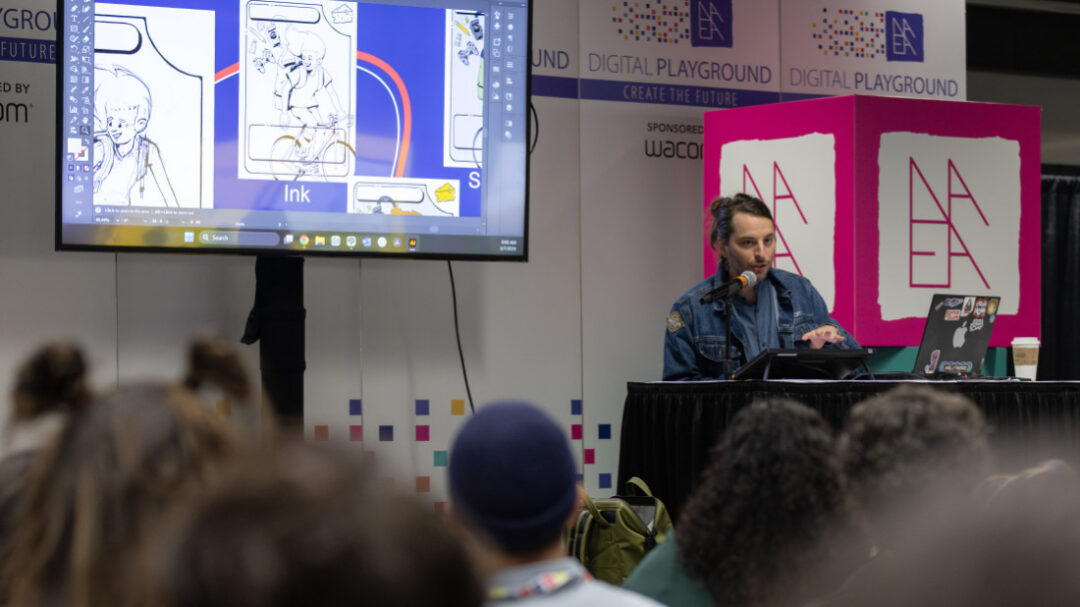
Digital Playground Sessions
Throughout the conference we also hosted sessions on the Digital Playground stage. These sessions focused on approachable ways educators can bring digital art into their classrooms.
Michele kicked things off with Chromebook Creativity: Quick and Free Digital Art Tools, showing how teachers can transform everyday Chromebooks into creative studios using free web-based art applications. The session highlighted tools students can use for drawing, painting, design, and mixed media projects without needing to install any software. Many educators appreciated leaving with ideas they could implement immediately in their classrooms.
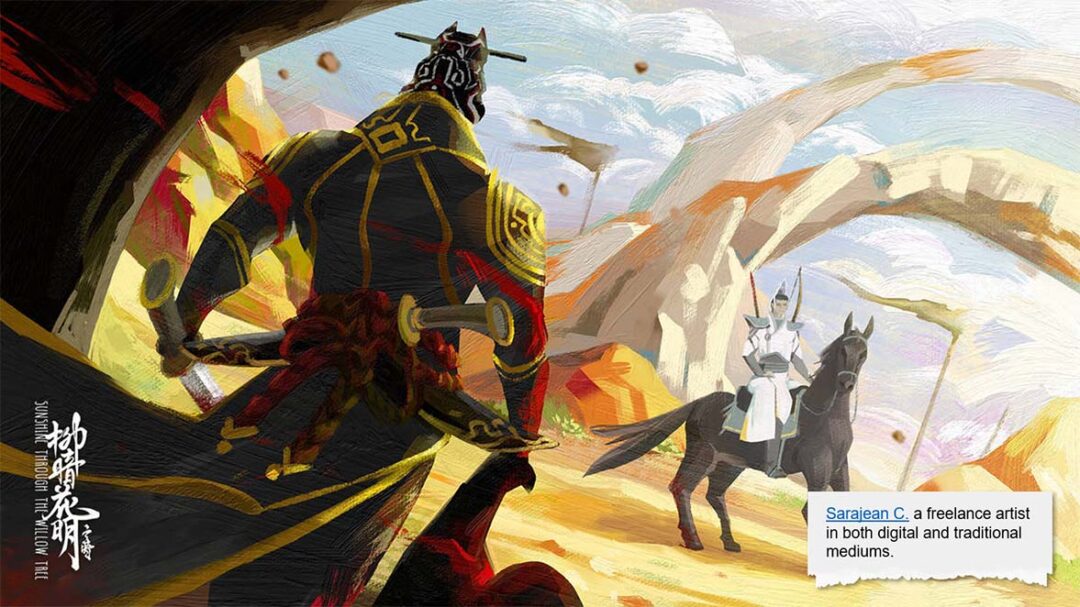
Sarajean led Creating Comics with CLIPSTUDIO, which introduced the comic creation workflow using CLIPSTUDIO PAINT. The session walked through pencils, inks, color, layout, and text while also exploring how teachers can structure their classroom like a comic studio.
Christopher presented Digital Illustration 101, a welcoming introduction to the fundamentals of digital illustration. Educators explored the basics of sketching, rendering, coloring, and shading while learning techniques that help student work look intentional and polished. The session emphasized that these principles apply regardless of which drawing software teachers are using in their classrooms.
Sarajean Chung also hosted a thoughtful session titled Why Make Art When AI Exists? This session explored one of the most common questions facing creative classrooms today. The discussion focused on helping students develop a strong artistic foundation, encouraging persistence through challenges, and building a healthy mindset around creativity and problem solving in a rapidly changing technological landscape.
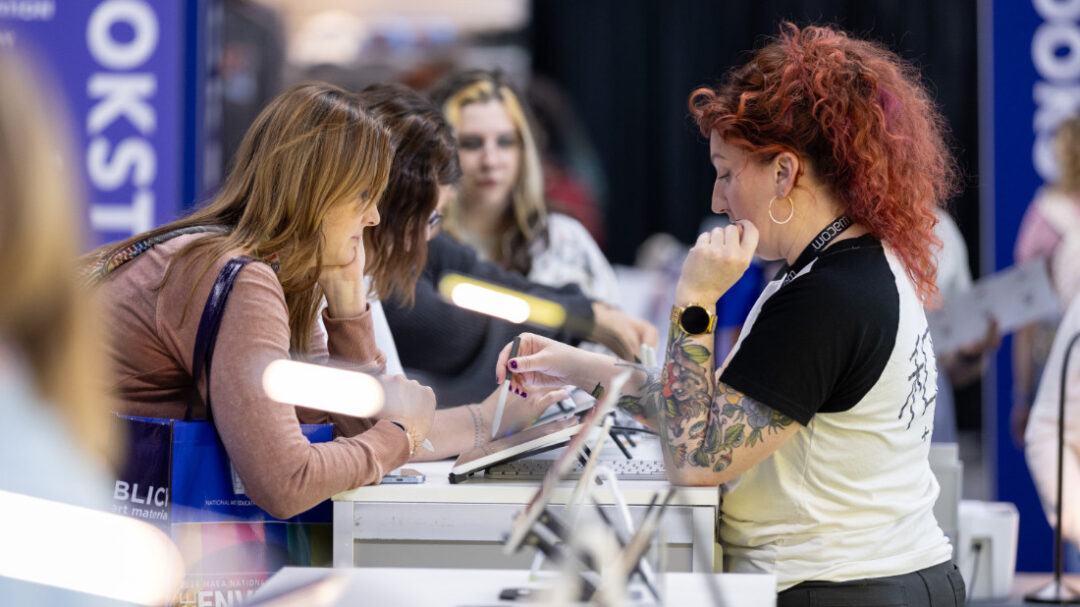
Hands-On Creativity at the Wacom Booth
The Wacom booth stayed busy throughout the conference as educators explored Wacom products.
Many visitors were interested in how digital tools can support traditional art practices, while others wanted to explore which devices work best for illustration, animation, and design. Some stopped by for a quick demo while others stayed longer to draw, sketch, and ask questions about bringing digital creativity into their programs.
What stood out most was curiosity. Educators were eager to learn how these tools can help students express their ideas, build new skills, and explore creative career pathways.
A Community That Inspires Us
One of the most meaningful parts of NAEA each year is the opportunity to spend time with such a passionate group of educators. The dedication art teachers show in helping students discover their creative voice is inspiring.
At Wacom, we are proud to support this work by providing tools, classroom resources, lesson ideas, and professional learning opportunities for educators.
Until Next Year
Thank you to everyone who visited the booth, joined a session, created an Art Hero, or simply stopped by to say hello. These conversations and connections are what make NAEA such an important event for our team each year.
We are already looking forward to gathering again with this incredible community. See you in New York for NAEA 2027!
]]>This year, we’re proud to celebrate two outstanding recipients whose thoughtful applications, strong instructional vision, and deep commitment to student success exemplify what the Wacom Lab Grant is all about.
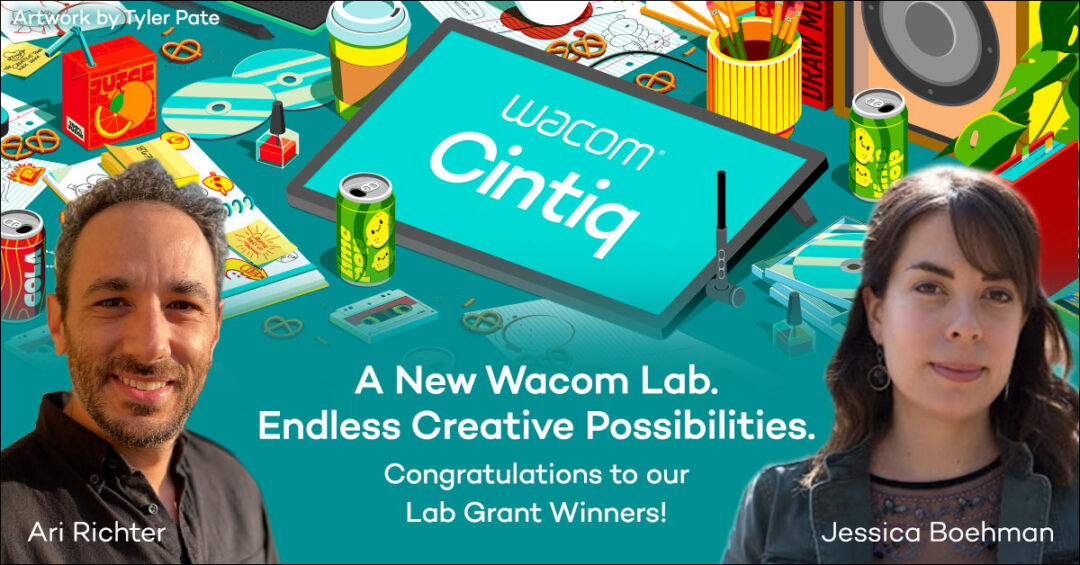
Wacom is excited to announce Ari Richter and Dr. Jessica Boehman, Professors of Fine Arts at LaGuardia Community College in Long Island City, New York, as the first recipients of this year’s Wacom Lab Grant! Their proposal clearly articulated both the challenges their students face and the transformative opportunity that access to professional creative tools can unlock. As a result, LaGuardia will receive Wacom Cintiq 16 pen displays, bringing industry-standard creative technology directly into two of their computer labs.
LaGuardia Community College, part of The City University of New York (CUNY) system, serves one of the most culturally diverse student populations in the United States. Many students in the Fine Arts, Design Studies, and New Media Technology programs are first-generation college students, first-generation immigrants, or come from families earning household incomes of less than $35,000 per year. For many of these students, purchasing personal creative technology simply is not an option.
Until now, they relied on traditional computer labs and a mouse to complete work intended for professional creative careers. That gap between curriculum goals and available tools was clear. And it mattered.
With the Wacom Lab Grant, LaGuardia will install Wacom Cintiq 16 displays across two labs, supporting more than 530 students across three academic programs. These devices will be integrated into coursework spanning illustration, graphic design, comics and graphic narrative, animation, web design, and computer art disciplines. Students will finally be able to work digitally in the same way professionals do.
The impact extends beyond individual classes. The Cintiqs will support college wide creative initiatives, including large scale public murals, t-shirt designs for community events, and student led comics publications like The Queerterly. These projects blend artistic expression with collaboration and real-world problem solving. They are exactly the kind of experiences that help students build confidence and strong portfolios.
LaGuardia’s mission does not stop at graduation. The college is deeply focused on helping students transfer successfully to four-year institutions and pursue careers in highly competitive creative industries. Access to Wacom Cintiq technology helps ensure students are prepared for that next step, both technically and creatively.
As Professor Richter wrote in the college’s application, “Access to industry standard tools should never depend on a student’s ability to purchase their own equipment. The Wacom Lab Grant represents an investment in equity, access, and long-term student success.”
We are proud to partner with LaGuardia Community College, Ari Richter, and Dr. Jessica Boehman as they bring this Wacom Lab to life. This is what happens when educator vision meets the right tools.
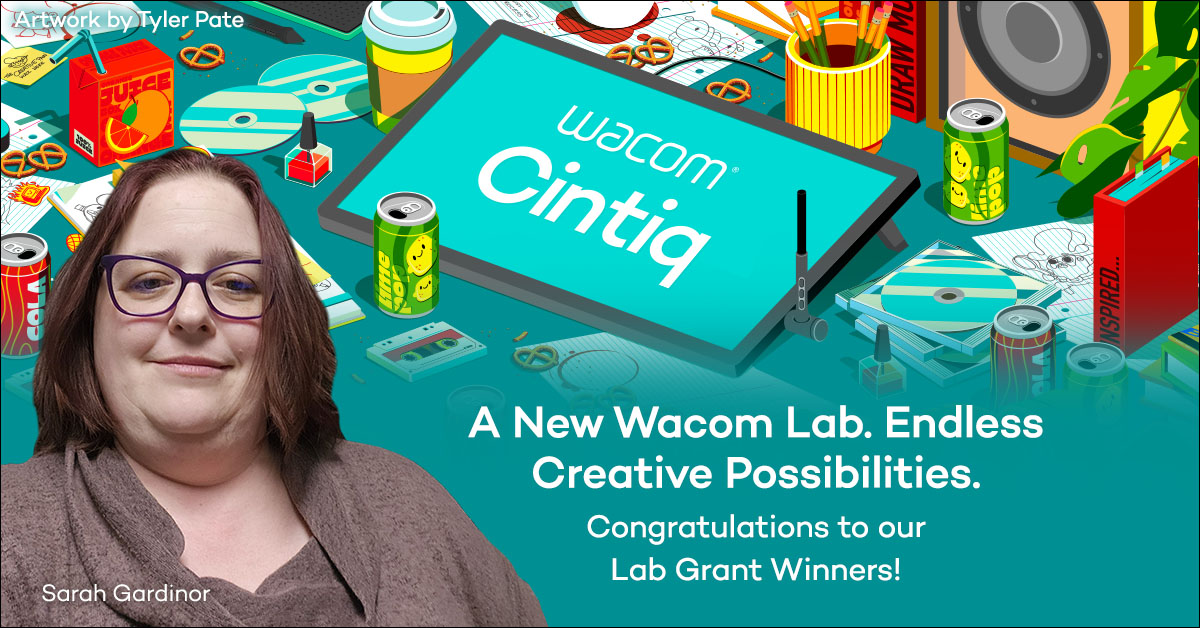
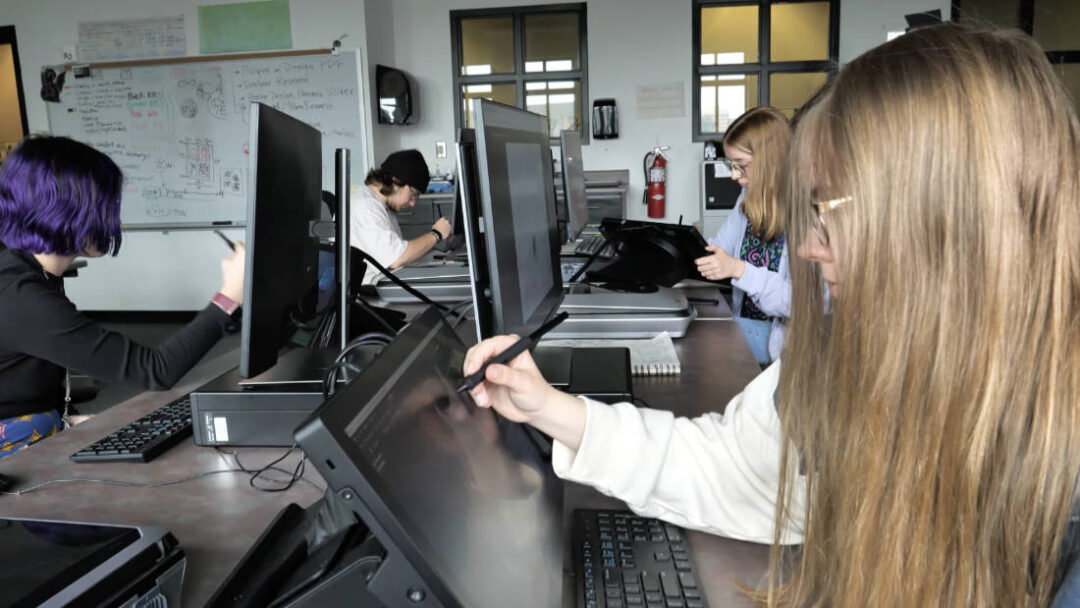
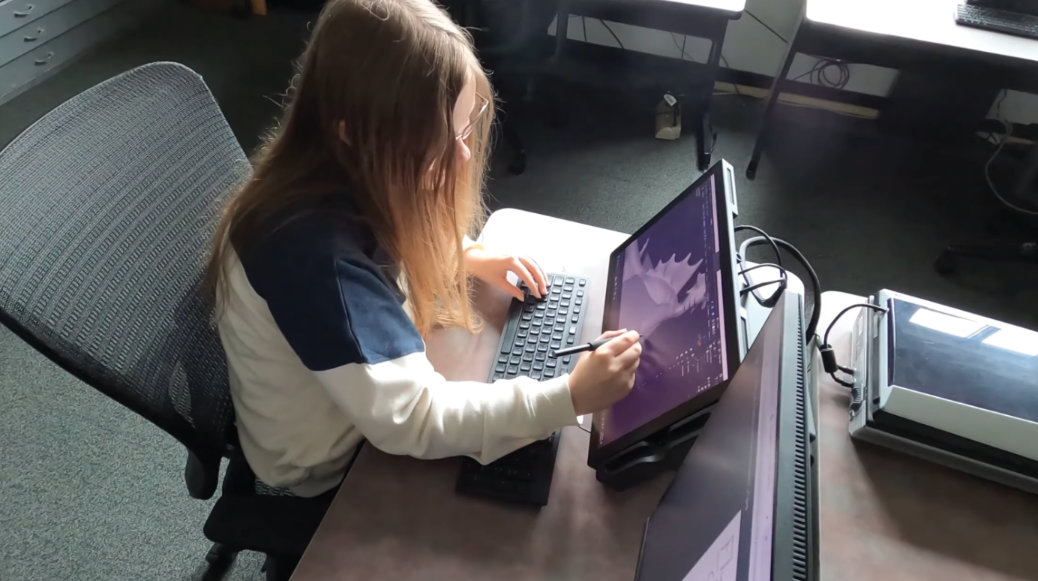
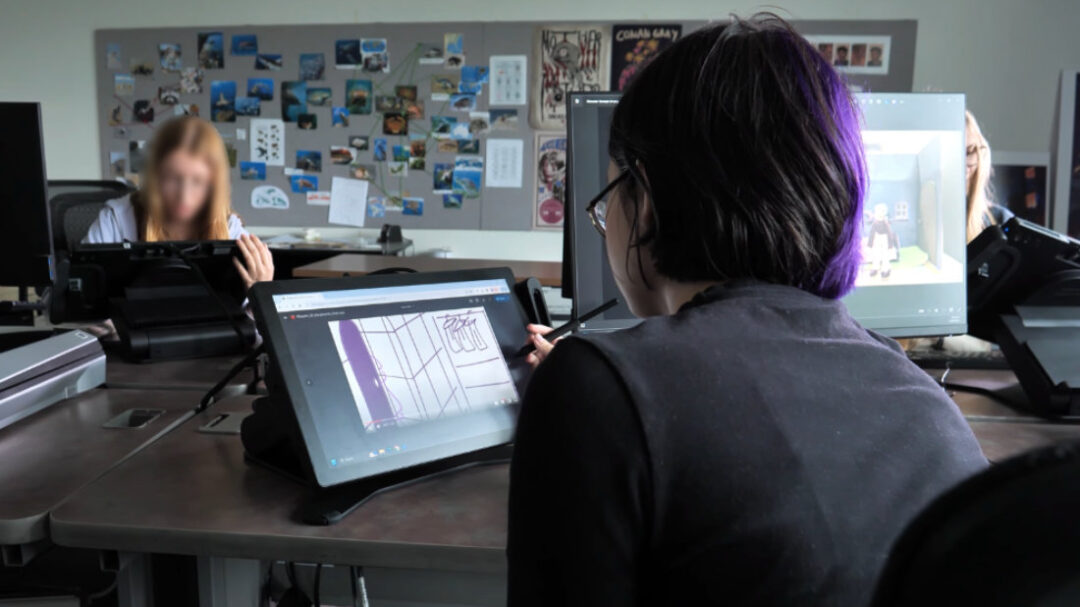
Wacom is proud to announce The Center of Applied Sciences & Technology (COAST) in Brunswick County Schools, North Carolina as the second recipient of the Wacom Lab Grant!
Led by educator and Spark NC Lab leader Sarah Gardinor, COAST’s application stood out for its strong alignment to Career and Technical Education (CTE) pathways, and clear commitment to preparing students for creative and technical careers. The grant award provides the school with Wacom Cintiq 16 pen displays, expanding access to creative tools for high school learners across the district.
COAST serves as Brunswick County Schools’ centralized hub for advanced high school-level CTE and STEM education, supporting both full-time and shared-enrollment students from across the district. Each year, more than 300 students participate in programs such as 3D Modeling and Animation, Game Art and Design, Technology, Engineering, and Design, and SparkNC learning experiences, many of which rely heavily on digital design and creative technology.
COAST students already work with powerful platforms including Unreal Engine, Unity, Autodesk 3Ds Max, Adobe Photoshop and Illustrator, Onshape, and TinkerCAD. The addition of Wacom Cintiq pen displays elevates this work by introducing precision pen input, allowing students to sketch, model, design, and iterate with greater control and creative expression.
From storyboarding game environments to visualizing engineering prototypes, Wacom technology will be embedded directly into project-based learning across multiple pathways.
Ms. Gardinor emphasized in the application how pen displays support employability skills such as iteration, attention to detail, collaboration, and client-focused design, while aligning closely with North Carolina’s Portrait of a Graduate competencies.
The Wacom Lab will be housed in COAST’s Spark Lab, a collaborative innovation space designed to support cross-disciplinary learning and long-term sustainability. With strong district IT support, dedicated lab leadership, and a clear rollout plan, the program is positioned for lasting impact.
COAST’s vision reflects what the Wacom Lab Grant is all about: partnering with educators to provide equitable access to professional creative tools that help students imagine, design, and build their futures.
Wacom is excited to support Sarah Gardinor, the COAST team, and Brunswick County Schools. Stay tuned for updates as this lab comes to life!
]]>Creativity works like a bridge: it reconnects students to their own voice while helping them reengage with the classroom culture. When students step back into a lesson that allows personal expression, they develop confidence, reorient themselves to the tools and routines they may have paused over break, and rebuild collaborative habits simply by sharing ideas with peers. For teachers, a well-designed creative task buys valuable time to reintroduce those classroom routines – how to care for devices, how to work with digital tools, how to navigate shared resources, and how to help one another – without the pressure of jumping straight into a major project.
Not sure where to begin? Here are four adaptable digital art lesson ideas to set a positive tone for the months ahead:

“New Year, New You” Digital Self-Portrait
A digital self-portrait offers a reflective and accessible way for students to ease back into using their digital tools. This project encourages students to illustrate how they see themselves entering the new year – perhaps braver, more curious, more patient, or more determined? Younger students might create cartoon or emoji-style portraits, while older students can experiment with shading, symbolism, or stylized rendering. This activity strengthens technical drawing confidence while giving each student a personal space to express change and growth.
Check Out this free Self-Portrait Digital Art Lesson!

2026 Vision Board Digital Collage
Setting intentions visually is a powerful way for students to reconnect with their goals and dreams. A digital vision board allows them to gather images, colors, and words that represent what they hope to explore in the year ahead. For elementary learners, this might include simple shapes, stickers, and teacher-curated image sets. Middle and high school students can build more sophisticated compositions using layers, images, textures, and even custom brushes. Vision boards naturally lead to discussion – students love sharing what inspires them – which helps rebuild community quickly after break.
Creative Goals – Vision Board Lesson Plan and Resource Deck

“One Moment From Last Year” Memory Illustration
Reflection through art not only taps into memory and storytelling but also invites students to connect with one another. This activity asks students to illustrate a meaningful moment from the previous year – something they learned, accomplished, or simply enjoyed. The subject matter can be light and joyful or thoughtful and introspective. Younger students may focus on simple scenes with bold colors, while older students can explore perspective, lighting, or symbolic imagery. This activity gently guides students back into deeper thinking and digital painting while creating space for sharing personal stories.

“Future Tech” New-Year Invention Concept Art
Nothing sparks creativity like imagining the future. Whether students design a robot, tool, vehicle, or wearable gadget, this activity encourages problem-solving, ideation, and imaginative thinking. Younger learners can dream up whimsical inventions with labels and simple shapes, while older students can dive into concept-art techniques like callouts, multiple viewpoints, or color variations. These future-focused designs invite playful exploration while reinforcing digital drawing and design skills.

Starting the year with creative tasks gives students a soft landing. It gently transitions them from break mode to classroom mode while reaffirming the joy of making. It also reinforces digital skills early, setting the tone for productive, hands-on learning throughout the semester.
And if you’re looking for one more creative launch-into-January activity, our “Word of the Year” Digital Poster lesson is available as a downloadable resource exclusively through our monthly Education eNewsletter.
If you already subscribe, keep an eye on your January newsletter – you’ll receive full access to the complete lesson plan. If not, subscribe today to start receiving monthly lesson plans, other educator reasources, and other Wacom news.
A new year is a new canvas. Let’s help students pick up their tools, and their confidence, and begin again with creativity!
]]>Each week on Wacom’s social media and on this blog, we’re sharing beautifully designed “first lines” of imaginary tales — and inviting artists everywhere to continue or illustrate them. The classroom version of this project builds on that same idea, transforming it into a hands-on, creative way to explore digital art skills, storytelling, and design.
Want to utilize this lesson in your classroom? Click here to download the entire lesson plan series!
The Power of a Single Line
A single sentence can ignite an entire world. Phrases like “The snow didn’t fall from the sky that morning — it shimmered up from the ground,” instantly spark curiosity and imagination. In this classroom series, each lesson begins with a “first line” prompt that encourages students to visualize that moment — to consider atmosphere, tone, and mood before creating a digital illustration that tells the story without words.
Teachers can use one prompt as a short creative challenge or combine all four lessons to build a winter storytelling portfolio. Each lesson focuses on a key digital art technique — such as creating glowing effects, manipulating light and shadow, showing motion, or using symmetry to explore reflection and time. Students practice essential digital painting skills while developing a unique story inspired by each line.
For example:
- Lesson 1: Teaches glowing effects with blending modes and brush opacity as students illustrate magical snow shimmering upward.
- Lesson 2: Explores lighting and contrast as students highlight a mysterious package on a doorstep.
- Lesson 3: Introduces motion blur and glow to capture the moment an ornament bursts into light.
- Lesson 4: Uses symmetry and filters to symbolize time pausing at midnight.
Each piece stands on its own, but together they form a cohesive visual narrative — a complete story told through four imaginative scenes.
Want to utilize this lesson in your classroom? Click here to download the entire lesson plan series!
Adaptable for Any Age or Skill Level
What makes these lessons so versatile is that they can be easily scaled for different ages and classroom settings.
- Elementary students might focus on sketching simple shapes, playing with color and light, and experimenting with a “glow” brush to make snow or stars shine.
- Middle schoolers can begin layering images, exploring opacity, and learning how lighting affects composition.
- High school students can refine advanced blending techniques, use filters and textures, and develop thematic consistency across multiple pieces.
Teachers can adjust the complexity of each lesson to fit the digital tools available — from drawing tablets and Photoshop to free web-based platforms like Paint Sumo or Kleki.

Beyond the Art Room
While this lesson series is rooted in digital art, it’s also a powerful tool for cross-curricular connections. The storytelling element makes it easy to adapt into:
- Language Arts: Students can write short stories or poems inspired by their digital illustrations. Each artwork becomes a visual “cover” for their written piece.
- Creative Writing: Use the prompts as warm-ups to spark narrative thinking — what happens next? Who’s there? What’s the mood?
- Media Arts or Graphic Design: Have students experiment with text placement, title design, or layout for a digital storybook or social media post.
- STEM and Technology Courses: Explore how light, color blending, and symmetry work from a technical standpoint — connecting artistic creation to digital imaging concepts.
Want to utilize this lesson in your classroom? Click here to download the entire lesson plan series!
Bringing It All Together
When combined, these lessons create a larger, unified end project — a personal “Winter Stories” digital art collection. Students can curate their four pieces into a slideshow, virtual gallery, or printed zine, adding short written reflections or artist statements that explain how their story evolved.
Alternatively, teachers can assign just one or two prompts as a quick creative challenge to re-energize students before the winter break. Either way, the activity offers an exciting opportunity to merge imagination, technology, and artmaking in a way that feels fresh, festive, and meaningful.

Join the Creative Celebration
To make the experience even more engaging, encourage your students (and yourself!) to follow along with Wacom’s “Spark Someone’s Story” event on Instagram. Each week, you’ll find new first-line prompts designed to inspire your creativity — and you’re invited to share your interpretations, illustrations, or stories with the Wacom community.
Whether in your classroom or online, these prompts remind us that every story — and every artwork — begins with a spark. This winter, let’s use digital art to share that spark, inspire others, and celebrate the power of imagination together.
Want to utilize this lesson in your classroom? Click here to download the entire lesson plan series!
]]>Whether you’re just starting to explore funding opportunities or you’re a seasoned grant writer looking for fresh ideas, this guide was built with educators in mind. It’s packed with national grant listings, strategic tips, and new features that make it easier than ever to turn your classroom goals into funded projects.
What’s New This Year?
- Expert Advice from a Grant-Winning Educator: This year’s guide includes insights from an experienced educator who has secured over $2 million in grants to support his creative and CTE-based programs. Learn how he structures his proposals, where he finds opportunities, and what makes a compelling “need statement” that gets noticed.
- Updated National and State-Level Grant Listings: Discover dozens of active grants and funding streams—whether you’re looking for STEM/STEAM support, arts education resources, or Perkins-funded CTE opportunities.
- Proposal-Writing Resources: Learn how to build your case for classroom technology with real-world examples, sample language for writing strong need statements, and strategic tips to streamline your application process.
- Inclusion of the 2025-2026 Wacom Lab Grant: Don’t miss this exciting opportunity! This year’s guide includes all the details about the Wacom Lab Grant, which provides select schools with industry-standard Wacom pen displays and tablets to support digital creativity and technical skill development.
Why the Wacom Funding Guide Matters
Wacom is committed to helping educators equip students with the tools and skills they need to thrive in today’s digital world. Whether you’re teaching animation, illustration, video editing, or even integrating digital ink into your science and math lessons, Wacom devices make it easy to turn ideas into impact.
The Funding Guide reflects that same mission by helping you access the financial support to bring these tools into your classroom – without breaking your school’s budget.
Get the Guide. Get Funded.
Ready to get started? Download the Wacom 2025–2026 Funding Guide and start planning your next grant-winning proposal today. Whether you’re applying for local support or national funding, you’ll find the insight, inspiration, and tools you need to make your vision a reality.
Download the Wacom Funding Guide!
Stay Connected
Want more funding tips, lesson ideas, and educator stories? Be sure to sign up for the Wacom for Education newsletter and follow us on social media for updates, webinars, and grant alerts.
Let this be the year you bring more creativity, engagement, and career-ready tools into your classroom – with a little help from Wacom and your next winning grant!
]]>So, what is sgraffito?
Sgraffito is an Italian word meaning “to scratch,” and it refers to a technique where layers of material are scratched away to reveal what’s underneath. It was popular during the Renaissance and can still be found today in architectural facades, pottery, and even murals around the world. In traditional art classrooms, sgraffito often shows up in the form of scratching oil pastels to reveal color – but now, students can explore this same effect digitally.
This 1-2 day lesson is adaptable for upper elementary through high school and works across various paid, low-cost, or free digital art tools like Adobe Photoshop, Chrome Canvas, and Paint Sumo. Students will learn to work with layers, explore textured eraser brushes, and develop a deeper understanding of how digital media can replicate – and even expand upon – traditional artmaking processes.
What’s in the lesson plan?
- A mini-lesson on the history and cultural context of sgraffito
- Step-by-step instructions for setting up a digital canvas and using layers and eraser tools to “scratch” into a top color layer
- Discussion and reflection prompts to deepen understanding
The process is simple, but the outcomes are as diverse and expressive as your students. Whether they’re designing abstract patterns, animals, or cultural motifs, the digital sgraffito effect creates bold, high-contrast pieces that pop off the screen.
This lesson is also a great introduction to working with digital layers and non-destructive editing – concepts that are foundational for students interested in digital design, illustration, or animation.

Download the lesson plan – and get even more
We’ve made it easy for you to bring this lesson to life in your classroom.
Download the full Digital Sgraffito Lesson Plan and get started!
Want the full set of teacher resources?
There’s more than just the lesson plan, though. Sign up for our Education Newsletter and you’ll receive:
- A downloadable slide deck you can use to guide your students through the lesson
- Monthly lesson plans and project ideas delivered to your inbox
- Bonus classroom resources and tips for integrating drawing tablets and digital tools
Whether you’re just beginning to explore digital art, or are looking to expand your library of creative lessons, this is a great activity to spark curiosity, connect to art history, and empower students to experiment with digital techniques in a meaningful way.
Ready to scratch the surface – and beyond?
Get the lesson plan, the detailed slide deck, and sign up for our Educators eNewsletter by clicking here!
]]>“This is the best day ever!”
– Student reaction to using One by Wacom tablet
At a K-4 elementary school serving about 800 students, the art teacher knew it was time to introduce something new: digital art. While students had a strong foundation in traditional media – paint, pencil, and pastels – most had never had the chance to explore digital tools unless they had access at home.
But all that changed when Wacom tablets arrived.
Why Digital Art?
The motivation was clear: students are surrounded by digital creativity every day—in animation, video games, and social media. Yet, they had no access to those tools in their art education.
“I didn’t want students to think that only fine art counts as ‘real’ art … using Wacom tablets allows them to experience an entirely new form of creative expression.”
– 4th grade art teacher reflection
With co-teaching support, training, and the right tools in hand, the educator felt ready to bring digital creation into the classroom, and to meet the needs of all learners along the way.
Getting Started: Learning Alongside the Students
Before introducing the tablets to students, the teacher took time to get familiar with the tools. They even swapped their regular computer mouse with a Wacom pen tablet for everyday tasks, building muscle memory and comfort through hands-on practice. When the tablets were rolled out in class, students were instantly intrigued.
“Whoa, what is that?”
“Can we really use these?”
“I saw one of those at Best Buy!”– Student reactions to One by Wacom tablets
A New Medium, A New Mindset
Students started with free exploration, using the web-based tool Sumo Paint. They practiced digital brush strokes, learned how to save and share files through Google Classroom, and recreated mentor artist studies using layers and transparency – skills not easily achieved with paper.
The result? Curiosity turned into confidence. Even students who were nervous at first became more open to trying new things.
“You don’t need to press the pen down hard … it just works!”
“I didn’t know art could be like this!”
“There were hundreds of ideas in my head!”– Student reactions to using One by Wacom tablets
Reaching Every Learner
The Wacom tablets helped support all types of learners:
- Tactile learners loved the natural pen feel.
- Visual learners explored blending, color theory, and layout with ease.
- Perfectionists embraced mistakes, thanks to the undo/redo function.
Even students with sensory sensitivities or fine motor challenges found the digital tools more comfortable than traditional supplies.
“They help you use your imagination and give you a way to like art.”
– Student reaction to using One by Wacom tablet
Honest Feedback and Real Conversations
Not every student preferred the digital medium, and that was part of the journey.
“It’s not like paper, and I like paper more.”
– Student reaction
These reflections opened up important classroom conversations about artistic preference, experimentation, and the many ways to be an artist.
A Shift in Teaching, Too
This wasn’t just a win for the students. The teacher also grew, both as an educator and as a learner. Tech confidence improved dramatically, and the classroom evolved into a place where creativity and problem-solving were modeled and celebrated.
“This gave students one more way to show what they know. And it made me a learner again, too … What surprised me most was just how ready the students were. They were hungry to try it, and they jumped right in.”
– Teacher reflection
What’s Next?
The success of this digital art pilot inspired big ideas for the future:
- Expanding digital art to more grade levels
- Collaborative digital group projects
- Student digital portfolios to track progress over time
- A potential after-school digital art club
Final Thoughts
Introducing Wacom tablets into this elementary art room didn’t just change the way students made art, it changed how they thought about what art could be. From improved digital literacy to newfound excitement, this experience empowered students to explore, imagine, and grow.
And based on their reactions? It was definitely a day to remember.
“They are really fun and the best!”
“I would tell other kids they should try it.”
“You might love it.”– Student reactions to using One by Wacom tablets

Want to bring digital art to your classroom?
Wacom tablets are an accessible, student-friendly way to start. Just bring your curiosity, and let your students bring the creativity. Check out the Wacom for Educators page for more resources, case studies, blog posts, teacher grant opportunities, and contact information to learn more about brining Wacom to your classroom.
]]>The South Carolina Governor’s School for the Arts and Humanities (SCGSAH) gives young emerging artists the opportunity to explore and refine their talents in a one-of-a-kind, arts-centered community. As a state-funded, public, residential high school serving sophomores, juniors, and seniors, SCGSAH gives artistically talented students from across the state the opportunity to receive pre-professional training in Creative Writing, Dance, Drama, Music, and Visual Arts.
With the guidance of teaching artists/mentors, Visual Arts students gain hands-on experience exploring different mediums and techniques. Young artists learn to be constructively critical others’ artwork as well as their own — all while gaining the tools necessary to be competitive in a creative environment.
As professional animation studios and game developers raise their expectations of what new hires bring to the job, there is increased pressure for schools to invest in industry standard tools that will make teaching —and learning — more effective.
For SCGSAH, preparing their students for professional careers has meant more than merely making the newest creative tools available. The school also wanted to ensure that the technology they invested in would enhance their students’ creative processes and efficiency. “The Wacom products help speed up the process of getting a result the students are thrilled with,” says Zachariah Inks, Visual Arts and Animation Instructor at SCGSAH.
Partnering with Wacom
Wacom products are not something new for SCGSAH. Intuos Pro tablets had been an asset in their visual arts program for years. There was a learning curve for the students with the Intuos Pro drawing tablets due to the lack of a display, however.
David Gerhard, Chair of the Visual Arts Department, shares: “With the Cintiqs, our students are able to feel the new technology in a very innate way. It feels like drawing with your hand. The older models worked great, but we had the disconnect with ‘I am drawing here and seeing it there.’ But now you are drawing right on the display. The learning curve has gone away.”
“Having a partnership with Wacom has provided tools that students are expected to know in the workplace. Having that experience gives students a leg up in their future.”
David Gerhard, Chair of SCGSAH Visual Arts Department
Time is a limited resource in the classroom, and the need to get students started quickly on their work is very important. Taking away the learning curve and providing a tool that is natural and intuitive is key. Inks says that the ability for students to quickly and easily move from traditional mediums into the world of digital allows students to iterate faster and get satisfying results.
“Because of tools like the Cintiq, our students are able to bring a lot of their traditional art practices to the program,” explains Gerhard. “[We’re bringing] the tradition forward. So, we see the textures they are learning about in painting class, [such as] and charcoal on paper, but we are able to utilize the Cintiq in a way that feels natural for an artist that maybe doesn’t feel comfortable with technology. They don’t feel that discomfort anymore.”
The Wacom Cintiq Pro displays feature 4K screens, superb color performance, enhanced ergonomics and a natural pen-on-screen experience users can fully immerse themselves in. All these features made the Cintiq Pro the correct decision for the staff and students of SCGSAH.
Implementation
The Governor’s school prides itself on being a pre-professional program, preparing students for their next steps, whether that is to higher education or directly into creative industry careers. With a variety of art studios on campus such as ceramics, photography, painting, and sculpture, the addition of the Wacom Cintiq Pro displays to graphic design and animation studios has provided access to industry-quality tools.
Student Reese Wiggins adds: “I was super excited to see that we were going to be getting the screen tablets. I know that it would help elevate my art and help me in so many different ways. Being able to use the screen as a secondary monitor for reference and being able to use the screen to directly draw on were both things that I was hugely looking forward to.”
“I have noticed an improvement in my speed and quality of my art both,” Wiggins continued. “Especially when it comes to things that I do digitally, [such as sculpting] in Blender. When it comes to sculpting, being able to work directly on that tablet helps it feel like I am still working with clay and being able to move it with my hands instead of feeling so detached from it as I would without the screen. When it comes to some of the 2D things I work on — usually it will be texturing — it really feels like I am just working with a paint brush or a pencil.”
It is always important to find the balance between traditional and digital within education, and even more so within the arts. The intuitive nature of the Wacom displays allow for the students to bridge that gap from traditional to digital.
“The Wacom Cintiq brings the intuitive nature,” adds Inks. “You can move from working in traditional mediums to the Cintiq. With the Wacom products, we are able to bridge the gap between pen and paper. It feels tactilely similar to pen and paper. We also use it a lot in the context of digital sculpting, so when you are translating those sculpting techniques to the digital world — there is a parallel there as well. The Wacom products allow us to really quickly move from the world that the student is currently comfortable in, to the digital world without a lot of friction. They are able to just do the work, focus on the art and not worry about the technology as much.”
Wacom for the win
Since implementing the Cintiq pro displays, Graphic Design instructor Chris Koelle says, “Students are getting experience with state-of-the-art technology that they will be using into the future in a professional career.”
Students benefit greatly from the addition of the Cintiq Pro displays into their classrooms. From long term career benefits to increased productivity in class, the students are pleased with the experience and work they are creating on the devices.
“Students are getting experience with state-of-the-art technology that they will be using into the future in a professional career”
Chris Koelle, SCGSAH Graphic Design Instructor
“I think both the quality and the speed of my artwork has improved, explains student Ellie Strom. “There is a lot less backing up with the Cintiq because I am drawing directly on the canvas, and I have a lot more control of my lines. That saves me a lot of time there. I feel like the responsiveness and pen sensitivity is better. It allows me to make smooth transitions from a large line weight to a fine line. It helps me get the vision from my head onto the screen.”
Wiggins agreed: “It has definitely helped my workflow. It helps speed it up while making sure that I am not losing the quality. If I were to just be using a mouse or trackpad on a computer or laptop, my workflow would be completely stumped. I wouldn’t be able to do what I do.”
Another student, Paige Dayton, summarizes the benefits of implementing the Cintiq Pro products into her educational experience: “Wacom tablets are the industry standard in animation. It’s very well known. Every college that I have toured has had the Wacom tablets. So being able to work on those tablets and using that equipment so early has been beneficial to my education and my future career because I am already familiar with these tools and resources that a lot of high school students are not familiar with. I have come to realize while using these tablets, just why they are the industry standard.”
]]>Mastering light and shadow is key to helping students create depth and realism in their digital art. In this lesson, students will refine their understanding of how light sources affect a composition by applying shadows and highlights to their artwork. Through hands-on practice, they will develop the skills necessary to enhance the quality of their digital paintings.
The objective of this lesson is to guide students as they improve their digital painting skills, specifically focusing on how to effectively apply shadows and highlights. Students will analyze the role of light sources in their compositions and use this knowledge to bring depth and realism to their work.
This lesson builds upon the first two lessons in the series. In the previous lessons, students interacted with lights and shadows through taking photos of objects. Then they looked at how color gradients play a part in developing light and shadow in a piece of artwork. Now, students will focus on applying shadows and highlights, helping them move from basic color transitions to more advanced techniques that create realistic lighting in their artwork. Understanding how light interacts with objects will add new layers of depth to their work.
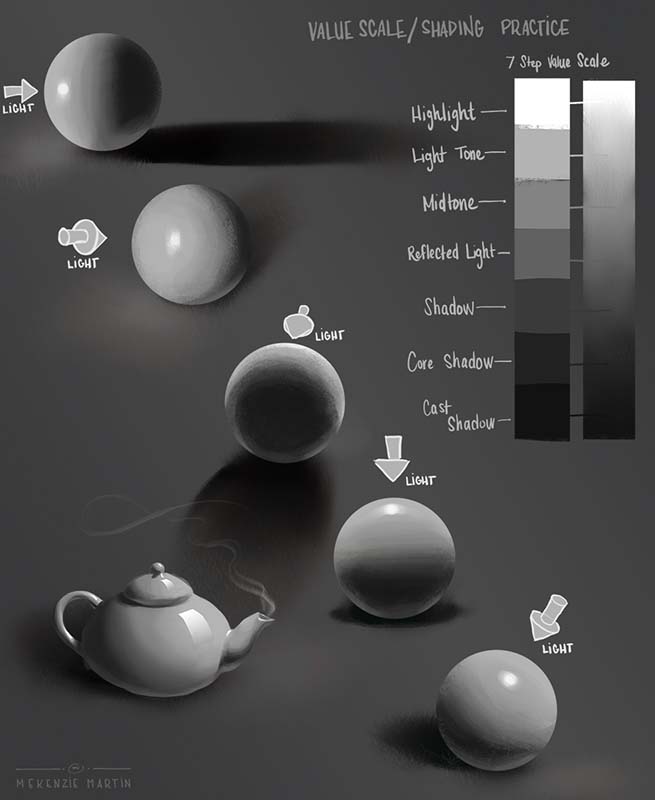
Begin by briefly reviewing how color gradients work to add depth in digital art. Gradients allow for smooth transitions between colors, helping create a sense of form. From there, shift the focus to shadows and highlights, which are essential for making digital art feel three-dimensional. Explain how shadows and highlights define how light interacts with the forms within the composition, adding a sense of realism.
Show examples of digital paintings that use shadows and highlights effectively. As students study these works, they’ll observe how the direction and intensity of the light source determine where shadows and highlights fall. This visual exploration will provide them with the knowledge they need to enhance their own digital paintings.
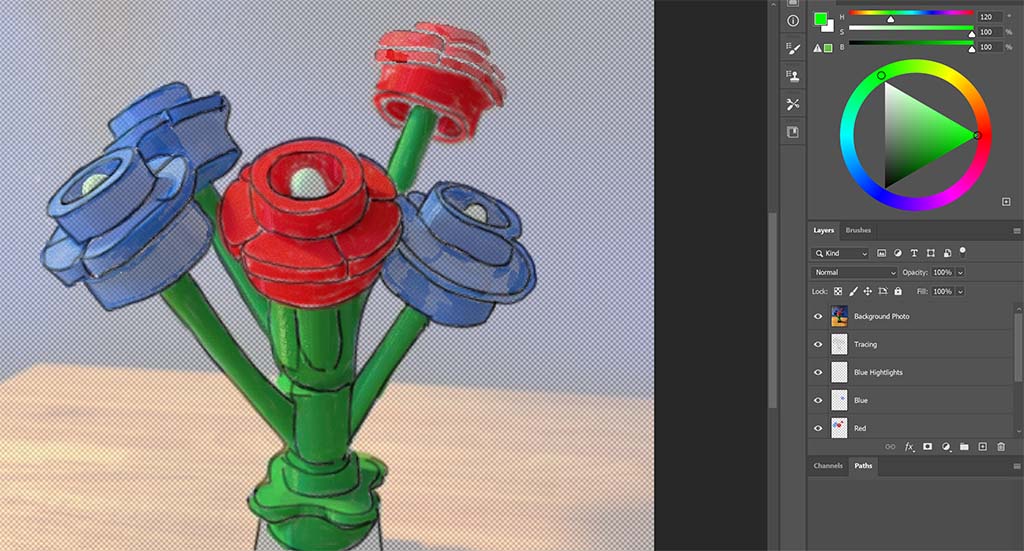
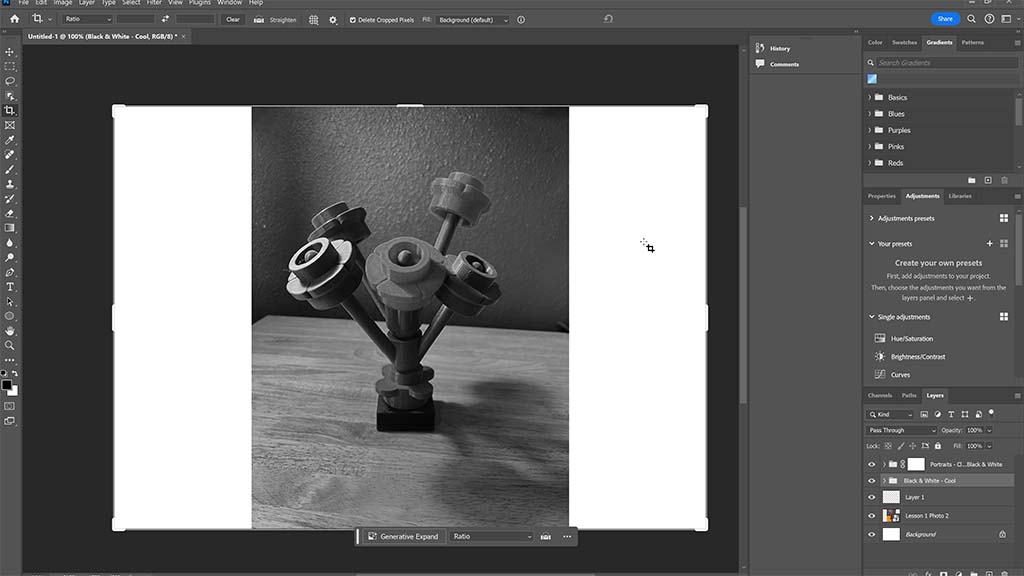
Next, demonstrate how to identify the light source in a reference photo and analyze its impact on the placement of shadows and highlights. Using Adobe Photoshop, model the process of adding shadows and highlights, focusing on how brush size, opacity, and blending modes can be adjusted to achieve realistic effects.
Once you’ve provided the demonstration, allow students to practice on their own digital paintings using reference photos from previous lessons. Encourage them to experiment with different techniques and settings to see how varying effects can change the depth and feel of their artwork.
After students have had time to work on their pieces, review the concept of light sources and how they influence the placement of shadows and highlights. Have students compare their digital paintings to their reference photos, identifying areas where adjustments may be needed to better align with the light source.
At this point, demonstrate the next steps for refining shadows and highlights. Show students how to use layers in Photoshop to separate shadows and highlights from the base painting. This gives them more flexibility to make adjustments and experiment with blending modes, helping them achieve more realistic lighting effects.
Allow students to continue refining their work, and as they do, circulate through the classroom to provide feedback and guidance. Encourage them to frequently reference their photos, ensuring the shadows and highlights they’ve added enhance the overall depth and form of their compositions.
Wrap up the lesson with a class discussion. Ask students to share the challenges they encountered while adding shadows and highlights and discuss how they overcame these obstacles. This reflection will help solidify their understanding and provide opportunities for peer learning.
As an extension, you can assign a more complex project, such as painting a portrait or still life, where lighting plays a critical role. For students who want to dive deeper, suggest additional tutorials that explore more advanced shadow and highlight techniques in digital painting software.
By the end of this lesson, students will have gained the skills and knowledge needed to use shadows and highlights to create more lifelike, three-dimensional digital paintings. This experience will help them understand the power of lighting in transforming their work from flat to dynamic.
Get access to the complete lesson plan, with materials — and more
If you’re interested in accessing detailed lesson plans and teaching resources, for this lesson series and more, we invite you to join our new Wacom Creative Educators Facebook group. Exclusive access to resources and other exciting opportunities awaits within our community of creative educators.
]]>Building upon the foundational concepts introduced in lesson one, this lesson dives deeper into the nuances of digital painting, honing in on the utilization of color gradients to elevate the depth and dimension of digital artworks.
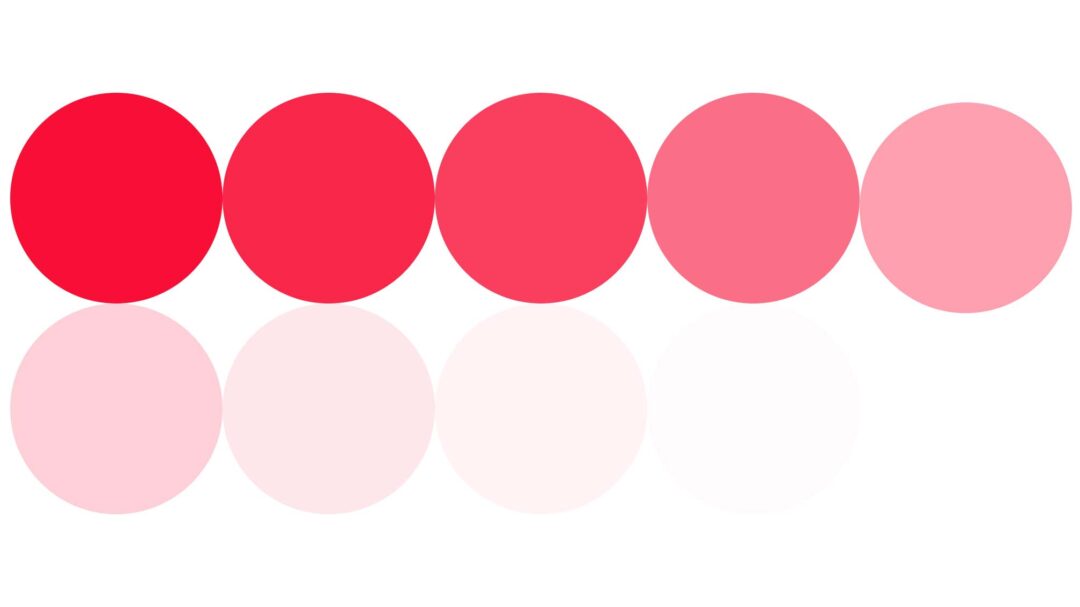
Continuing our exploration, our aim remains steadfast — to guide your students towards a deeper understanding of how color gradients can intricately shape shadows and highlights, thereby refining the quality of their digital creations. In this lesson, students will look at examples of gradient color in art. They will create a simple grayscale gradient and practice creating a digital color scale.
This lesson is designed to be adaptable for students from middle school to high school levels, ensuring that it caters to a diverse range of skill levels and interests. With a duration of 60 minutes, the lesson provides time for students to explore hands-on activities while also having class discussions and reflecting on new learning.
Since this is lesson two in a short series, students will need to have a photograph of an object that they are able to identify light source, shadows, and highlights. If the students do not have a photograph to work with, you may need to pause this lesson after completing the color scale. You can go back and explore the ideas from lesson one by reading the blog post here.
Building upon the foundational knowledge acquired in lesson one, students will embark on a guided exploration of color gradients. Through examples and discussion, they will deepen their understanding of how gradients can contribute to the overall composition and visual impact of a digital painting.

Start the lesson by looking at examples of artwork that showcase color gradients with the use of shadows and highlights. The digital works of Simon Stalenhag, or Yoki Honda are great examples of gradients. Discuss gray scale and have students practice a scribble gray scale gradient on scratch paper with pencil by starting dark and getting increasingly lighter ending with a white box.
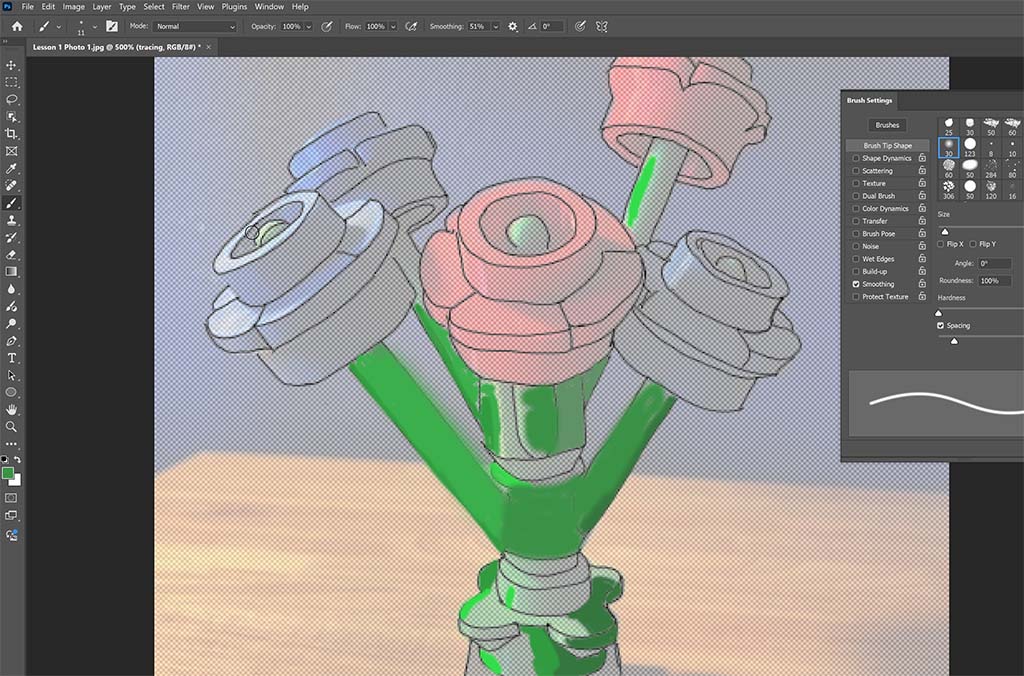
Next you will model how to set up Adobe Photoshop and their Wacom tablet for digital painting. Show the students how to create a shape and duplicate the shape on multiple layers, adjusting the opacity to create a color scale. Give students the opportunity to experiment and refine their techniques independently by exploring various brush settings, opacity, and masking layers.
Through classroom discussion, help students draw connections between light sources, highlights, and shadows explored in lesson one. Students will apply their understanding of color gradients to further enhance their digital paintings. The first step is to import the photo taken during lesson one into Photoshop. Have the students add and use the black and white adjustment layer. This can help to identify the shadows and highlights even more. The next step is to trace the lines of the object in the photo. This photo will continue to be the reference image in future lessons.
As a form of assessment, students will analyze artwork to identify the effective use of color gradients in creating depth and dimension. Through guided reflection and discussion, students will have the opportunity to share their observations and experiences with their peers, fostering a culture of continuous improvement and self-reflection.
The activities the students have done are all building towards the ability to use color, highlights, and shadows in their digital painting.
Stay tuned for lesson three, coming soon! Additionally, if you’re interested in accessing detailed lesson plans and teaching resources, we invite you to join our new Wacom Creative Educators Facebook group, launching June 2024. Exclusive access to in-depth lesson plans, resources, and other exciting opportunities await within our community of creative educators.
]]>This unit was inspired by the presentation of Sarah Honeywell, a digital arts, photography, and art history teacher at Columbia Heights High School. Her presentation at the 2024 NAEA Convention, on Grisaille painting techniques, reminded us of the importance of starting at the beginning to support student artists with digital painting.
The activities in these lessons will prompt students to observe how light creates shadows and highlights on objects and how to recreate this in digital art. Students will manipulate light to take a photo for their reference image, then digitally paint the image demonstrating their understanding of color scales, gradients, layers, shadow, and highlights.
This is lesson one of a four-lesson series, and can be used independently of the other lessons.

Mini-Unit: Exploring Light, Shadows, and Highlights
Introduction to Lesson One
In this lesson, we delve into the fundamental aspects of digital painting, focusing specifically on the interplay between light, shadow, and highlights. Your students will be guided towards exploring the art of utilizing light sources to infuse depth and dimension into their digital artwork.
The primary objective of this lesson is for your students to develop the ability to identify and manipulate light sources. By doing so, they will create shadows and highlights that add realism and depth to their digital paintings.
This lesson is designed to be adaptable for students ranging from middle school to high school levels, ensuring that it caters to a diverse range of skill levels and interests. With a duration of 60 minutes, the lesson provides ample time for your students to engage in hands-on activities while also allowing for meaningful reflection and discussion.
Overview of Lesson One
Prior to the lesson, you will need to gather a variety of items for your students to photograph and provide a range of lighting options. These preparations will allow your students to experiment and explore with different materials and techniques.
The lesson begins with a brief mini-lesson, during which you will introduce the key concepts of light, shadow and highlights. Through examples and discussion, they will learn how these elements contribute to the overall composition and visual impact of a digital painting.
During your lesson, provide opportunities for students to examine artwork and analyze the direction and intensity of light sources, your students will gain a deeper understanding of how to effectively use shadows and highlights when it is time for them to take their own photos.
Following the mini-lesson, demonstrate for the students how they should select an object and use various lighting options to take multiple photos of their object. This hands-on activity will allow your students to experiment with various light sources and directions, enabling them to observe firsthand how light affects the appearance of shadows and highlights.

During the independent practice phase of the lesson, your students will be given the opportunity to apply what they have learned during the lesson and demonstration. They will select objects to photograph and experiment with different lighting setups to achieve a desired effect. Throughout this process, your students will be encouraged to reflect on their choices and make adjustments as needed to enhance the overall composition and visual impact of their work.
As a form of assessment, your students can analyze artwork to identify the direction of light sources and the placement of shadows and highlights. In a slide deck, prepare a couple of photographs from known artists. Students will then apply their knowledge by uploading three of their own photographs and marking similar elements, demonstrating their understanding of how to effectively use light and shadow to create depth and dimension.
The lesson concludes with a review and reflection session, during which your students can discuss their observations and share their experiences with their peers. Through guided questioning, your students will reflect on the effectiveness of different lighting strategies and consider how they can apply these techniques in future projects. This reflective process serves as a valuable opportunity for your students to consolidate their learning and gain insights into their own artistic practice.
Interested in the full lesson plan?
An overview of Lesson Two in this mini unit will be posted to this blog soon! If you are interested in getting a more detailed lesson plan, along with teaching resources for this lesson, you should join our new Wacom Creative Educators Facebook group launching June of 2024! Members will get exclusive access to resources like lesson plans and other fun opportunities. Stay tuned to this blog or follow our WacomEdu Facebook page for updates and access once the Facebook group goes live!
Feature image for this blog post by Av Creations on Unsplash
The versatility of Wacom drawing tablets makes them invaluable tools for fostering creativity in the classroom. From sketching diagrams to illustrating concepts, these tablets empower students to express their ideas in dynamic ways. For example, in a science class, students can use Wacom tablets to annotate diagrams of biological processes or sketch out potential solutions to physics problems. In English or language arts classes, students can use the tablets to illustrate scenes from literature or create digital storyboards for their own narratives. Wacom tablets and displays are an essential tool in all digital art classes as well as core curricular areas.


Starter Packs
Incorporating Wacom products into the classroom is easier than you might think, thanks to the variety of starter packs available. The basic starter pack includes the Intuos tablet, which offers mobility for teachers to move around the classroom while instructing. Teachers can use the tablet to annotate presentations, demonstrate drawing techniques, or provide personalized feedback on student work. For a more immersive experience, the deluxe starter pack includes the Wacom One display, allowing teachers to draw directly on the screen with a natural pen-on-paper feel. This opens up opportunities for collaborative brainstorming sessions, interactive lessons, and multimedia presentations.
Both the basic and deluxe starter pack include five wired drawing tablets for students. These sets provide the perfect solution for implementing station rotations or choice options for digital assignments. For example, in a math class, students can use Wacom tablets to solve equations, graph functions, or visualize geometric concepts. In a history class, students can use the tablets to create timelines, map out historical events, or analyze primary sources. Having a small set in the classroom is a great way to get students used to using the devices for their daily work.

Lab Pack
The perfect addition to your art studio or maker space lab is a pack of five Wacom One 12″ displays. The high-quality display and natural drawing experience make it an essential tool for students exploring their artistic talents. Without barriers to entry, students can dive into their creative projects by drawing directly on the display. For example, in an art class, students can use the Wacom One display to experiment with different drawing techniques, explore digital painting, or even create animations. In a maker lab, students can use the display to design prototypes, create digital mockups, or develop interactive multimedia projects. The Wacom One display is a game-changer for art classrooms and maker labs.

Classroom Sets
For classrooms committed to a digital workflow, Wacom offers a basic and deluxe classroom set of drawing tablets. The basic set includes 25 One by Wacom tablets, and the deluxe set offers 25 Intuos wireless tablets. Each of these sets also include 5 replacement pens. The classroom sets ensure every student has access to these transformative tools. By incorporating Wacom tablets into classroom activities, educators can enhance student engagement, promote collaboration, and foster creativity across all subject areas.
Wacom’s education bundles offer educators a straightforward solution to integrate digital pen technology into their classrooms. With a reputation for quality and reliability, these bundles provide the tools needed to elevate the classroom experience and prepare students for the digital demands of the future. To learn more about the devices included in the bundles, pricing, and purchasing process, visit our Education Bundles page.
]]>But if you’re new to using creative pen tablets or displays, you need to get set up and learn how everything works. We’ve got you covered! Whether you’ve just received your class set of tablets, have made an order but want to get prepped and ready before they arrive, or if you’re just thinking about how you might pitch an investment in classroom technology to administration, we’ve got a bunch of video resources below so you can get all the information you need.
If you didn’t see it already, make sure to check out our previous post for more video tutorials on the basics of getting your tablet set up, installing drivers, and the basics of using a pen. If you’ve already gone through those tutorials, read on for building your capacity via more advanced settings, customization, and advanced pen skills.

What you’ll need:
- Your Wacom pen tablet
- Your computer
- Access to a drawing application. See our recommendation below.
Which drawing application should you use?
For these exercises, we recommend Magma. Magma is a free browser-based drawing platform that you don’t have to download and you can access from any computer, be it a Mac, PC, or Chromebook!
In the video below, we show you how to access Magma without creating an account. If you’d like to save your work so you can leave and come back later, create an account using your email, Google, or social logins.
Customizing your Wacom Tablet
Wacom Pen
In this video, you will learn about how to customize your pen settings that will work best for your use case. Not only will you see how to change your pen settings, but you will also see examples of how to use the pen with a variety of settings.
Understanding Mapping
The biggest difference when you are using a pen instead of a mouse is the idea of mapping. If you are working with multiple displays, this is an essential video for working efficiently with your pen tablet.
Two key terms introduced:
- Mouse Mode (Relative Mode): In relative mode, the cursor’s location is based on the last location of the cursor, not the current location of the mouse. For example, if you lift up a mouse, move it 6 inches to the left, and then put it back down, the cursor will not have moved.
- Pen Mode (Absolute Mode): In absolute mode, the cursor’s location is based on the current location of the pen tip on the tablet. For example, if you lift your pen and place it in the top left corner of the tablet’s active surface area, the cursor will appear in the top left corner of the screen.
Building Skills for Using your Pen
This video will show five exercises to familiarize yourself with using your pen. These exercises are good for both teachers and students.
Customization
If you have been following along with this series of tutorials, you have already seen the ways in which you can customize your pen buttons. In this video, we will explore how to customize the other features of your Intuos tablet. This is a longer video that would be best viewed while you are able to follow along with your computer and Wacom tablet.
Care and Cleaning
Now that you are ready to actively use your Wacom tablet, let’s see how you can maintain your new device!
Get creative!
Now that you’ve got the basics down, give it a try! Check out the Wacom for Education site to learn more, learn about Wacom’s educator discount, sign up for the Wacom for Education eNewsletter, or check out some of the great lesson plans and ideas on this blog for more: maybe The benefits of creativity in the classroom, Student jobs for the 21st century classroom, or How to multiply yourself in the classroom?
]]>Here are seven ways educators can better engage parents and students to increase participation in and understanding of CTE programs.
1. Host Information Sessions: Building Understanding and Painting a Clear Picture
Begin by organizing informational sessions or open houses for parents and students. These events provide a platform to introduce the CTE program, its objectives, curriculum, and the benefits of pursuing a career in digital arts. Address any concerns or questions parents and students may have, establishing a foundation of understanding. Emphasize the real-world applications of digital arts skills. Showcase success stories of individuals who have excelled in their careers after completing a CTE pathway. Share with students and families facts about the industry that support and encourage them to pursue careers in digital arts.
Did you know?
- Digital arts is a career path that is growing rapidly. There are many specialized career opportunities within digital arts. Here is a recent blog post that highlights multiple unique opportunities.
- Digital art is one of the fastest growing areas in the creative economy – as of 2021 an estimated two-thirds of all high-paying artistic jobs are specifically for digital art.
- The digital arts industry offers the possibility of working on projects for clients and companies from around the world. Remote work and collaboration tools have expanded the geographic scope of job prospects.

2. Collaborate on Goal Setting: Empowering Ambitions
Encourage parents and students to set academic and career goals together. Discuss the specific skills and knowledge students hope to gain from the program, aligning these goals with their interests and future aspirations. This collaborative approach increases motivation and commitment, as both parties actively participate in shaping the journey.
3. Showcase Student Work: Celebrating Achievements
Regularly celebrate and showcase student projects and achievements. Organize exhibitions, art shows, or online portfolios to display the creativity and skills students are developing. Invite parents to these events, giving them a tangible connection to their child’s progress. Creating authentic purpose for students to create can drive engagement in the work that is being done in the classroom. This recognition fuels students’ passion and motivates them to excel.
4. Offer Workshops and Webinars: Exploring the Digital Landscape Together
Host workshops or webinars that provide insights into digital arts and related industries. These sessions can include guest speakers, hands-on activities, and discussions about emerging trends and technologies. Encourage parents and students to attend these informative sessions together, deepening their knowledge and fostering shared interests.
5. Foster Communication: Keeping Everyone Informed
Maintain open lines of communication with parents. Send regular updates on program developments, student performance, and opportunities for involvement. Create a feedback mechanism to address concerns and suggestions effectively. A well-informed and engaged parent community becomes a valuable support network. Invite parents to participate in advisory committees that help shape the CTE program’s direction. Their input can provide valuable insights into community needs and industry trends, ensuring the program remains relevant and aligned with real-world demands. Collaboration on program development strengthens its impact.

6. Encourage Student Leadership: Nurturing Responsibility
Empower students to take leadership roles within the program. Encourage them to mentor peers, organize events, or participate in student councils. This not only boosts students’ confidence but also fosters a sense of ownership in their education. Student leadership contributes to a dynamic learning environment. Not only does this help your students grow, but it also helps to grow the program. When student leaders are able to talk about their experiences, other students listen.
7. Provide Resources for Parents: Equipping for Support
Offer resources and guides for parents on how to support their child’s digital arts education journey. This can include information on scholarships, internships, and extracurricular opportunities related to the field. Equipped with resources, parents can better guide their child’s academic and career choices.
The Benefits of Engaging Parents and Students in Digital Arts Career and Technical Education
Engaging parents and students in digital arts CTE programs is essential for creating a supportive and motivating learning environment. By fostering communication, showcasing student achievements, and involving parents in decision-making processes, you can ensure that both students and their families are invested in the success of the program. Together, you can nurture the creative talents and future career prospects of the next generation of digital artists and innovators, strengthening the bridge between education and the professional world.
]]>But if you’re new to using creative pen tablets or displays, you need to get set up and learn how everything works. We’ve got you covered! Whether you’ve just received your class set of tablets, have made an order but want to get prepped and ready before they arrive, or if you’re just thinking about how you might pitch an investment in classroom technology to administration, we’ve got a bunch of video resources below so you can get all the information you need.

Product Overview
In the below video, we take a look at three different Wacom pen tablets: the One by Wacom, the Wacom Intuos, and the Wacom Intuos Pro. After watching this video, if you receive questions from students, colleagues, or faculty about Wacom tablets, you’ll be able to provide informed answers and recommendations.
Unboxing and getting connected
In the below video, we cover what is included in your box, where to place your tablet when getting started, and how to connect your tablet to your computer. Once your tablet is placed correctly and connected to your computer, you’ll be ready to install the Wacom driver.
Installing the Wacom driver
In the below video, we show how to install the Wacom driver on a Mac or PC. The driver is what allows your tablet to communicate with your computer’s operating system, and without it, your tablet won’t work.
If you’re using a Chromebook, the driver is already built into your Chrome browser, so your tablet should work by simply plugging it in! No driver installation is needed. That said, even if you’re using a Chromebook, this video will show you how to install a driver should you or a student need to download one on a Mac or PC in the future.
Note: Installing the Wacom driver requires a full restart of your computer.
Download the latest Wacom driver here: Wacom Drivers
The pen is mightier than the mouse
The primary benefit of using a Wacom tablet is because you’re able to utilize the creative possibilities of the Wacom pen. In the below video, we briefly cover the pen — how to grip it, how to position it over your tablet, and the difference between pen mode and mouse mode.
Get creative!
Now that you’ve got the basics down, give it a try! Check out the Wacom for Education site to learn more, learn about Wacom’s educator discount, sign up for the Wacom for Education eNewsletter, or check out some of the great lesson plans and ideas on this blog for more: maybe The benefits of creativity in the classroom, Student jobs for the 21st century classroom, or How to multiply yourself in the classroom?
Stay tuned to this blog for another upcoming post, coming soon, that will give you even more tips, tricks, and exercises for making the most out of Wacom pen tablets in the classroom.
]]>In this blog post, we’ll explore how these specialized tools, such as Wacom pen displays and pen tablets, have become indispensable assets for a variety of creative careers, providing precision, control, and creative freedom to excel in the world of digital arts. Read on for a journey through these specialized creative professions and discover how advanced digital tools like Wacom pen technologies empower visionaries to redefine what’s possible.

Digital art conservators and restorers: Precision and fidelity
Digital art conservators and restorers play a pivotal role in digitally preserving artistic masterpieces for future generations. Their work requires a delicate touch and precise attention to detail. With tools like Wacom pen tablets and displays, which offer unmatched precision, conservators and restorers can digitally protect and restore artwork with fidelity and accuracy. Every brushstroke or correction becomes an act of preservation, made possible by these advanced tools.
Education:
Digital art conservators typically hold a bachelor’s degree in art conservation, art history, or a related field, but experience and training in digital art practice can also be essential. Advanced positions may require a master’s degree in art conservation.
Skills:
- Proficiency in digital art restoration techniques
- Strong attention to detail and a delicate touch
- In-depth knowledge of art history and digital preservation

3D printing specialists: Crafting tangible dreams
3D printing specialists transform digital models into tangible creations, bringing dreams to life in three dimensions. The precision required in their work is complemented by technology designed specifically for their needs. These specialists use advanced digital tools to sculpt, refine, and prepare their models for printing. Responsive digital pens, like Wacom’s, offer a level of control that’s essential for translating digital concepts into physical reality.
Education:
Aspiring 3D printing specialists may pursue a bachelor’s degree in engineering, industrial design, or a related field. Hands-on training and certifications in 3D printing technologies are also valuable.
Skills:
- Proficiency in 3D modeling software and 3D printing technology
- Attention to detail and precision in model preparation
- Understanding of materials used in 3D printing

Virtual Reality (VR) artists: Creating immersive worlds
VR artists craft immersive experiences in virtual reality, transporting users to entirely new realms. Their canvas is a digital landscape, and their palette is an intricate blend of colors, shapes, and emotions. With advanced technology at their disposal, VR artists have the tools they need to create these immersive worlds with extraordinary precision. The result is a deeply immersive and emotionally resonant experience for users.
Education:
VR artists often begin with a degree in digital arts, computer graphics, or a related field. Some are self-taught and build portfolios through personal projects.
Skills:
- Proficiency in VR software and 3D modeling
- Strong creative and artistic abilities
- Understanding of immersive storytelling and user experience design

Generative artists: Melding code and creativity
Generative artists create art through code and algorithms, forging a unique fusion of human vision and computational precision. For these artists, advanced digital tools serve as a bridge between the digital and the artistic. The ability to sketch, draw, and manipulate code with the same fluidity as traditional media empowers generative artists to express their creativity more authentically. These specialized tools ensure that their creations retain the human touch.
Education:
Generative artists may come from diverse educational backgrounds, including computer science, mathematics, or creative coding. However, formal education is not always a prerequisite.
Skills:
- Proficiency in programming languages such as Processing or Python.
- Artistic vision to blend code with creative expression.
- Ability to manipulate digital media seamlessly.

Other creative careers that use modern digital tools
There are many other career options in the digital arts:
- Digital fabrication artist: Digital fabrication artists use computer-controlled machines like CNC routers and laser cutters to create intricate physical objects and sculptures. They combine design skills with knowledge of digital fabrication technologies.
- Forensic animator: Forensic animators use computer graphics and animation software to recreate crime scenes or accidents. They can create 3D reconstructions of crime scenes, accidents, or events to help investigators and jurors better understand the sequence of events.
- Augmented Reality (AR) designer: AR designers specialize in creating digital overlays and experiences that blend the virtual and physical worlds. They work on AR apps, games, and interactive installations.
- Sound designer for interactive media: These professionals focus on creating audio experiences for video games, virtual reality, and interactive media. They design sound effects, music, and voiceovers to enhance the user’s experience.
- Virtual set designer: Virtual set designers create digital environments used in television and film production. They use 3D modeling and compositing techniques to design sets that seamlessly integrate with live action.
- Digital marketing artist: Digital marketing artists create visual content and assets for digital marketing campaigns. They design eye-catching banners, infographics, and social media graphics to promote products and brands online.
- Forensic Digital Sculptor: Digital sculptors create 3D reconstructions of human faces or remains based on skeletal remains or partial remains. This can aid in the identification of unidentified bodies.
- Medical illustrator: Medical illustrators use their artistic skills and digital tools to create detailed and accurate illustrations of anatomical structures, medical procedures, and scientific concepts. Their work is used in medical education and publications.
These careers highlight the diverse applications of digital arts across various industries, including healthcare, forensics, entertainment to marketing and education. Each role requires a unique set of skills and expertise, making them exciting options for those interested in combining creativity with technology.

Advanced digital tools have emerged as indispensable assets for individuals in every creative career, providing them with the precision, control, and creative freedom needed to excel in their respective fields. Whether they’re preserving digital masterpieces, harmonizing content and design, crafting tangible dreams, painting immersive worlds, or melding code and creativity, these tools empower creative visionaries to push boundaries and explore uncharted horizons.
As the digital arts landscape continues to evolve, these specialized technologies, like those from Wacom, remain steadfast allies, enabling professionals to redefine what’s possible.
]]>Creative activities sprinkled throughout the day or week can be a great way to engage students and help them learn in a fun and creative way. In the previous posts in this series, many other benefits for students and their learning experiences were highlighted. In this third and final post of the series, we would like to share a few times during a period or classroom routine where you can provide creative opportunities for your students. All of these ideas are accessible to students and teachers alike, even if you do not view yourself as an artist.
Soft landing tasks
A soft landing is often used for catching up on work or completing a quick assessment as students enter the room or as a teacher meets with individual students. Electing to do a creative task during the soft landing could be setting the stage for a more cognitively rigorous lesson or as a warm up to a larger creative task.
Mandala drawing
A mandala is a piece of art that is comprised of geometric designs or patterns. Drawing a mandala can be a great way to relax and prepare for learning. Here are some guiding steps for students to create their own mandala:
- Draw a circle in the center of your drawing space (whether it is digital or on paper)
- Divide the circle into 4 equal sections
- In each section draw a different geometric shape
- Fill in the shapes with colors you like
Students can add patterns or designs to their mandalas. The level of detail may allow for this to be a soft landing across multiple days. This might be the perfect activity to transition with after lunch or perhaps a physical education class.

Morning meeting or community circle
During morning meetings or community circles, students often share or discuss a specific topic to build classroom community. A way to switch this up and to provide a voice to those who may not want to speak aloud in a whole class setting is to have students do a quick drawing.
Grateful drawing
At their seats or prior to gathering for the class meeting or circle, have the students sketch something that they are grateful for. This activity is a great way to start the day or period by focusing on the positive. It can also help students connect with each other.
If you are using your Wacom drawing tablets, this is a great digital art activity because students can turn in their work digitally, allowing more students the ability to share and even provide encouragement to one another. As students share, this is a great way to start a conversation about gratitude.
Direct instruction
Direct instruction seems like it would be a difficult time during the day to integrate an artistic outlet for students. In reality, this could be the easiest time to do so. Often in direct instruction, we encourage students to take notes and to be attentive listeners. There is research that shows students who draw what they learned were nearly twice as likely to remember information than those that simply wrote the information down. Drawing allows us to process the information in multiple ways.
Sketchnoting
Sketchnoting is a mixture of handwriting, shapes, visual elements and drawings that show how information is connected. Here are some guiding steps for students to begin sketch noting once they have gathered their tools:
- Listen to the teacher – identify the main points the teacher is saying
- Sketch out the main points using images or visual elements such as lines or shapes
- Add some details – things like key words, definitions or examples to your main ideas
- Be creative – there is no right or wrong answers here
- Review your sketchnote – review your notes and add anything you think you missed. This review will also help you remember the main points of the lesson.
Sketchnoting can turn into a beautiful piece of art conveying information in a creative manner. You can learn more about sketchnotes and sketchnotes in the classroom here by viewing some past webinars.

Reflection
Reflecting on learning is like zipping up a cognitive backpack. You want to provide opportunities for learners to cement in their learning that way when they return to class the next day, you have a starting point for scaffolding new information.
Mind map
A mind map is a diagram that shows the relationships between different ideas. This is a great way to wrap up a lesson. Because a mind map starts with a blank space to create – students can be as creative as they like when reflecting on the lesson. If a student is stuck on creating a mind map here are some tips to get them started:
- Place the main idea at the center of the paper with branches off the main topic to write down related ideas
- Continue to add branches and sub-branches until a web of related ideas has been created
- Add colors, images or symbols to help organize your map
- Look for patterns or themes in your mind map to help you see the big picture of a topic
A mind map is something that can be returned to many times to add on more information and create a deeper understanding of a topic. It can also be a great tool for students to have some agency over how they study or prepare for an assessment.
Allowing time for creative representation throughout the learning day can have a positive impact on student engagement, learning and overall well-being. By providing opportunities for students to explore their creativity, we can help them develop important skills and foster a love of learning that will serve them well beyond the classroom.
And when it comes to creative endeavors, Wacom drawing tablets can be the perfect tool to enhance the experience. Our tablets provide an intuitive and user-friendly way for students to bring their artistic visions to life, whether they’re sketching, painting, or creating digital illustrations. So if you’re looking to incorporate more creative activities into your classroom, consider adding a Wacom drawing tablet to your toolkit – it might be the key to unlocking your students’ full creative potential.
]]>Art activities in the classroom can greatly improve learning experiences for students. Whether it’s providing a means for self-expression, fostering collaboration among peers, or increasing engagement and motivation, the incorporation of art into the curriculum can help create positive and fulfilling learning experiences. In this second post in the Infusing Creativity into Classroom Routines series, we will look at how art activities can help students tap into their creativity and imagination, while developing valuable social and emotional skills.
Art activities provide a unique opportunity for students to express themselves in ways that are personal and unique. By engaging in art, students can use their imagination and creativity to produce work that reflects their personal experiences and emotions. This process of self-expression can be therapeutic for students who may struggle with communicating their feelings or experiences in other ways. Art also allows students to explore and experiment with different materials and techniques, providing them with a sense of control and agency over their work. By incorporating art activities into the classroom, teachers can create a safe and supportive environment where students can freely express themselves, building self-confidence and self-esteem. Through self-expression, students can better understand themselves and their place in the world, leading to a more positive and fulfilling learning experience.
Examples of art activities that allow for self-expression:
- Free-drawing: Give students the freedom to create whatever they want on a blank space whether that is paper or on online platform. This activity allows students to express their creativity and emotions without any restrictions or guidelines.
- Creative writing and illustration: Encourage students to write and illustrate their work. This can be more than just a story, it could be writing and illustrating the steps within a science experiment or writing and illustrating what they learned in a recent unit. This allows for creative expression in both written and visual means.
In addition to providing an outlet for self-expression, art can be a powerful tool for fostering collaboration among students in the classroom. Art projects such as group murals or posters require students to work together towards a common goal, encouraging them to communicate effectively, share ideas, and respect one another’s opinions. Through collaborative art projects, students learn valuable teamwork and problem-solving skills that they can apply to other areas of their lives. When students collaborate on a creative task, they also develop a sense of shared ownership and responsibility, which can promote a sense of community and belonging in the classroom.

Examples of art activities that foster collaboration:
- Collaborative drawing: Have students work together to create a large drawing – an online never-ending whiteboard is great for this. Each student can take turns adding to the drawing or building upon what the previous student drew. This activity requires students to communicate and compromise to create a final product that incorporates everyone’s ideas.
- Storyboarding: Students work in groups to create storyboards for a short film or animation that demonstrates understanding of a topic. Each group member can contribute to the storyline, character development and scene design. This activity requires students to listen to and build upon each other’s ideas.
Providing opportunities for art in the classroom could increase student engagement and motivation. Art activities provide students with the freedom to explore and express themselves in a way that traditional assignments may not. When students are given the opportunity to engage in creative activities, they are more likely to be invested in their work and motivated to learn. This approach can help create a more positive and enjoyable learning experience for students.
Examples of art activities that increase student engagement and motivation:
- Artistic response projects: Assign students to create an artistic response to a text or a historical event. Because “artistic response” is open ended, students can create in a variety of mediums as well as providing a large amount of agency to what they create. This also allows students to engage with the classroom material in a creative and personal way.
- Design a book or movie cover: Have students create a book cover or a movie poster about a classroom topic. This activity can increase engagement by giving a creative outlet to engage with content and potentially leading to further discussion in the classroom.
Infusing art activities into the classroom can have a profound impact on student learning experiences. Art provides a means for self-expression, fosters collaboration among peers, and increases engagement and motivation. Art activities allow students to express themselves in ways that are personal and unique as well as provides a sense of control and agency over their work. Art is a powerful tool that can help enhance the educational experience and create a more well-rounded and fulfilling learning environment.
In the final post of this series, we explore various times during instructional periods during which you can infuse art activities for students. Check out that post here.
]]>The International Society for Technology in Education (ISTE) Conference is the world’s most comprehensive Education Technology event. Wacom is thrilled to be participating at ISTE this year in the exhibit hall. With approximately 12,000 attendees, ISTE is the place to be a learner, be inspired, and connect with other educators. This year’s conference will be held in Philadelphia, Pennsylvania, from June 25-28. “Discover your next … idea, collaboration, inspiration…,” is the theme for the conference. The Wacom team is excited to discover our next partnership, discuss innovative ideas, and connect with educator friends.
The ISTE conference serves as a hub for educators and professionals to explore the latest trends, tools, and pedagogy in educational technology. Each day is filled with a variety of session types, in person and virtual options, all facilitated by engaging educators. The Wacom team has highlighted a few sessions that we are looking forward to attending:
Building Efficacy to Create an ULTRA Accessible Classroom
Utilizing and Leveraging Technology to Reinvent Accessibility (ULTRA) is an education research grant aimed at building teacher and student efficacy in STEM through professional learning, using Microsoft 365 accessibility tools and Minecraft: Education Edition. Learn how the ULTRA team provided professional learning and how ULTRA is revolutionizing efficacy in STEM.
Presenters: Allison McGrath, Jason Pearce, and Kelley Predieri from Duval County Public Schools
10 Must-Try Formative Assessment Strategies: Check for Understanding With Digital Tools
Get an introduction to 10 strategies for checking student understanding in all grade levels across all content areas. You’ll walk away with tips you can use tomorrow as we share actionable, meaningful ways to gather data to inform instruction.
Presenter: Dr. Monica Burns
Kickstart Creativity: Fostering a Schoolwide Culture of Creativity
How do you scale and foster creative culture within your school? In this interactive session, we will play and imagine together while we explore opportunities designed to spark inspiration with students and staff. Come prepared to move, have fun and think outside the box!
Presenters: Martha Bongiorno, Meggan Ford, and Isabella Hembree from Fulton County Schools
The Versatile World of Sketchnotes
Learn to ditch that copier by incorporating sketchnotes. Learn ideas, strategies and tools to use sketchnotes to empower students to take ownership of learning, assess learning, and take notes visually. Discover ways, both with and without tech, to create sketchnotes, curate student sketchnotes, and bring student learning to an authentic audience.
Presenter: Adam Juarez
In addition to these great sessions, we will be visiting some of our partners in the exhibit hall as well. Our friends over at Kami are always having a great time sharing the new tools and features for annotation, accessibility, and integration. You can probably spot one of the trainers on the Kami team using a Wacom tablet to be mobile while presenting! We are super excited to be in the Pear Deck booth to chat about how Pear Deck and Wacom are better together. With the pen precision of our products and the drawing features of Pear Deck, we are the perfect “pear!” Our friends over at the Foxit booth have included us in their scavenger hunt for prizes – so check out what they are doing and join in on the fun.

As you navigate the enormous exhibit hall, we invite you to head over to Booth #2057, where you can get hands-on exploring our various pen tablets. You can give them a test drive with your favorite digital tools like Magma, Kami, and Pear Deck. The Wacom team will be eager to answer your questions and help you discover the endless possibilities that Wacom’s technology brings to your school or classroom. Check out how you can be teaching untethered in the classroom with the Intuos wireless tablet, or explore our pen displays to really get your students’ creativity flowing.
The ISTE conference is an unparalleled gathering of educators, technology enthusiasts, and innovators who are passionate about harnessing the power of technology in education. We hope that if you are attending, you can find time in your schedule to stop in and chat. Whether you are attending or not, you can follow along with the Wacom team at ISTE on our socials @wacomedu.
]]>About the contest
The Wacom Character Design Contest was open to any student, over the age of 13, enrolled in a high school art or Career and Technical Education (CTE) course in the United States. Students submitted their own original character designs, which were then judged on shape, color, dynamic pose, and overall design by a panel of industry experts. Our judges included:
- Joshua Leonard – Character Designer, creator of Team Supreme
- Mike Morris – Episodic Director, Story Artist and Animation Supervisor
- Meredith Giltner – Director of Visual and Applied Arts
The first place winner will receive a new Wacom Cintiq 16 pen display. Second place will receive a Wacom One pen display, and third place will receive a Wacom Intuos Pro pen tablet. There were hundreds of entries from around the country, but we could only pick three winners. Here they are:
The winners

1st Place Winner: Amanda Arant, Colorado

2nd Place Winner: Jayna Valdez, New Jersey

3rd Place Winner: Miles Solevad, Washington
We would like to congratulate all of the winners, and thank all of the participants for their amazing work. Each of the judges noted how impressed they were with the quality level of the artwork and how difficult the judging was.
The winning entries will be featured on our Education social media channels: Instagram, Twitter, and Facebook at @wacomedu. We hope that these entries will inspire other students to pursue their creative endeavors. Please follow us to see more of the student artwork, as well as to learn about future contests and activities with Wacom.

We would also like to thank our judges for their time and expertise. Their insights were invaluable in selecting the winning entries. We are excited to see what the future holds for these talented young artists!
]]>As educators, we are always looking for ways to enhance our students’ learning experiences. One way to achieve this is by infusing creative outlets into classroom routines. Creative activities provide numerous benefits to students in both academic and non-academic areas, making it a valuable addition to any classroom. This is the first post in a series, “Infusing Creativity into Classroom Routines.” In this post, we will be exploring the benefits of providing creative outlets to students in the classroom.
Improved academic performance
Engaging in creative activities can be a way improve academic performance. Studies have shown that music education, for example, can improve language acquisition, reading skills, and mathematical abilities. In addition, art and drama activities can help students to develop critical thinking skills and improve their ability to analyze and interpret information. By incorporating creative activities into classroom routines, teachers can help students develop a deeper understanding of academic content while also fostering their creativity.

Enhanced problem-solving and critical thinking skills
Creative activities give students the opportunity to think outside of the box, solve problems, and think critically. By incorporating creative activities into classroom routines, educators can help students develop these essential skills which are crucial for success in academic and professional settings. For example, drama activities can help students develop empathy and perspective-taking skills, while visual arts activities can help students express and regulate their emotions.
Increased motivation and engagement
When students are given opportunities to express themselves creatively, they often become more motivated and engaged in their learning. This can lead to improved academic performance and a more positive attitude towards school. Educators who encourage creative expression can help students develop a passion for learning that can last a lifetime.
Improved physical and mental health
Another positive impact of creative activities is on students’ physical and mental health. Research has shown that engaging in creative activities such as music, dance, and art can reduce stress, improve mood, and promote physical fitness. For example, a study found that music and dance activities had a positive impact on physical fitness and stress reduction in adults. Other research has shown that engaging in art-making has a connection to health and well-being. This can carry over to help students develop healthy habits that can improve their overall well-being.

Improved social and emotional development
Art activities in the classroom can have a significant impact on students’ social and emotional health. By engaging in creative activities such as drawing, painting, and sculpting, students are given a means of expressing themselves in a nonverbal manner. This can be beneficial for students who may struggle with verbal communication or expressing their emotions. Art is also a great way to connect with others. Students can share and collaborate on projects together, giving them an opportunity to build relationships and strengthen social bonds. Consider adding art activities to the classroom routine to impact students’ social and emotional health.
Increased career readiness
Creativity is a highly valued skill in the workforce, and engaging in creative activities can help students develop the skills they need to be successful in their future careers. Creative activities can help students develop problem-solving skills, adaptability, and the ability to think creatively. Teachers who prioritize creative activities in the classroom can help prepare their students for the ever-changing demands of the workforce.
Providing creative outlets to students in the classroom can have numerous benefits for their academic and personal development. By fostering creativity in the classroom we can help our students become successful learners and members of society.
The next blog post in this series will focus on how creativity can improve learning experiences, with the final post sharing examples of how and when to infuse creative activities into your classroom routine. Check out that post here.
]]>National Poetry Month is coming up in April. This is a great time to celebrate the beauty and power of poetry in your classroom! There are unlimited ways to explore poetry in April, ranging from creating poetry journals, to reading poems aloud, to hosting a poetry jam to share the joy of poetry.
Here at Wacom, we always look for ways creativity can shine through. National Poetry Month is a great time to explore the intersection of poetry and digital art. Many of these are possible no matter the tech you have access to in your classroom, but work best with a class set of Chromebooks and One by Wacom tablets. Here are some creative ideas you can try out:
- Create a digital poetry anthology. Students can collect and curate poems around a theme or topic. Google Slides, Flipsnack, or Canva are great tools that allow for incorporating interactive elements such as animations, videos, and sound effects. Once all of the students have contributed to the book, you now have a variety of poems for all to enjoy.
- Use Canva or Adobe Express to create a visual poem. Use a poem as inspiration to create a visual representation with images, colors, and typography.
- Try creating found poetry. Blackout poetry is a great example of found poetry, where existing text is used to create new meaning and beauty. In blackout poetry, a page of text is selected and certain words are blacked out with a marker, leaving only a few key words visible. These visible words are then arranged to create a new poem. Kami is a great tool for completing this type of activity. Find a common text, and share it out to your students. From there students use the Kami tools to creatively black out sections of the text.
- Discuss poems as a group. Connecting and finding meaning in poems is a great opportunity to start dialogue in the classroom. Sometimes this is a difficult task, because not all students feel confident enough to speak up. Using a tool like Pear Deck, where students can visually represent their understanding, or write a response to a poem, teachers can ensure more voices are heard.
- Create a stop-motion animation using poetry. Use clay or other materials to create characters or scenes inspired by a favorite poem, then use a camera to take a series of photos of each movement. This can easily be done on a Chromebook using the Stop Motion Animator Chrome extension.
These examples of digital projects allow students to engage with poetry in new and exciting ways, while also building digital literacy and creativity skills. By incorporating multimedia elements and digital tools, students can express themselves in unique and impactful ways, making the poetry come alive in a whole new way.
Feature image by Photo by Matthew Henry from Burst

Wacom for Education
For more information about how Wacom supports education, and how Wacom products can elevate collaboration and engagement in classrooms across all grade levels and subject areas, check out the Wacom for Education site or the education section of this blog!
Earth Day has been an important holiday since it was first celebrated in 1970. Currently observed on April 22nd, the holiday is intended to promote environmental awareness and encourage people to take action towards a healthier and more sustainable planet. As we approach Earth Day, it’s important to reflect on the ways we can contribute towards a greener future. One way to do so is by reducing waste in our classroom, including our paper usage — and that’s where Wacom tablets come into play.

Photo by Phil Hearing on Unsplash.
It might seem like an impossible task to teach an art class, or do creative, artistic projects in a non-art class, without buying and eventually discarding tons of paints, pens, paper, and canvas. But the future of art is digital, and if we want to prepare our students for the future, we have to offer opportunities to explore digital creativity.
Wacom has a variety of devices that allow artists, designers, students, and teachers to work digitally, without the need for paper or other traditional classroom and art supplies. By utilizing a Wacom tablet, individuals can reduce their paper consumption, which has a positive impact on the environment.
Getting Wacom tablets for your classroom can be an excellent way to celebrate Earth Day and begin to move toward going paperless. Instead of using paper and pencils for drawing and note-taking, students can use a Wacom tablet and pen to create digital artwork and notes. This not only reduces paper usage, but it also creates a more efficient workflow and makes it easier for students to organize their work.
Wacom tablets can be used in a variety of subjects, including science, math, and language arts. Students can use them to create digital illustrations for science projects, work through math problems digitally, or even practice handwriting in a digital format. By incorporating Wacom into the classroom, teachers can demonstrate the importance of reducing paper usage and encourage their students to be more environmentally conscious.
The utilization of Wacom tablets is a great way to promote creativity in any classroom — but they can be especially powerful in an art classroom. Students can experiment with different digital art techniques and tools, and the tablets’ pressure sensitivity allows for precise control over the digital brush strokes. This opens a world of possibilities for creative expression and encourages students to think outside the box when it comes to their projects, and helps prepare them for a digital future.
Earth Day is an excellent opportunity to reflect on the ways we can contribute towards a healthier planet. By incorporating Wacom into the classroom, teachers can promote environmental awareness and encourage students to go paperless. This not only reduces paper usage, but it also fosters creativity and creates a more efficient workflow. Let’s make Earth Day a day to remember, and work towards a greener future together.

Wacom for Education
For more information about how Wacom supports education, and how Wacom products can elevate collaboration and engagement in classrooms across all grade levels and subject areas, check out the Wacom for Education site or the education section of this blog!
Feature image for this blog post obtained from Burst.
Enter your Students’ Work into the Wacom Character Design Contest!
If you’re a high school teacher who wants to provide an opportunity for your students to showcase their creativity and skills, as well as possibly win exciting prizes, here’s a great opportunity to do just that. Consider submitting your student’s original character designs to this brand new art challenge!
Character design is an integral part of the creative process and plays a crucial role across various fields including animation, video games, comic books, and more. Not only does it allow artists to bring their ideas to life, but it also helps to tell a story and convey emotions and personalities.
This is a great opportunity for young artists to showcase their talent and have their work recognized by a leading technology company in the digital art industry. So share this opportunity with your students, grab your Wacom pen, and start designing today!

About the contest
By participating in this contest, students will not only have the chance to win exciting prizes but also develop valuable skills in character design, including concept creation, storytelling, and visual storytelling. Additionally, they will have the opportunity to be recognized by Wacom, a leading company in the digital art industry.
Logistics
This contest is open to any student, over the age of 13, enrolled in a high school art or Career and Technical Education (CTE) course in the United States. In order to protect student data and information, however, classroom teachers will be submitting student work anonymously via a link on a secure form, provided by Wacom. The participating teacher will also fill out a registration form and be the main point of contact with Wacom throughout the contest.
Prizes:
Prizes will be awarded for 1st, 2nd, and 3rd place.
- First Prize: Wacom Cintiq 16
- Second Prize: Wacom One
- Third Prize: Wacom Intuos Pro
Judging
A panel of industry leaders will be judging the entries. Head over to the registration page for more information about judges, and stay tuned to this blog for a detailed judging breakdown, coming soon!
Contest Dates
The contest will begin the week of February 6th, 2023, and entries will be accepted through April 15th, 2023. The winners will be announced before Memorial Day weekend 2023.

How to Enter:
To enter the contest, a participating high school teacher will need to go to the registration page, which has the submission packet, terms and conditions, as well as teacher resources for character design lessons.
After submitting students’ characters, we’d love for teachers to share some of their students’ work on social media. If you do, tag @wacomedu — but make sure to keep all artwork anonymous until the challenge is over! We love seeing what is being done in the classroom and great new characters.
Bookmark the registration page, as well as this blog, as both will be updated with more information about our judges and the prizes, as well as other tips and resources for students.
Want more information about the contest, the rules, the judges, the requirements, or to access additional materials? Or, ready to enter your classroom? The Character Design Art Contest page registration page has everything you need!
Every purchase of a Wacom Intuos Wireless, Wacom One, or One by Wacom comes with a free three-month trial bundle of powerful education software, including Pear Deck.
In this webinar, learn how to create interactive lessons and achieve 100% student engagement with the Pear Deck Google Slides Add-on! It will cover how to add formative assessments and how to use the Drawing tool with Wacom tablets to enhance your lessons. You’ll also see examples of best practices to help cultivate an engaging classroom with Pear Deck in any learning environment.
Short on time? Read on for a few key takeaways from the session.
Why Wacom + Pear Deck?
Most educators are familiar with slide decks — combining verbal instruction with an accompanying visual is a standard pedagogical tool. But Wacom and Pear Deck work together powerfully to supercharge any teacher’s slide decks, and have the potential to level up engagement in the classroom.
A range of options
Wacom has a range of products across all price points, education levels, and use cases, meaning there’s a Wacom pen tablet or display that’s perfect for your classroom.
The best product for most educators is a Wacom Intuos Wireless, Wacom One, or One by Wacom, and each comes with a free three-month trial bundle of powerful education software, including Pear Deck!
But the Wacom Cintiq is a less common, but very powerful tool for an art teacher or educator who’s ready for advanced digital lessons — and the Wacom BTH-2452 is purpose-designed for podiums and front of classroom use, and is perfect for college classrooms.
The power of the pen
Working digitally with a Wacom pen is intuitive, versatile, and better for learning. Pens feel familiar and comfortable for nearly everyone, even those who aren’t tech-savvy or don’t have much computer access or experience. They can be used in many different ways to enhance teaching and learning. And even better — studies show that writing with a pen boosts learning and retention over typing!
Flexibility and reduced barriers
Wacom technology lowers barriers to effective digital education. Wacom technology works seamlessly with most preferred devices, operating systems, and software, especially Chromebooks — many Wacom tablets are Works with Chromebook certified, meaning they plug in and just work with no drivers or fiddling with settings! They’re built to be intuitive for all users, with a short learning curve, and are designed to work in any educational setting.
Enhanced engagement
Wacom helps teachers and students learn better together. Using a pen display or tablet means teachers can use a familiar teaching style while facing the class, not the whiteboard. They can create multimedia learning materials that have increased impact, especially in STEM and language classes. They also enable more dynamic and memorable learning, and open up new collaboration opportunities as well.
Pear Deck in the classroom

Draggable slides
Pear Deck’s “draggable” slides feature means that a slide can have digital elements that students can quickly and easily manipulate to share information with the teacher all at once.
This makes “temperature checks” simple and easy. Temperature checks are opportunities to ask a short, easy question to all students simultaneously, and to get instant feedback. You can get a quick idea of how your students are feeling about the pace of a lesson. Getting consensus, or near-consensus, before moving on helps ensure everyone is still with you, and can help you identify students who might need extra attention.
You can also use draggable slides to ask a multiple-choice question — your slide can visually display a range of options, and each student can drag an icon to their choice. Students will only see the icons themselves, while the teacher will see students’ names attached to icons.


Individual drawing slides
Drawing slides include a space where students can use their pen tablet, and Pear Deck’s drawing tools, to write or draw responses to questions, or to show their work. These can be done collaboratively or individually.
In the first example above, students will work out the problem, show their work, and put the final answer in the square provided. In the second example, students can write with a Wacom pen on their pen tablet, or they can use the type tool to fill out the graphic organizer.

Collaborative drawing slides
Another option is a collaborative drawing slide. With this option, all students or groups of them can draw on a slide simultaneously. In the above example, everyone can add squiggles and shapes to create a collaborative piece of abstract art. The teacher can see all submissions individually — perhaps to make sure everything’s appropriate for display — or view and present them all layered on top of each other, for a collaborative piece.
This can also work in small groups, where students work out different sections of a task or work on a visual presentation together.
That’s not all!
For more on using Wacom tablets and displays with Pear Deck, check out previous Pear Deck posts on this blog.
To learn more about how to use Pear Deck, check out their Help Videos, How-To Handbook, and Knowledge base — or reach out to help@peardeck.com.


About the presenters
Mary Alys Foutz is a former elementary school teacher and Instructional Technology Manager at Pear Deck, and current Pear Deck Certified Coach and Senior Advocates Strategist at Go Guardian.
Michele Dick is the Education Specialist on the Wacom team. She has over 20 years experience in education as a classroom teacher and educational technology administrator. Michele’s passion is to work with educators to find ways that technology can solve problems and amplify student voice.