I’m planning to use this little animation as a GIF. I’m a verified artist on GIPHY, this means that whenever I upload a GIF to GIPHY, it will end up in sticker packages on most social media channels. Making use of GIPHY this way is something that I like.
Step 1: Prepare your canvas
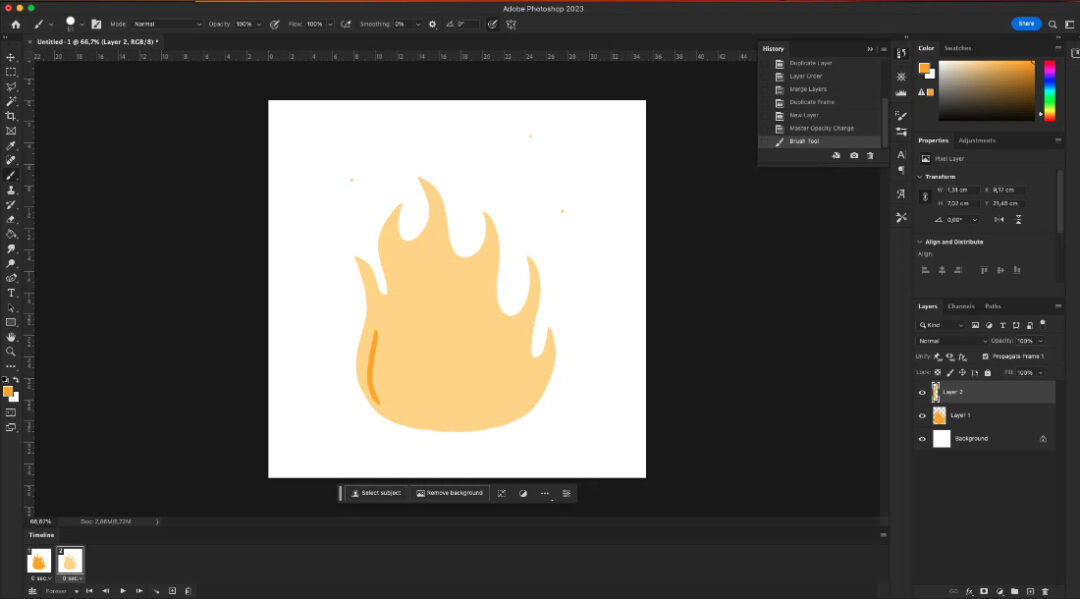
I turn on Photoshop and click on “New.” Since the GIFs you use on social media are very small, I’m creating a small canvas: 1000 x 1000px. But for my purpose it could even be smaller than that, to be honest.
Next, tick the Timeline Option Under “Window.” Clicking on this will activate the Timeline view, which is the bar under your main screen on Photoshop.
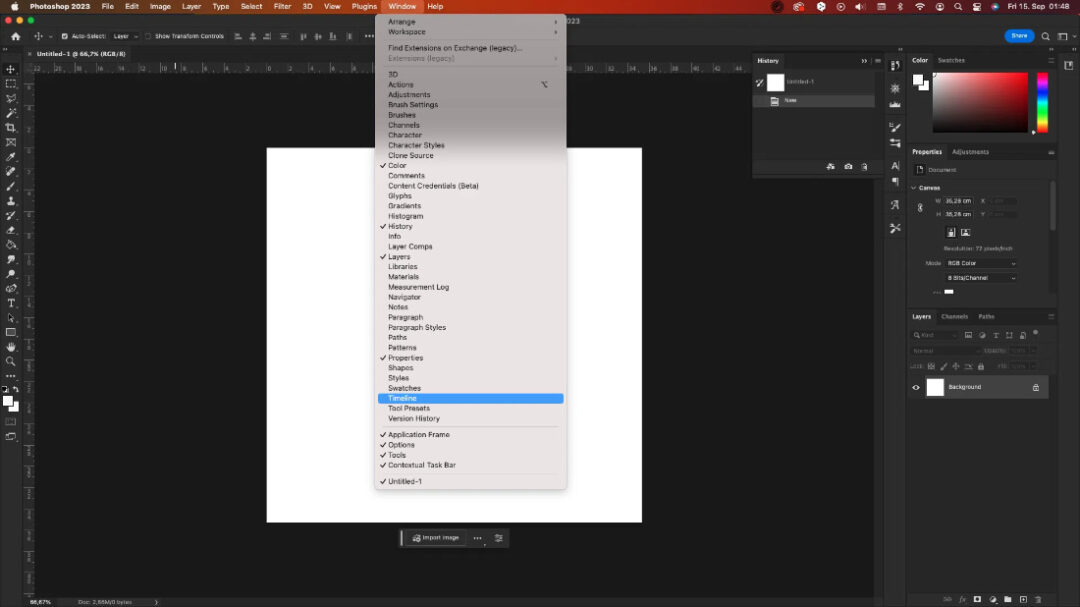
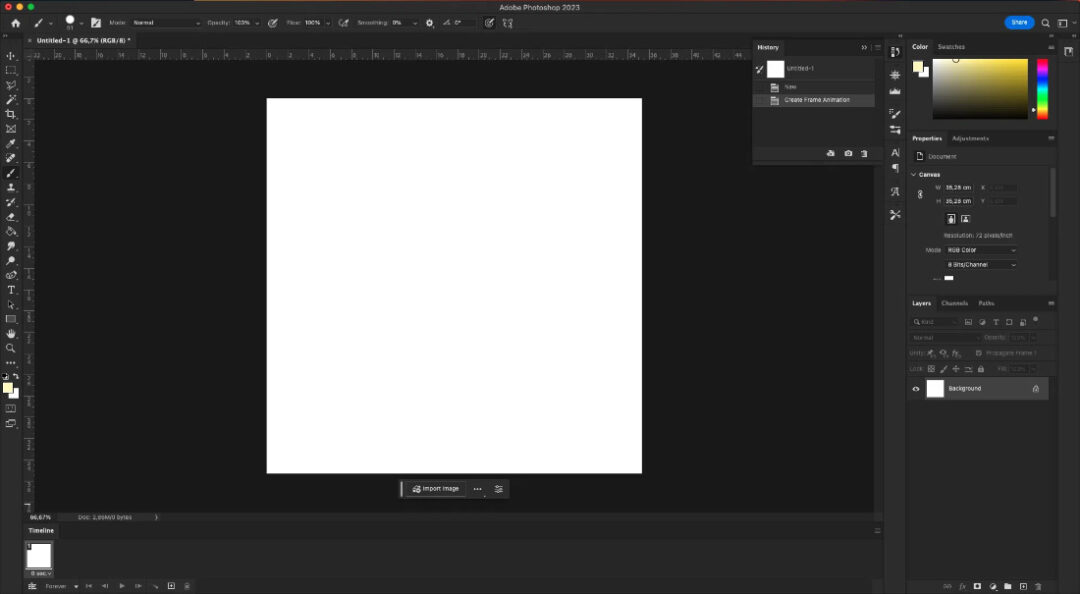
There, I click on the “Create Frame Animation” option.
When using this method, you have two important terms you will see a lot when creating GIFs: Frames and layers. Frames are different than layers, and you will see why as we go on. Just keep it in your mind for now that when I say layer, I’m referring to our layers that we draw on, on the right to the screen. And when I say frames, I’m referring to our timeline which is at the bottom left part of the screen.
Step 2: Let’s Draw!
Now create a layer (on the right) and start drawing one random fire in the canvas with the color of your choice. I made this, very fast and quick:
Congrats! You have your first frame. Now, on the bottom left where frames are, click on the little plus sign in the square to create a new frame. After this, go to the right, to the layers again and create a new layer.
Now, remember: when animating in Photoshop, each Frame serves as a specific time stamp. Not layers, but frames. Whatever you do when a particular frame is selected, it will be only in that frame because, for animating an image, we need different frames. So Photoshop keeps the changes on the selected frame, so that the rest can stay different.
But there is one exception to that, and it is the first frame. Whenever you do something new, even if it’s on a different frame, the first frame takes it and always memorizes it. And automatically repeats it in all the other frames. This may be useful for some other animations, but with this specific one, we don’t want our still frame drawings to show up in all the other frames and cause our animation to be distorted.
So each time you make a change (like creating a new layer), you should go to the frame 1 and deselect your new layer, so that your animation won’t be messed up afterwards. I will explain this a bit clearer below.
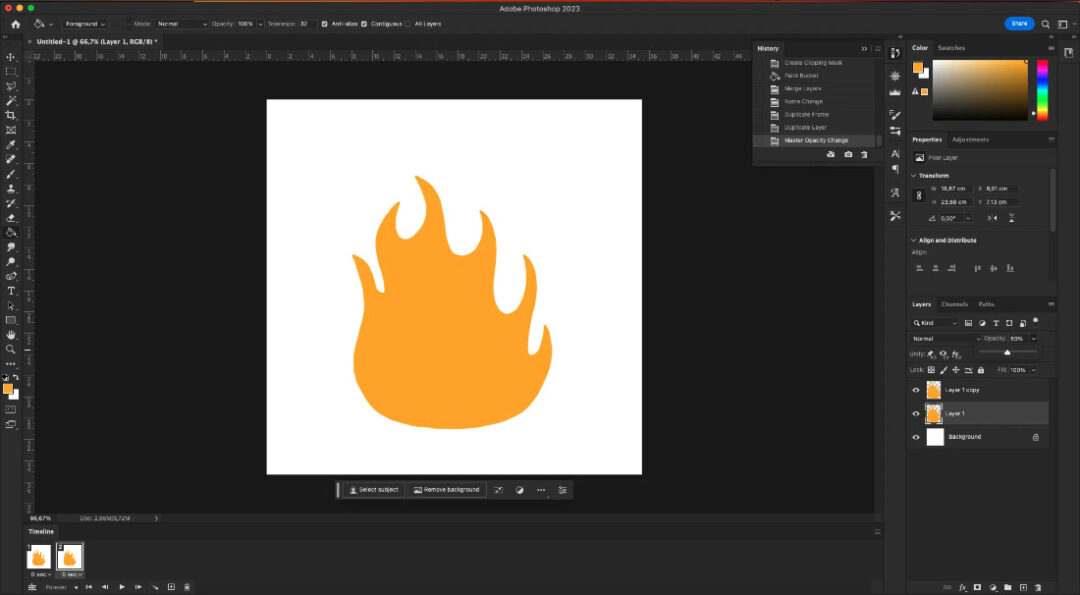
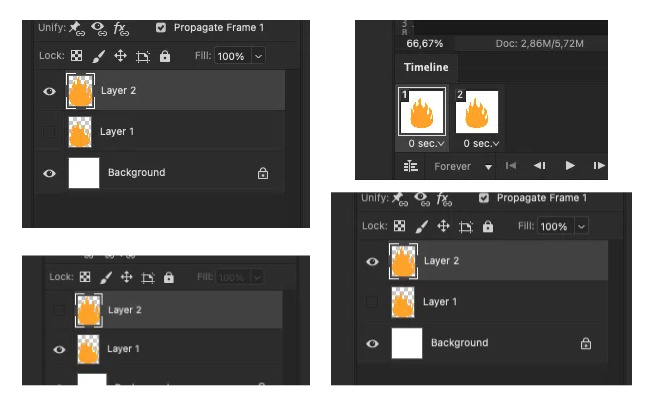
Now that you have your new layer, when frame 2 is selected, decrease the opacity of layer 1. I decreased my first layer to 50% percent. This will help me see the first frame while drawing the second one.
Now start drawing a second random flame shape but this time pay attention to different parts of flame, see how some parts are longer and the others are shorter. Try to make them different than each other but try to keep the bottom somewhat same. Always draw random shapes. When you finish drawing the second layer, it should look like this:

Step 3: Time to pay attention
Go to the layers and deselect the first layer. But also remember that when you had created the new layer, the first frame memorized it. It is very important to be able to tell your frames from layers by this point, so I hope we’re on the same page. So, we need to click on the first frame, go to the layers and deselect layer 2, and then click on frame 2, after that come back to layers, and select Layer 2.
Yes, I know, this part is a bit complicated, and I promised something easy. But bear with me. Once you get the hang of it, you will get used to it. The first few times may be a bit confusing but that’s why we have the screenshots, which I hope are being useful.
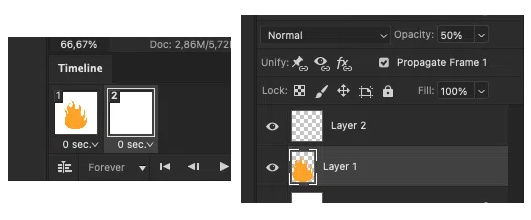
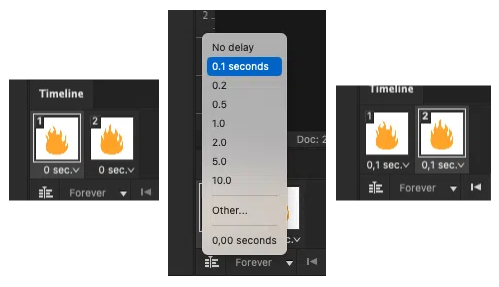
Now that you made it, you have two frames. Which means you already have a looping animation! Don’t forget to select the little arrows under the frames and select 0.1 sec. for each of them – once you do it, every new frame will come out with the same length, so you won’t need to do it for all the frames.
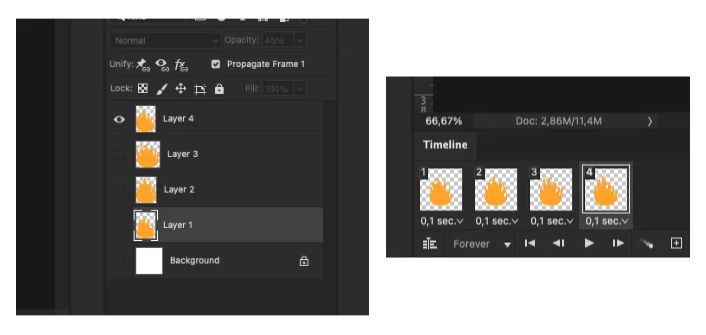
Now, let’s create a third frame by repeating the same actions, and then with a fourth frame by repeating it again. Now you have four different layers, in four different frames. With each also present in the frames pane.
Step 4: Exporting the animation as GIF
Congrats, you made it! Press play to see your animation. When you press play, there will be a looping flame animation right in front of your eyes! If the animation doesn’t loop, pay attention to where it says “Forever” on my screenshot at the bottom. If it says “once” or “3 times” there instead of “Forever,” click on it and select “Forever,” so that your animation will be looping.
But how will you turn into a GIF? Don’t worry, I got you. If you’re happy with your animation, go to File -> Export -> Save for Web.
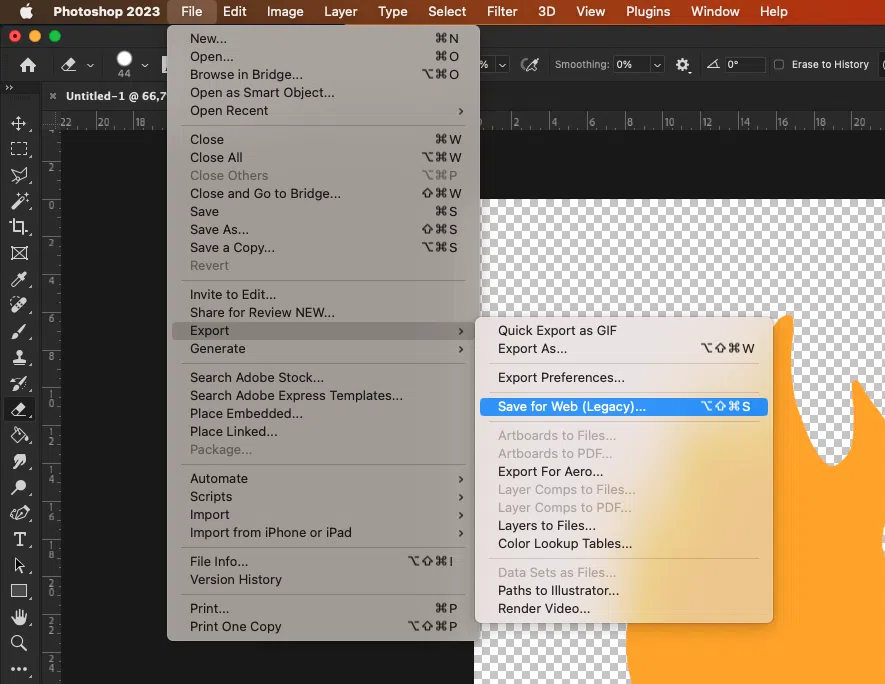
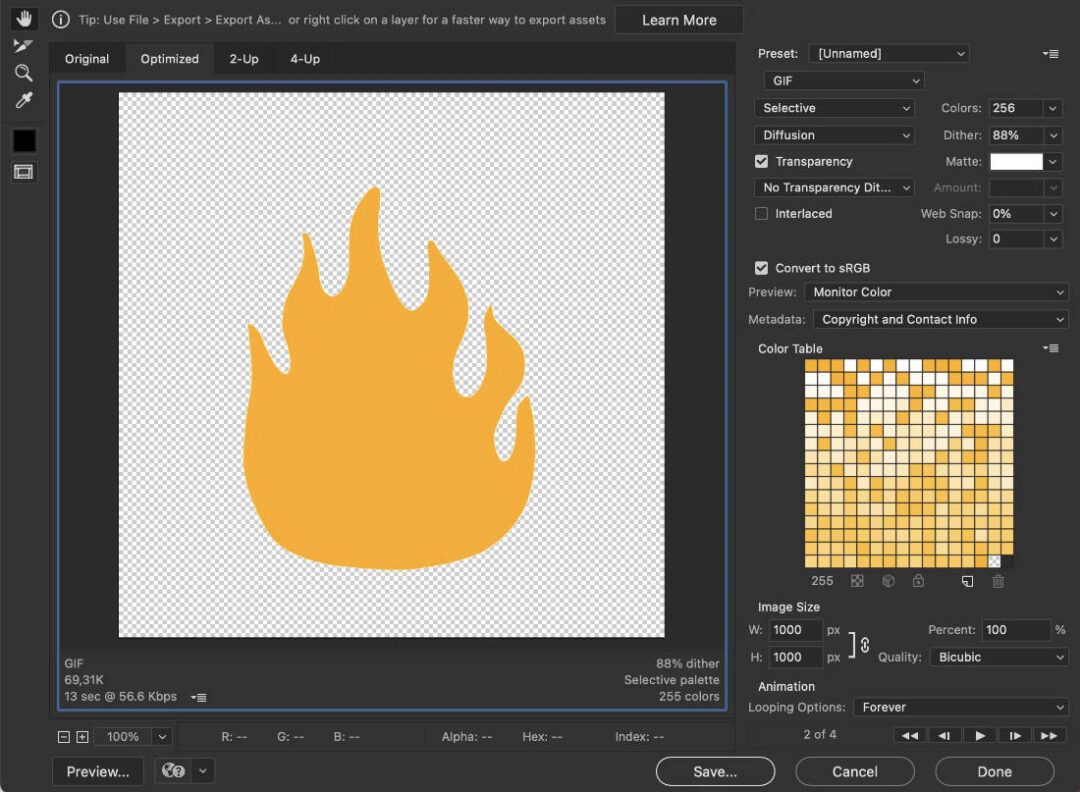
On the “Export as…” dialogue box, make sure your presets are similar to those in the below screenshot. On the top right, GIF should be selected as your export file type. And when you click “Save” it should be ready to go.

You did it! Now you can get registered to GIPHY and upload your GIF there. Or use it in your videos, or just animate some parts of your illustrations, so that they are just funkier.
Result: Easy & Quick Flame Animation

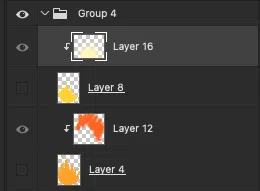
If you want, you can repeat the process to add more layers to the drawing and make the flame a bit more detailed, and you can include more colors, too. For that, you need to group your layers for each frame. So in one group, there should be the different layers that belong to first frame, in the second group the second frame’s layers should be, and so on.
I painted more layers on top and turned my flame animation into this:

To be honest, I like simple versions too, but painting more is always nice. As you can see, with a few simple steps in Photoshop, you can create endless animations for your artwork. Using this technique will allow you to level up your artwork!
Have you made an animation using my tutorial? Don’t forget to post your results on social media and tag @wacom and put the hashtag #madewithwacom so that we can repost your work!
]]>And when it comes to designing a good cover for a book, maybe we can look at various designs, try to analyze what type of techniques can be used in visual design, and get inspired for our own work. So it’s not really “judging” per se, but let’s say “appreciating” good design.
Are you ready to look at some good book cover designs? Let’s get into it!
Photography
I want to start by showing some covers that were designed by using photography. In this technique, we see how the typography is incorporated into the images, as well as how impactful symbolic photography can be for a book cover.
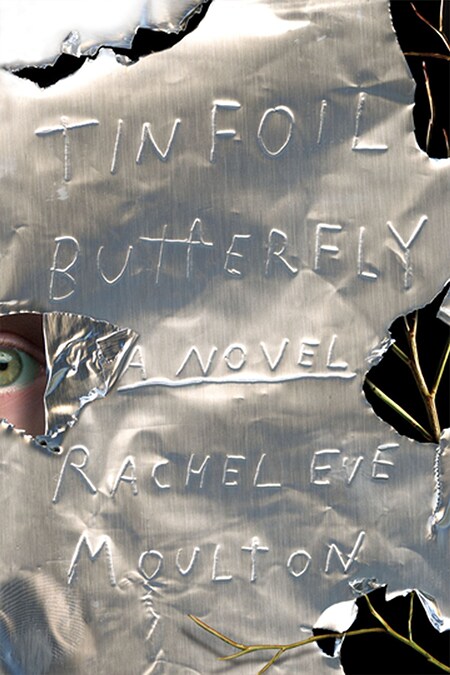
As we can see from these examples, photography on its own is not enough, because, you know, we’re talking about book covers. So every design should be made with lettering in mind. We can say that lettering and the idea of the material to be used in the initial artwork would make the main point and everything else comes afterwards.
But how do you decide which material to use for the photography? It would be up to you, but I would say the context of the book or the title itself would help in deciding what kind of material you are going to use in your design.
After that point, how you design the lettering would be completely up to your creativity. Like in these images, they can be handmade, or made by using Photoshop to look like they are handmade. Another option would be, just like in the last example, completing the design with digital typography but in harmony with the rest of the image.
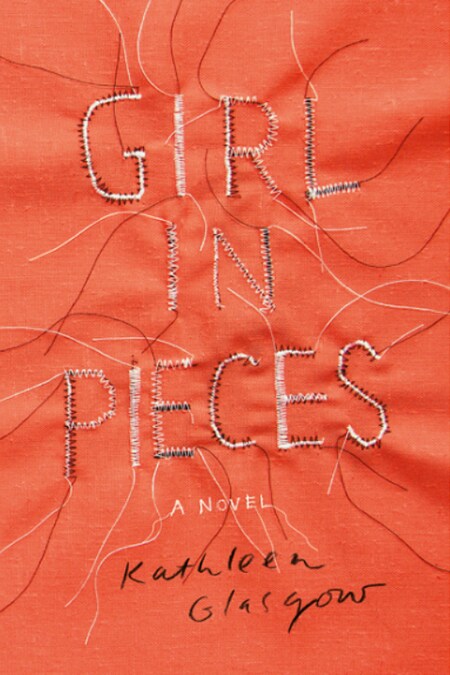
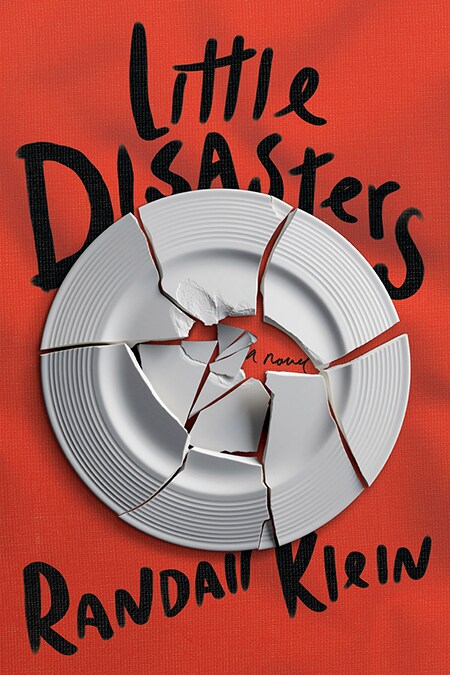
Look at these examples, aren’t they a sight for sore eyes?
Illustration
Now let’s talk about illustrative book covers! I always feel like illustration is the sister of design. You really need to have a good design eye in order to make your compositions and colors come together in a perfect harmony when you’re illustrating.
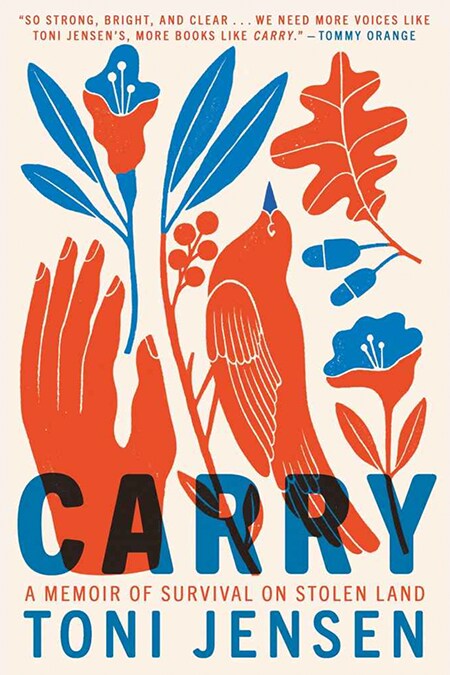
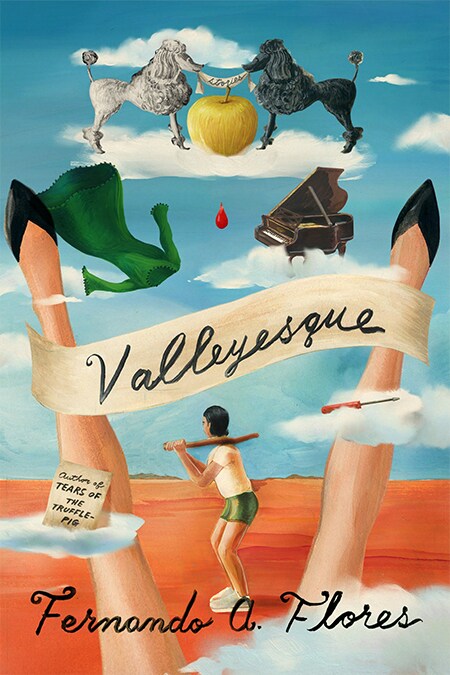
These covers are among the best examples of that harmony.
Whether it be with popping colors or the creative usage of typography, illustrative book covers not only help the readers get a glimpse of what the book is about, but also they serve as a whole different genre of the togetherness of illustration and design.
Moreover, using different types of fonts with different types of illustrations is also important. Everything should come together like good team players, supporting each other. Like we can see from Adalis Martinez’s and Na Kim’s designs above, the illustrations they used as well as the fonts are completely different styles but they both look harmonious within themselves.
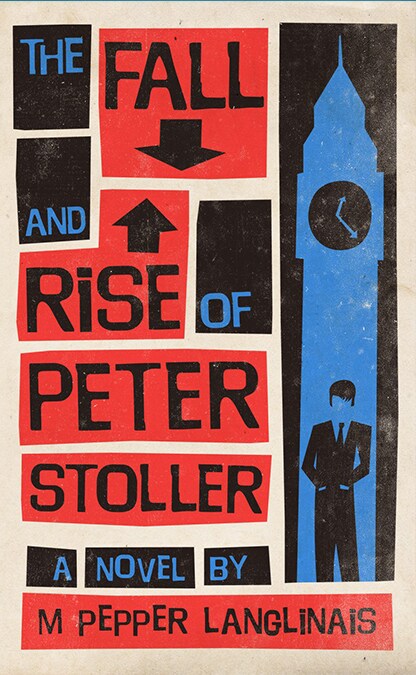
When you are using illustrations for a book cover, you don’t have to use them in every corner. Sometimes it looks better when you use only a few illustrations and make the typography pop. The last two examples by Adalis Martinez and jestyr37 are very well made in terms of incorporating this “less is more” perspective into the designs successfully.
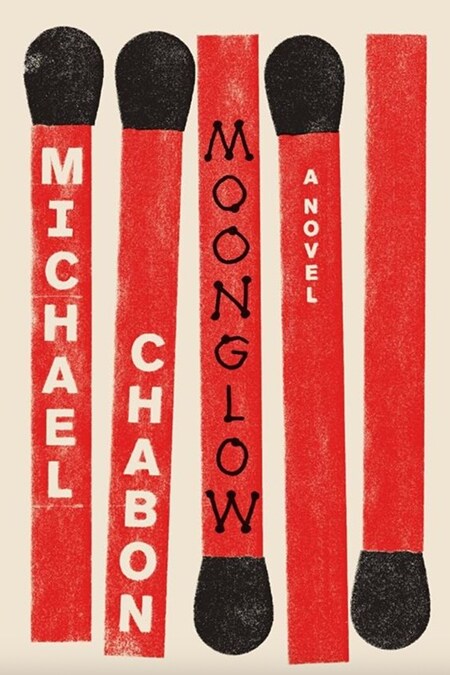
Just Typography
Like I said multiple times in this article already, typography is the most important thing when it comes to designing a book cover. Making a design that is both eye-catching and giving the message clearly is where the mastery of typography lies.
So now let’s have a look at how digital typography can be used on its own creatively for cover design.
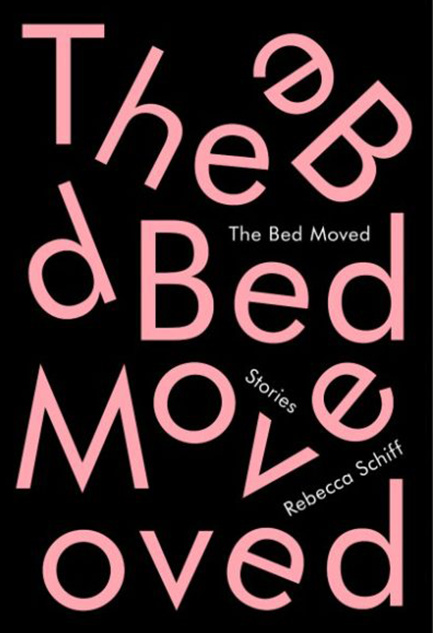
I love in this first example that Janet Hensen took a risk and made the words not very clearly readable, but we can still successfully see the name of the book, The Bed Moved.
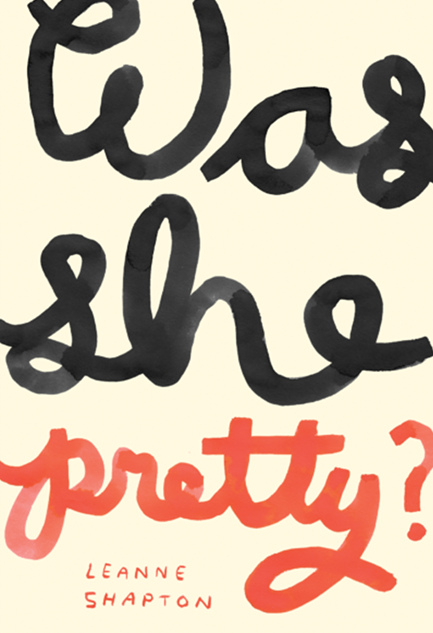
The design of “Was She Pretty?” is also by its author. Made by using a hand-lettering and a very successful composition and framing, Leanne Shapton gives us in the first glance what we need to see: dramatic colors, not so perfect, even an emotional hand lettering, and overall an eye-pleasing design.
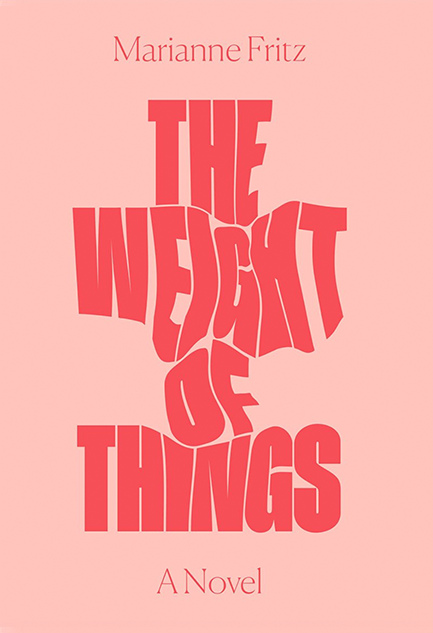
This typography actually impressed me a lot, because with just a few simple touches of warping the letters’, Erik Carter gives us a visual story already in a few seconds. The title, “The Weight of Things” makes so much sense when we see that the letters are pushing into each other as if they are affected by some external force.
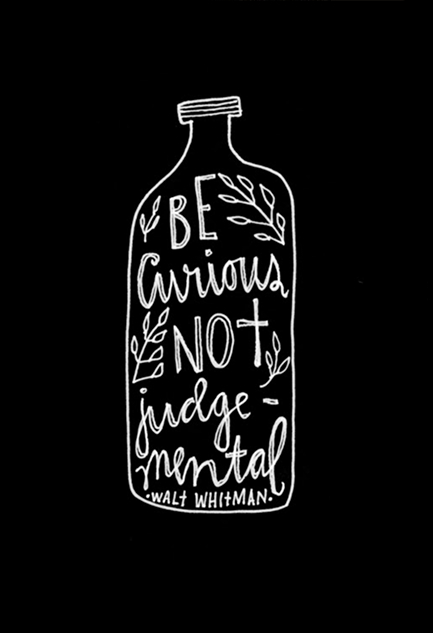
Victor Ehikhamenor’s design for “Be Curious not Judgemental” shows us again that sometimes simple hand lettering can be very impactful when it’s easy to read. By presenting the letters in a closed bottle, the design also carries the message of how being judgemental can cause a person to limit themselves.
Overall, for a good book cover design, besides photography and illustration, only lettering and typography can be used too. Of course, separating these categories is not so easy, because typography goes into all of them, but I still wanted to present you with some different types of cover design that we all can learn from.
I want to also emphasize that there is a common theme in all of these works, and that is, they are very simple and they get to the point really quickly. This is one of the most important things that make a good visual design, I think. In a time where images are presented to us so often so fast, we may not always have time to look at details, so it’s always better to let the audience see the purpose of those images as quickly as possible.
Are you also interested in design? Check out our pen displays and pen tablets, which makes designing fun and easy. And if you’re already making some designs using our products, post them on your social media with the hashtag #madewithwacom so that we will see them and repost them for our followers to see!

About the author:
Zeynep Alpay is a freelance multidisciplinary artist and illustrator based in Köln, Germany. Their work encompasses illustrations, animations, paper cut-outs, and traditional artwork. For more information or to see more of Zeynep’s works, check out their portfolio, their Instagram, or their Linkedin.
Today I wanted to put together a list of a few of my favorite art direction inspirations from music videos we all know, ranging from animation to live action, from the 80s to today. Grab your dancing shoes and join me in this article where music meets visual climax!
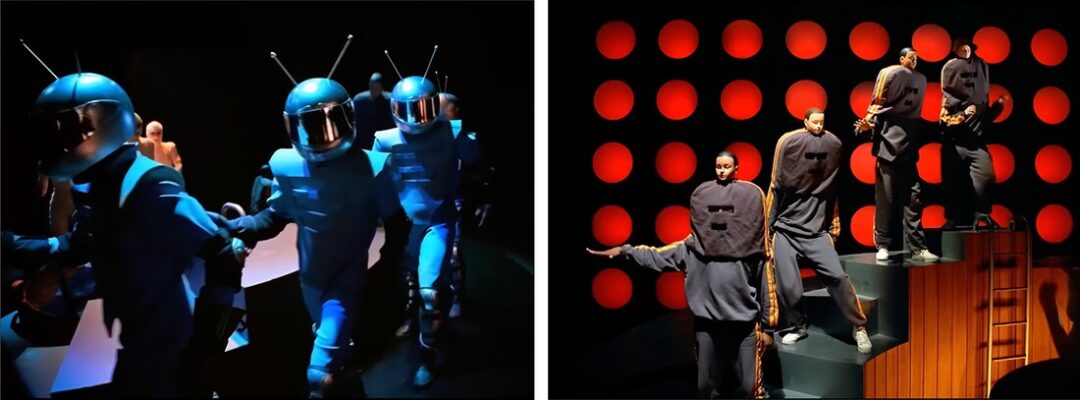
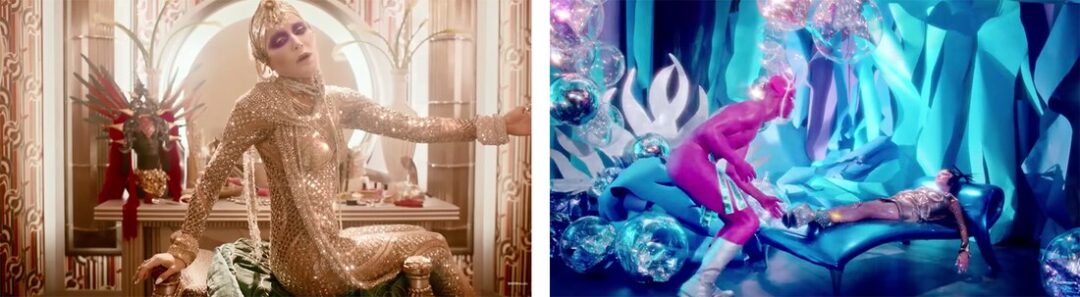
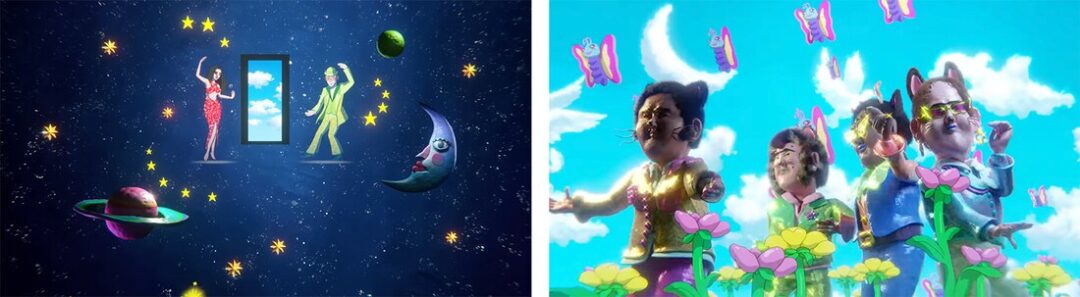
Lady Gaga – “911” by Tarsem Singh (2020)
One of the strongest names of pop culture in the 21st century, Lady Gaga has been known for her striking music videos. She didn’t disappoint the fans with one of her hits in 2020, “911” from her album Chromatica that came out in the same year. Directed by the master Tarsem Singh, this music video is one of the best examples that comes to my mind when I think about great art direction. It has everything that you can look for when you think about making a video that is bursting with art: great costumes, scenes that you want to look for hours, incredible attention to detail, perfect color usage, and masterful framing and composition in every second.
Throughout the video, warm and cool colors are used in a great balance where costume designs and the choreographies captivate the audience.

The video is a homage to the iconic Soviet/Armenian movie The Color of Pomegranates by Sergei Parajanov. If you already watched the movie, you can easily see the similarities.
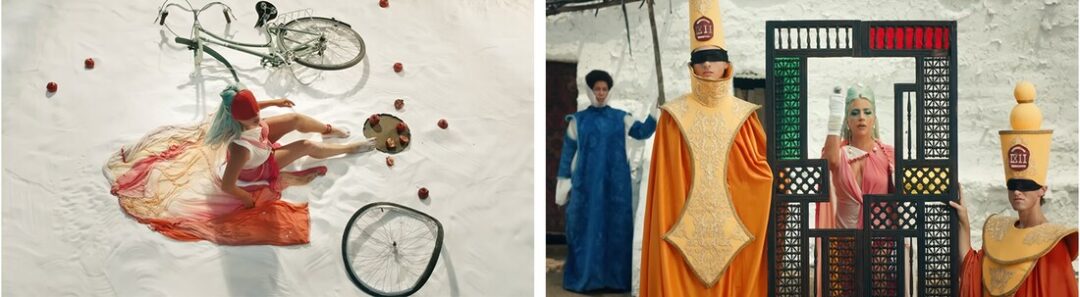
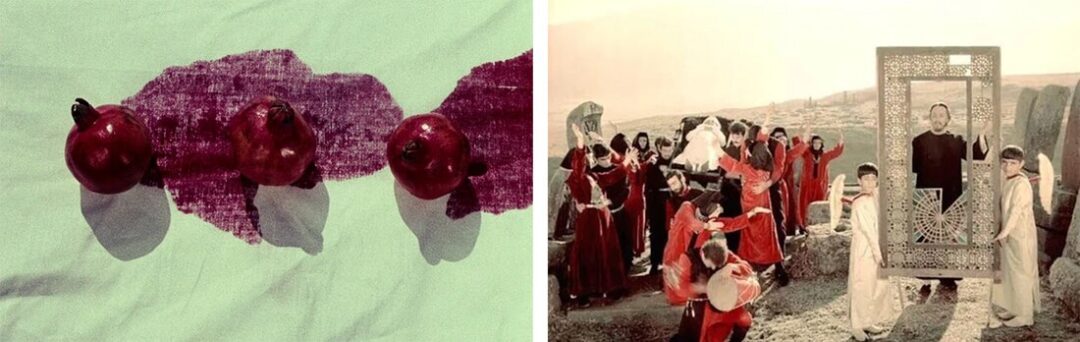
Also in the beginning of the video, we can see pomegranates spread out on the ground, and – spoiler alert! – when everything is revealed, we see that it was actually apples that fell on the ground. Moreover, the poster of the movie The Color of Pomegranates is also shown, in a theater where an Armenian film festival is taking place, right next to the spot where Lady Gaga had the accident.
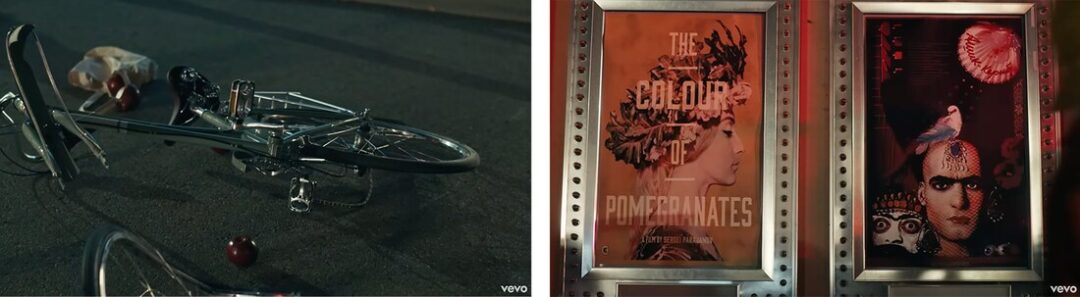
What inspires me the most about this video is I just want to pause the video, take a screenshot of that moment, and hang it on my wall as a poster for almost every scene. The composition and the framing is so good that it is hard to ignore the mastery of the team behind this work, first and foremost Sergei Parajanov, who made the movie The Color of Pomegranates in 1969, and Tarsem Singh who we know from his movies The Fall (2006) and The Cell (2000).
Daft Punk – “Around the World” by Michel Gondry (1997)
Those of us who can remember the 90s, know the effect of MTV had on the children and on the youth. Being a late 80s-early 90s child myself, whenever “Around the World” came out, I would be glued to the screen and try to memorize all the choreography that spooky characters in quirky outfits were displaying.
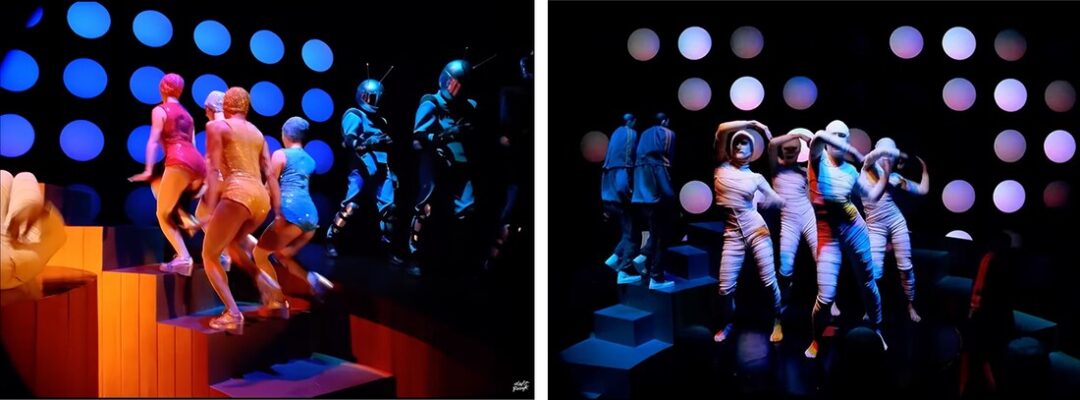
The single was released in 1997, which came out of their album, Homework. The first of the two examples in this article for the impressive music video direction of Michel Gondry, this video is one of a kind in the sense that it is visually replicating all the instruments in the song itself.
Each group embodies the different looping samples in the song. Here I would like to quote the Wikipedia article on the video: “According to Gondry’s notes, the robots represent the singing voice; the physicality and small-minded rapidity of the athletes symbolizes the ascending/descending bass guitar; the femininity of the disco girls represents the high-pitched keyboard; the skeletons dance to the guitar line; and the mummies represent the drum machine.”
This video can easily serve as a lecture in combining different forms of art. Not only the pairing of the music and the visuals, but also the color usage and composition at each step is like a masterpiece for photography.
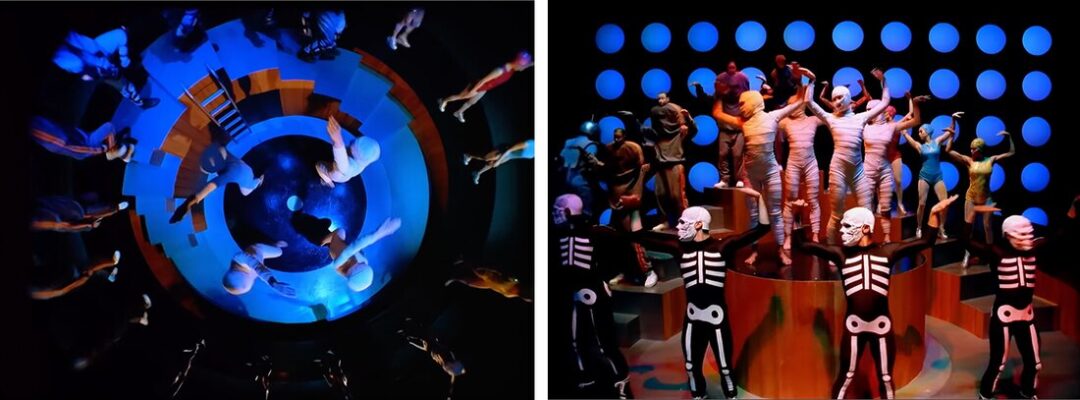
From the beginning of the video where we are introduced to the characters, until the end where we see them all dancing to the music, the choreography by Blanca Li captures the spirit and the uneasy nature of the song.
It is also worth mentioning that Michel Gondry is a renowned director who is known for Eternal Sunshine of the Spotless Mind (2004), The Science of Sleep (2006), and Be Kind Rewind (2008). I am not a photographer or a movie maker, but I’m definitely taking some notes on the composition and the color usage whenever I watch this music video!
Daphne Guinness – “Evening in Space” by David LaChapelle (2014)
Striking colors, great costume design, campy attitude: This music video has it all! Being only one of David LaChapelle and Daphe Guinness’s multiple partnerships in art, this video wasn’t shot on a green screen. Instead, the team built everything in David LaChapelle’s studio from scratch.
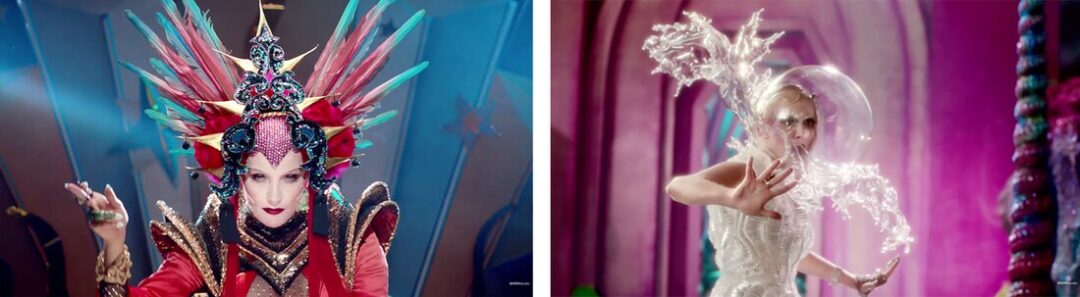
From the bright spaceship models and the lively interiors to the glorious costumes, this analog-made video is bursting with colors, fashion and creativity. I don’t know where to look; the make ups that are full of surprises, the craftful head pieces, or the always changing beautiful scenery and the costumes that scream “fashion”?
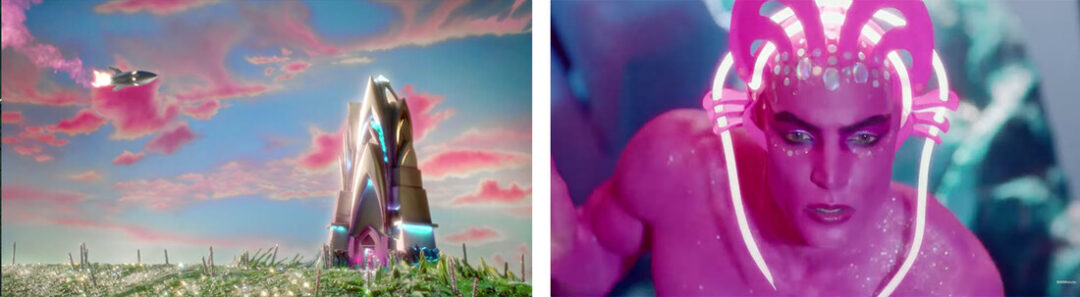
Not only that but also the very obvious bright color choices, the scenario of the video, the hand painted backgrounds and seeing the ropes on the tiny spaceship are all exuding with the campy feeling of vintage movies, which is something that draws me and inspires me to make more art.
If you are curious to learn more, you can also watch this video giving detailed information on behind the scenes of the video, from which technical tools were used to how the set was built.
Ok Go – “I Won’t Let You Down” by Kazuaki Seki and Damian Kulash (2014)
Now let’s talk about one of the coolest bands on the planet – Ok Go. For me, they are always these artsy guys with the mind-blowing music videos that make us ask, “How did they even come up with this?” It was hard to pick up just one video from Ok Go, but I chose one of their gems, the video for “I Won’t Let You Down.” And trust me, it’s a visual feast!
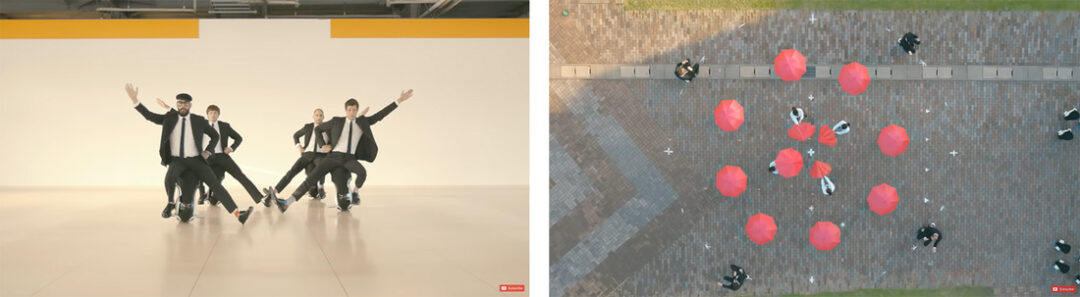
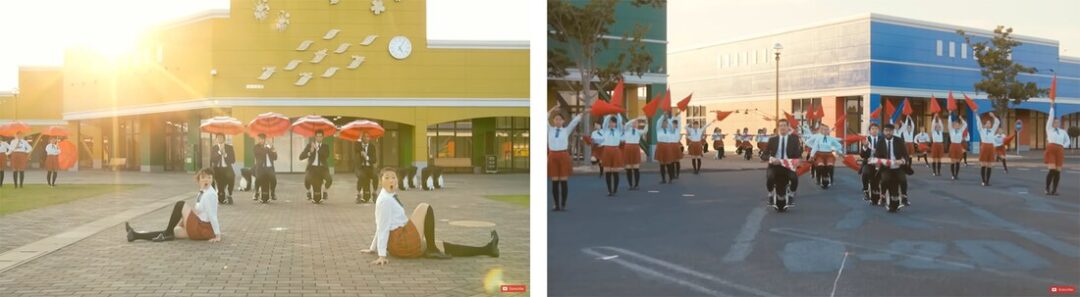
Directed by the genius duo Kazuaki Seki and Damian Kulash, this video is like an art project on steroids. Picture this: an army of umbrella-wielding people on Honda UNI-CUBs creating mesmerizing patterns. It is literally synchronized umbrella dancing on futuristic unicycles. Yeah, you heard that right – futuristic unicycles!
The video starts with the four band members on Honda unicycles, and slowly other choreography members join them. I’m only saying choreography members but it’s a literal army of professional women dancers, who are precise to every beat.
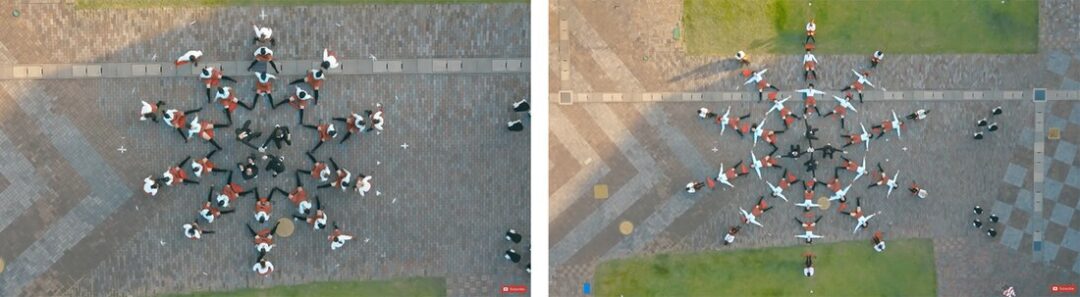
What’s even more mind-boggling is that the whole thing was shot in one take, with drones. No movie magic, no hidden cuts – just pure awesomeness. The precision, the choreography, the sheer courage of pulling off such a stunt – it’s like a visual mic drop.
As the video progresses, they travel around the studio while drones are shooting them.
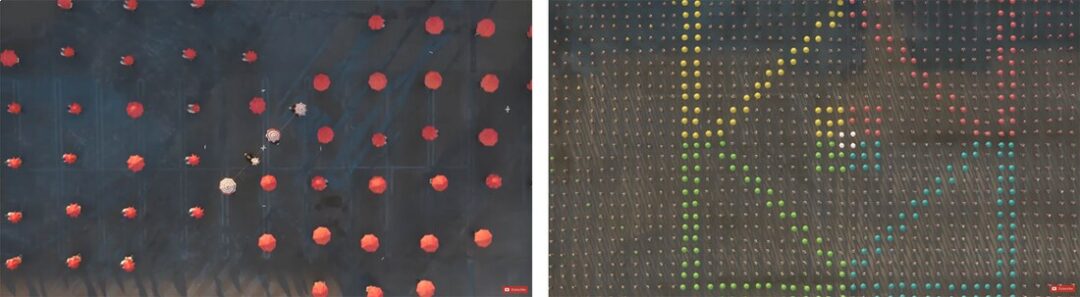
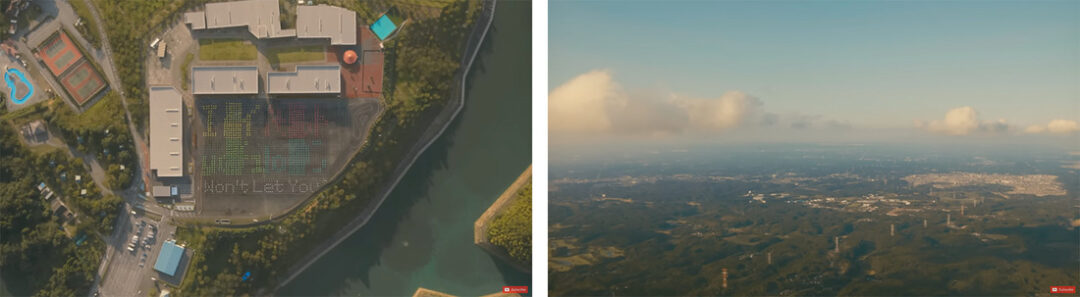
And at the very end, the drones keep flying away, the audience can see how big the studios were, and the umbrella choreography makes a sliding text, just like those signs you find in front of many stores. Then the drones fly and fly, until we are left with the stunning views of Japan.
Ok Go’s very own Damian and Tim talk about the behind the scenes of the music video here on this Interview and they give some insights as to how this piece of art came to life. Damian Kulash, also one of the directors of the video, says that he met Kazuaki Seki two years prior to this video in France. And since the day they met, they had been looking for a reason to work together. When this idea came to their minds, Honda was involved too, and the magic happened in Japan and it took a month for them to shoot it.
Another thing that makes this video so visually incredible is the choreography. Damian mentions that the choreography was inspired by the legendary Busby Berkeley, who was an American film director and musical choreographer. They learned that Berkeley shot everything with a slowed down pace at first, and then sped the video up to have a crispy feeling to the motions. That’s when they decided to use the same technique and it helped them give us this video that my mind just can’t grasp.
And the song itself? A banger, of course. Ok Go doesn’t just serve us jaw dropping visuals; they throw in killer tunes for good measure. So, if you haven’t experienced the magic of “I Won’t Let You Down,” go do it now. Trust me; you won’t be let down.
Elton John, Dua Lipa – “Cold Heart” (PNAU Remix) by Raman Djafari (2021)
The topic of art direction in music videos wouldn’t be complete if I didn’t mention any animated videos. One of the most recent examples from my favorites, directed by the talented Raman Djafari, is the video for the collaboration between Elton John and Dua Lipa for “Cold Heart”. Through fantastical elements and the magical storytelling of a night of dancing, the video creates a visually stunning and nostalgic experience, blending the retro essence of Elton John’s iconic past with Dua Lipa’s contemporary style.

The video is mainly made of 3D animation with a claymation look, which is one of the main elements in this work that creates the nostalgia feeling. The filters and the background are in a perfect harmony with the disco beats that the song has. Moreover, throughout the video, there are many 2D animation sequences as well. And after some point, we start seeing the 2D and 3D elements in combination. It is mind blowing!

The transitions and combinations between 3D and 2D elements are executed with precision, contributing to the video’s overall fluidity. With his distinct style, Raman Djafari captures the magic of Elton John’s illustrious career when showing us about a night of partying to the disco music until the early morning lights. The animations are just mas-ter-ful *chef’s kiss*.
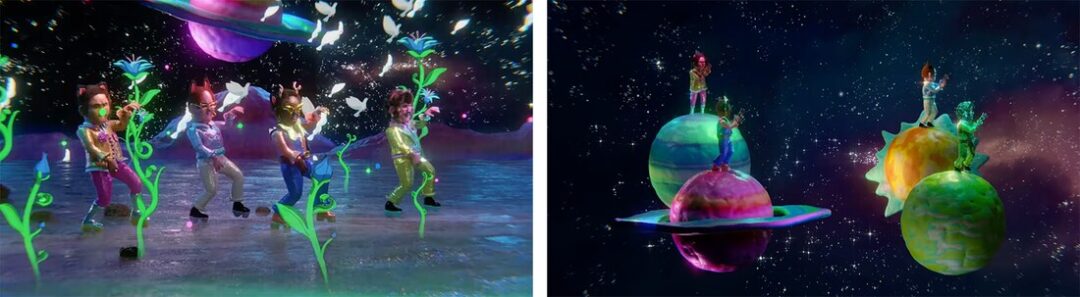
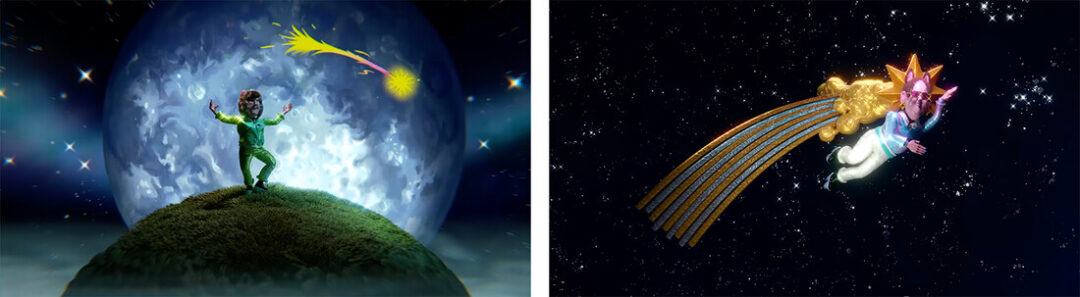
Since the 1960s, the disco scene has been influential on the party culture all around the world. Styled with the elements from the same scene, the video tells a familiar story to those who like partying; a story of getting lost in the beats and the charm of the dance floor, and becoming one with the song and the other dancers around. Starting with the four characters’ dance moves, the video carries us through their night, and into the morning, who are then joined by Elton John and Dua Lipa themselves.
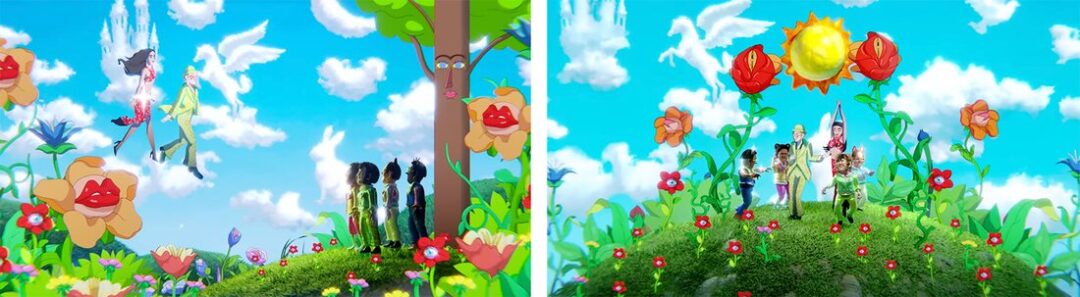
I can’t help but stay in awe watching this masterpiece of animation, which serves as a celebration of timeless music and the intergenerational appeal of both artists. I just want to wear my flared pants and platform shoes, and go to the nearest club to dance with my friends all night like these characters do. Who knows, maybe Elton John and Dua Lipa will join us too!
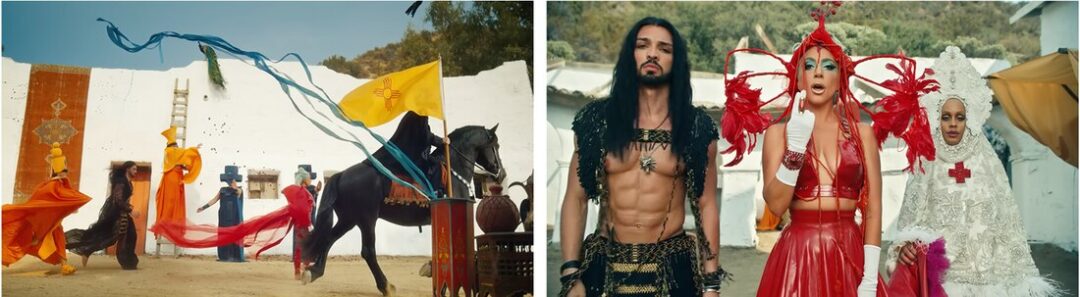
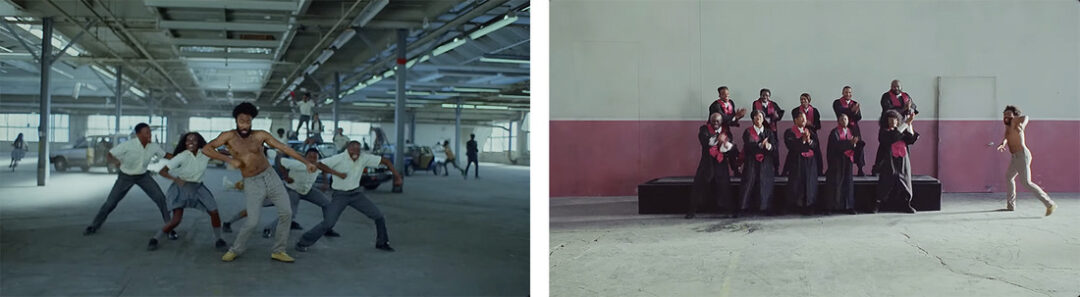
Childish Gambino (Donald Glover) – “This is America” by Hiro Murai (2018)
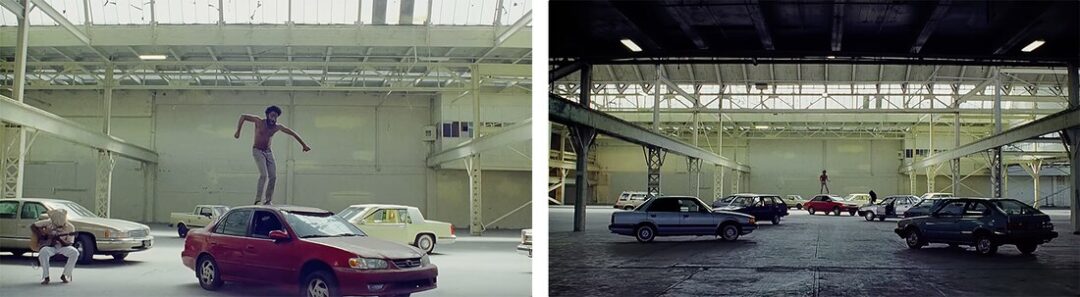
Now let’s talk about a video that’s not full of colors or polished costumes. This work of art is simple yet striking with its incredible choreography, masterful direction and great storytelling full of symbolism. Childish Gambino’s “This Is America” is a cultural narrative that takes our attention and draws us to reflect on the social problems in the USA. Directed by Hiro Murai, the video is another visual masterpiece on this list, bringing cultural commentary and artistic brilliance together.
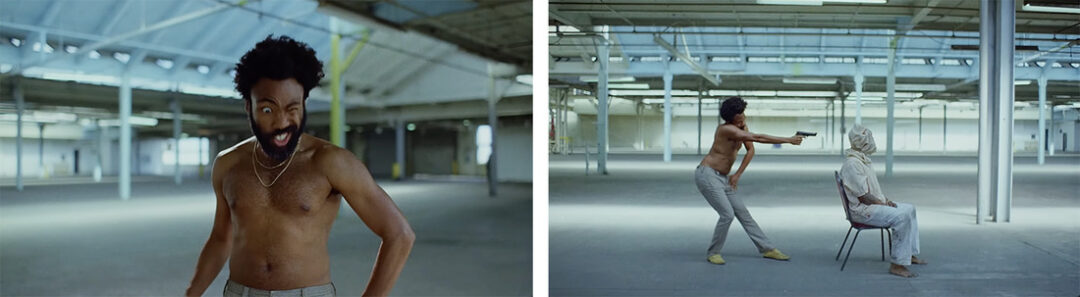
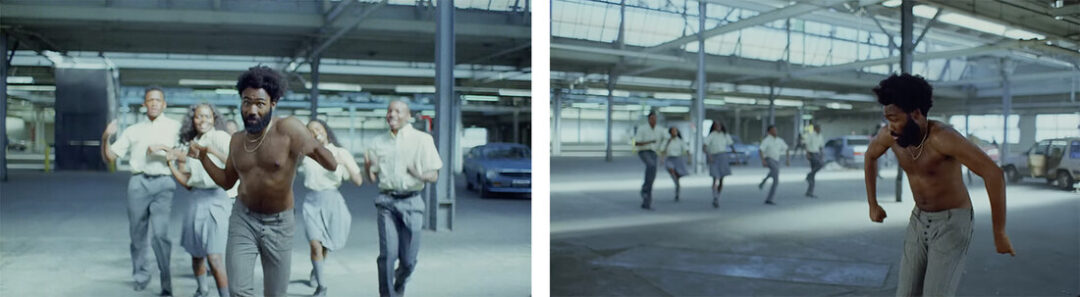
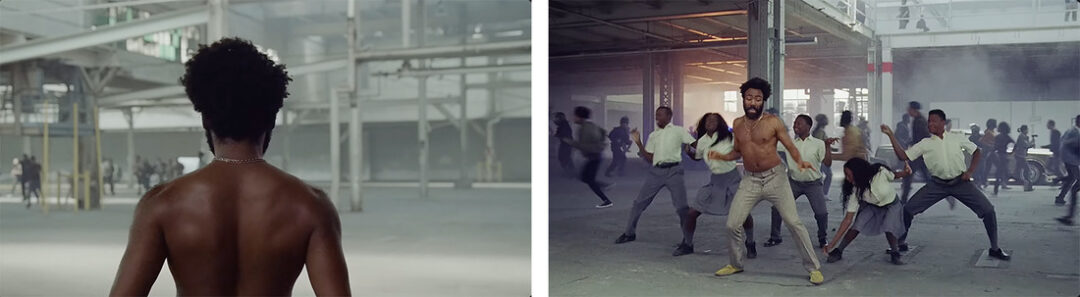
The symbolic art direction in “This Is America ” is striking. The strategic placement of lively dance sequences right before and after scenes of violence, and chaos that’s happening at the background while Childish Gambino is dancing on the front, deliver a powerful commentary on how entertainment can act as a distraction from harsh realities. Symbolism, like the choir and the white horse, adds layers of meaning, inviting viewers to analyze each frame.
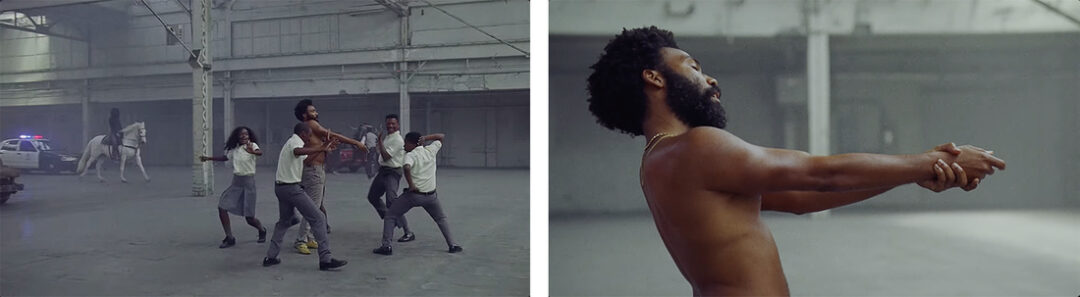
Hiro Murai chooses to show us a raw way of storytelling and a rather pale color palette accompanied by a genius choreography by Sherrie Silver, capturing the chaotic reality of USA’s socio-political landscape. The intentional use of long takes – there are only three shots in the video- helps the experience become more intense, taking the audience out of their comfort zones and calling them to confront the harsh truths depicted throughout the video. Murai’s skillful navigation between chaotic scenes and moments of stillness feels like a wake up call to reality.
Another astonishing point is the acting of Donald Glover, also known as Childish Gambino, himself. He can switch between poses and between facial expressions so fast and so seamlessly. Through his sarcastic lyrics and his powerful acting skills, in “This is America”, Glover addresses gun violence, racism, and the commodification of Black culture. Such serious and crucial issues can only be told in such an intense way, yet the art direction takes the video to another level, making it not only a political commentary but also a work of art.
In this interview, Donald Glover talks about how the song at first came to his mind as a joke, and then together with Hiro Murai they decided to turn it into a more serious one. He says that for inspiration he studied “Thriller” by Michael Jackson a lot, because he really wanted to get the moves right and wanted to make people care.
If you want to learn more about this music video and the details of symbolism in it, I suggest you to watch this video, where Dr. Lori Brooks, who teaches in the African-American Studies department at Fordham University, tells in detail of the political artistry behind it.
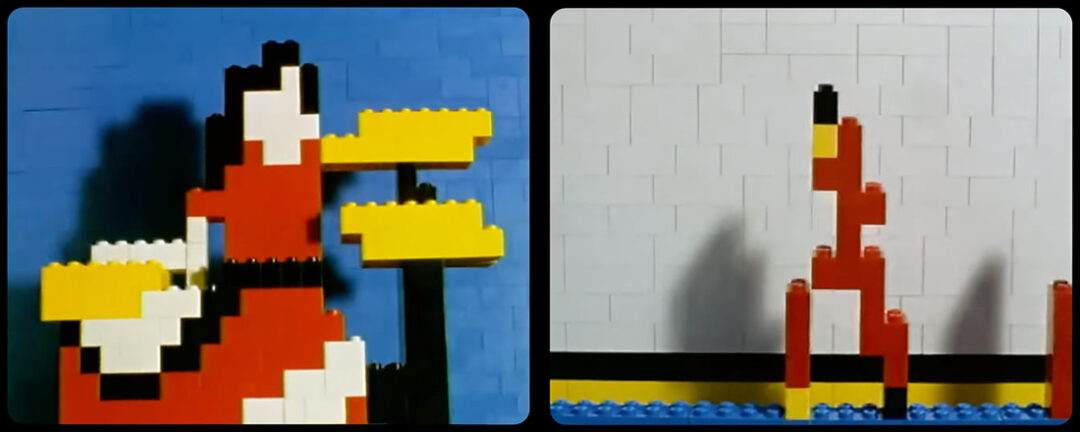
The White Stripes – “Fell In Love With A Girl” by Michel Gondry (2002)
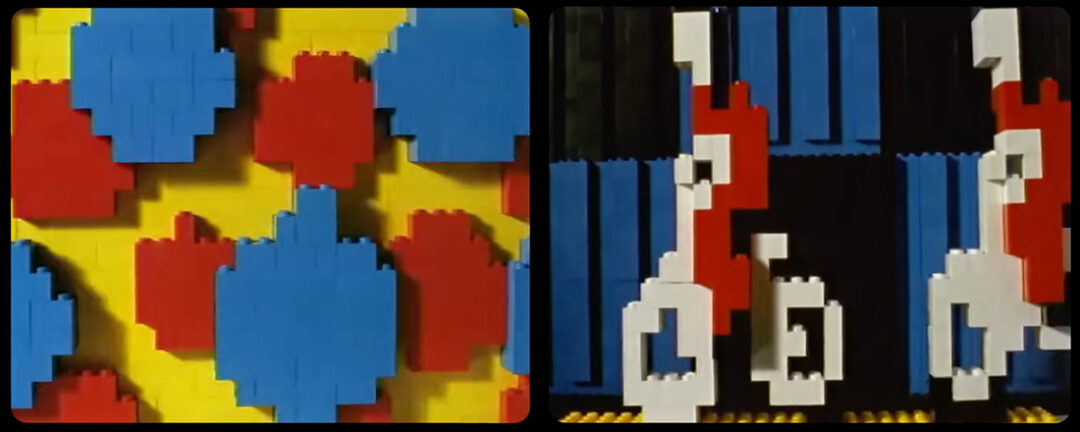
My last pick for the list showcases yet another version of animated mastery. And yes, I’m going to talk about Michel Gondry again, because this video is just too good not to mention. Lucky us, we get to see and fall in love with the beautiful and artistic simplicity of stop motion animation made by – yes you guessed it right – only LEGO bricks!
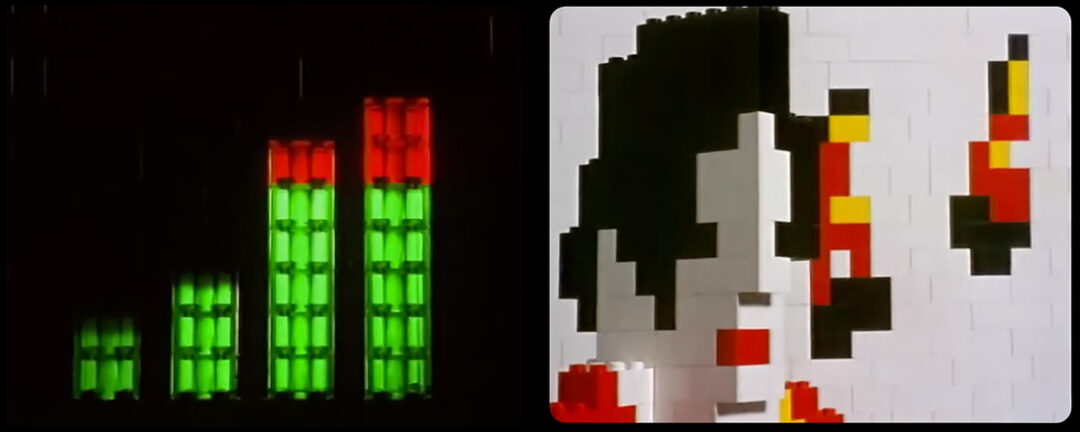
If you were also a child that liked to play with LEGO bricks, or maybe some of you still do, then you know that it’s really easy to make innumerous variations but it’s not always easy to make the details of your builds so understandable when you are using only a few bricks. But Michel Gondry figured out a way to do it. According to this article, Gondry first shot everything as live action, and then digitized the frames and turned them into pixels, printed them, and built every frame by LEGO bricks again. Isn’t that insane? But that’s what art is!

You can also see the two members of the White Stripes, Jack White and Meg White, and Michel Gondry himself talk about the behind the scenes of the video here. What is so interesting is, in this short interview we learn that Meg’s idea was actually to make a video of themselves which were made of Oreo cookies. Now I’m intrigued to see it, to be honest.
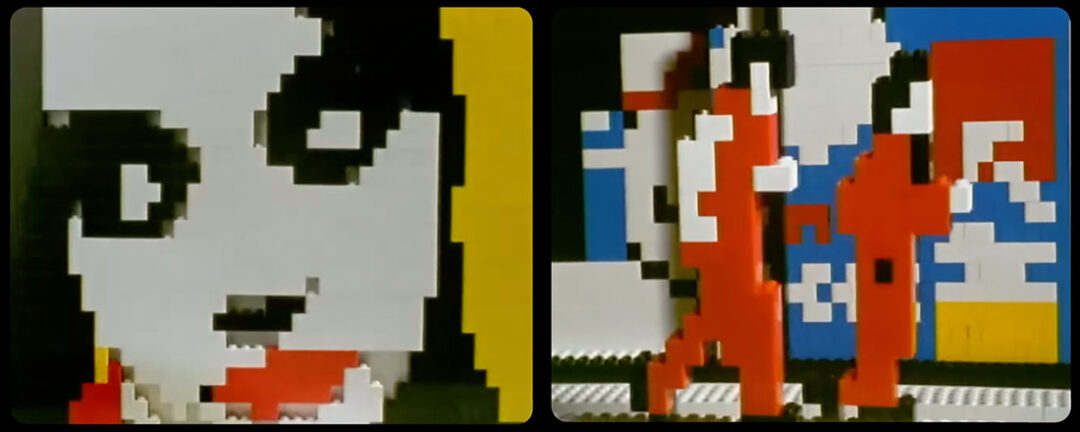
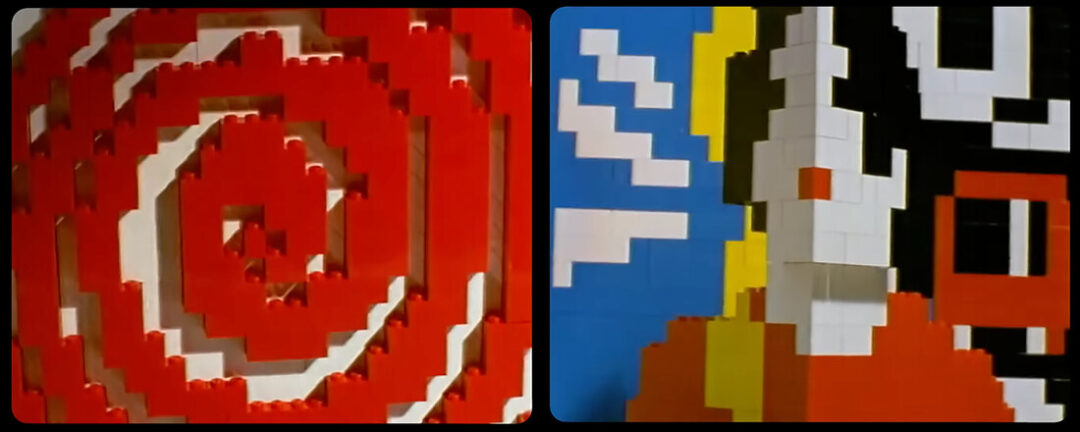
Simple colors and simple pixels are enough to make a historical storytelling of falling in love with a girl, when creativity is present. And considering that it took 2 months of hard work to complete this video, all the rewards they won don’t come as a surprise.
These have been my picks for the great art direction in music videos. Different directors have different approaches in making videos, and it’s always so fun to try to understand the details and the artistic approach behind a work.
What do you think, what are your favorite art direction examples in music videos? If there is anything you would like to add, send us a message on our socials and maybe there will be a Part 2 of this article 🙂
Do you also enjoy editing videos or photos? Wacom creative tablets are here for you. Don’t forget to check out our products here and choose the best one for you, and start creating!
About the author:
Zeynep Alpay is a freelance multidisciplinary artist and illustrator based in Köln, Germany. Their work encompasses illustrations, animations, paper cut-outs, and traditional artwork.
For more information or to see more of Zeynep’s works, check out their portfolio, their Instagram, or their Linkedin.
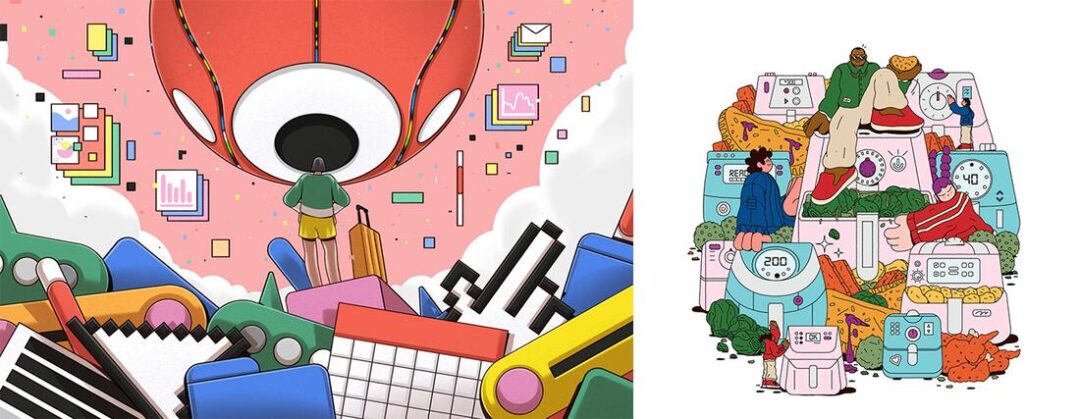
In this article, I will present some illustration trends from 2024 that I found for you. These are some specialties that I observe are present in many artists’ work, which add a certain quality to the images that are created by them. I should also mention that these are very subjective, and some illustrations that I use as an example in this article have multiple of these points at the same time.
It is important to mention in the beginning that, in 2024 we saw more maximalism and diverse character design in illustration than in previous years. In both commercial use and personal works, these two elements were the two leaders of the trends to watch out for. So when you’re reading this article, remember that many of these examples also carry traces from these two design elements.
Without further ado, I’d like to introduce you to the first trend of my selections:
Symmetrical Composition
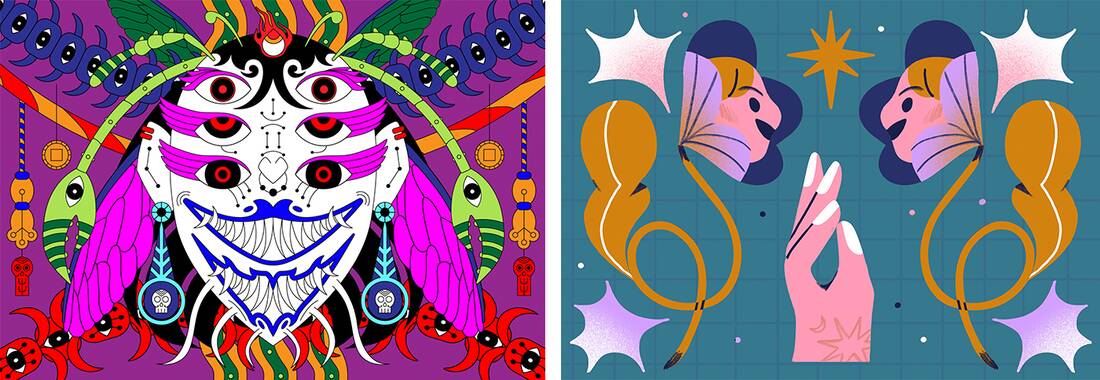
Who doesn’t like good symmetry? While adding a geometrical language to your designs, symmetry can also be used to create more maximalist images.
Using bold and muted colors together, and creating colorful palettes, symmetrical composition will add a good quality to your artwork.
You made a good design but it looks a bit empty? Try multiplying it and using its symmetrical twin in the same frame. You can also multiply it and rotate the copies and reverse the colors for a richness.
Don’t forget to add little geometric shapes or floral/quirky decorations around, and voila! You have an illustration with a full and neat composition to look at.
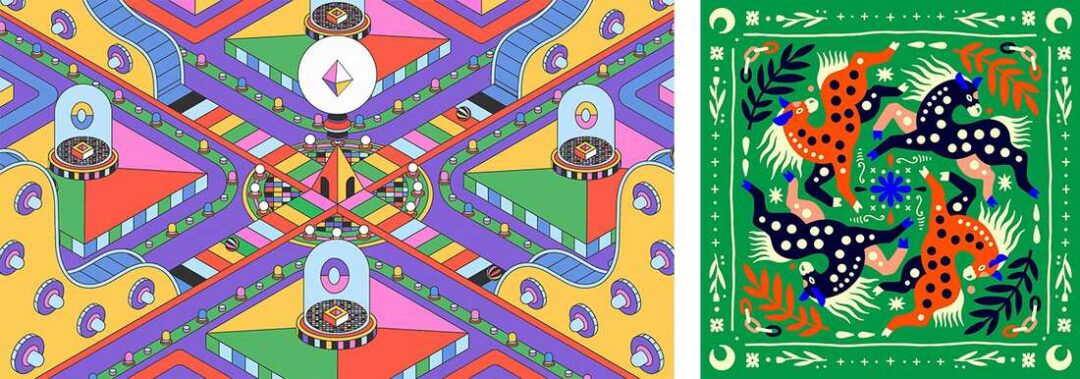
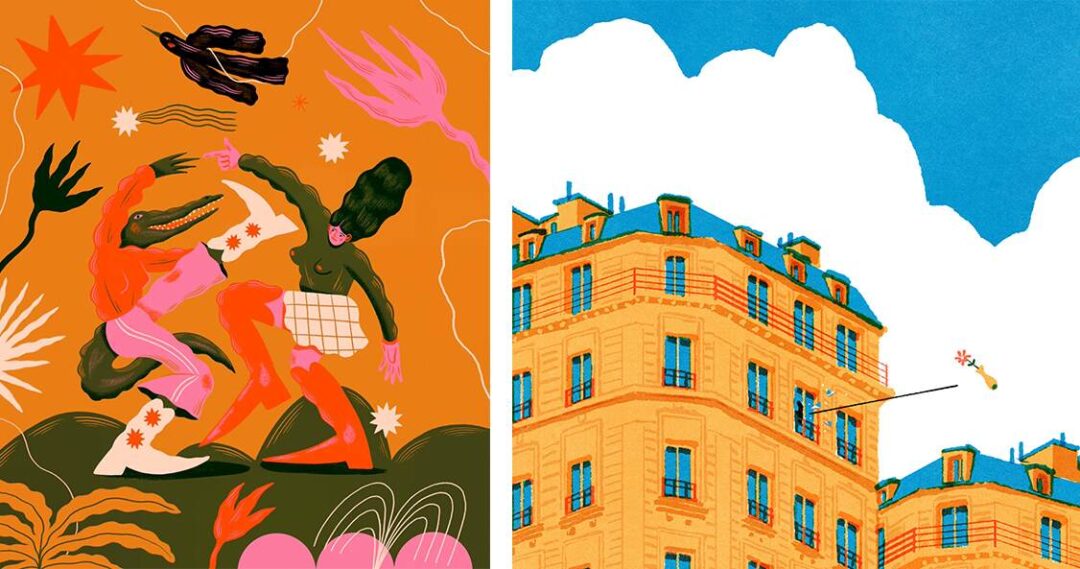
Abstract Perspective
Perspective is not always so easy to nail while staying in your own style. But once you get the hang of it, It is always fun to extend the boundaries of your imagination and play with realistically impossible possibilities.
You probably have also noticed that, in recent years, a distorted perspectival game changer was introduced to the illustration scene with the use of really large feet and legs. Ok, maybe it wasn’t really introduced in the recent years, but it has surely been really popular among many illustrators. Suddenly our Instagram feeds were filled with proportionately larger human body parts, and I don’t know about you but I lived for it!
In 2024, things were changing even more.
If you’re looking to try something new in your artwork, think about distorting not only the size and perspective of the body parts, but also of the objects and decorative elements that you are using in your illustrations. An object which seems to be far away can be larger than the object in the front, and vice versa. Try drawing floating objects, or eliminating perspective all together. What can you create when you delete the rules of reality? Or maybe the right question should be; what can’t you?
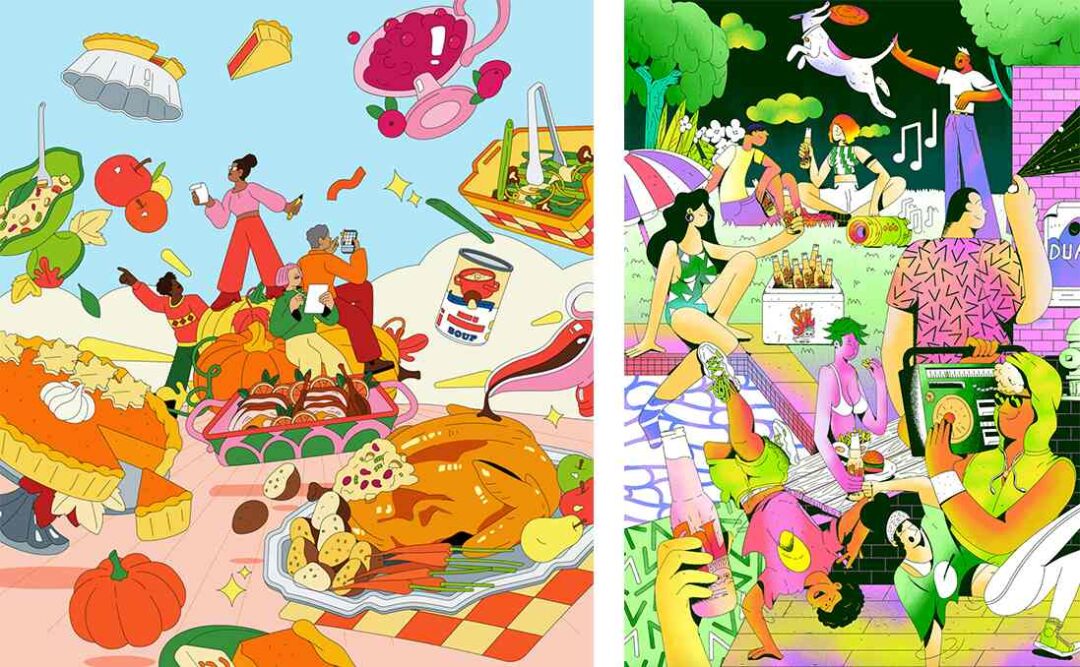
Limited Palette (vibrant and muted colors together)

The colors we use when drawing an illustration is usually what makes or breaks it. Yes, I already mentioned maximalism, which basically means “more is more,” but sometimes it’s possible to say “less is more” color-wise, and still maintain a maximalist look. In my opinion, this creates an elevated look on illustrations and makes them really nice to look at.
As you can see in these examples, you can challenge yourself by limiting your palette up to 5 or 6 colors (preferably even less than that) and try painting your illustration that way. Use colors that you wouldn’t normally think of using for skins or other objects, and try to avoid using the same color for elements that are next to each other. Why not have green, blue or purple skins and a yellow sky? Just get creative and see where it takes your artwork!
3D / 3D Looking Elements
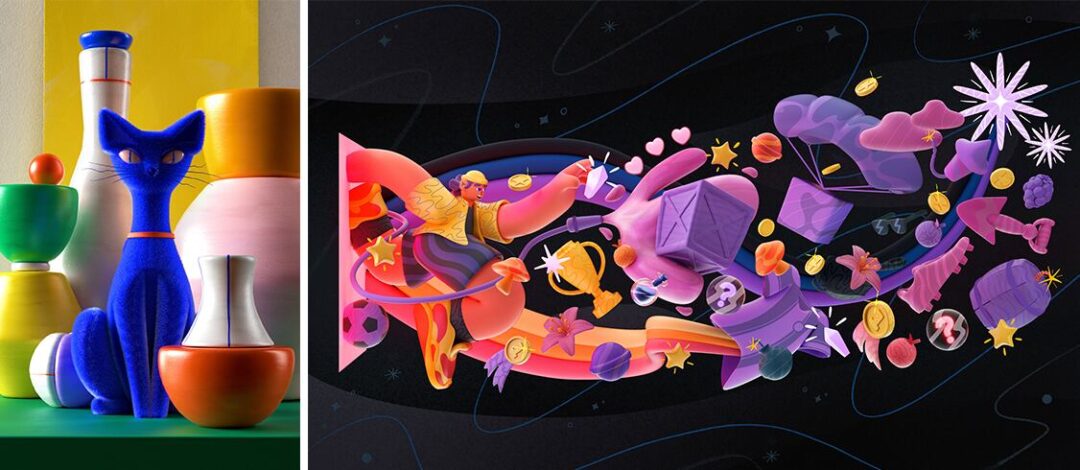
3D illustrations have definitely been on the rise as of lately. As the softwares and technical tools are getting more accessible and user friendly, more and more illustrators are creating their own 3D designs with their already existing style.
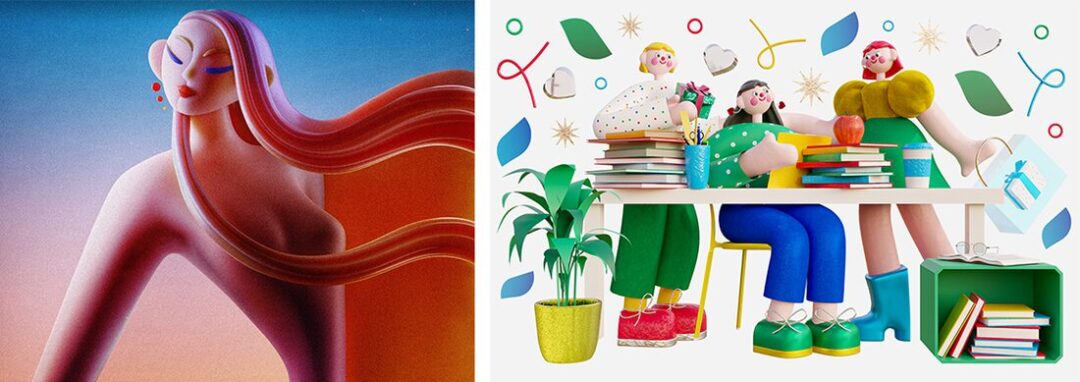
3D design has been a dominant theme in personal portfolios of many digital artists but we also see it in music videos, corporate identities or commercial usage of other kinds. It is not only pleasant to look at, but also it is fun to create something of your own that exists in a virtual space!
Moreover, with the rise of online lectures that you can find on many platforms such as SkillShare, it is now easier to learn 3D design.
But there is a second way to use 3D elements as part of your design. You can just use your painting and shading skills to create 3D-looking elements in your drawings.
In 2024, we will be seeing more of these examples, as the trend is gaining acceleration. These examples I’m showing here are not all in the same style of aesthetics if you ask me, but from the point of 3D usage, they can be considered in similar categories.
If you want to turn some elements in your illustrations into 3D-look, I would suggest using airbrush type brushes and practicing your light and shading skills for it. You got this!
Texture
If you’re an illustrator, you know that small changes make big differences! Especially when it comes to adding fun details on our illustrations such as textures.
Textured brushes give illustrations a more hand-painted/traditional artwork look, and on digital drawing it can be a game changer even when you make very subtle touches.
If you want to get good at using textures, you can try by using a textured liner brush for your outlines. Then you can maybe add just some slight textures on your backgrounds or on some parts of your characters’ clothes.
Remember that you wouldn’t want to make the textures overpower the whole illustration, so try playing with the transparency and the modes of your texture layer. But in the end, if you want to make your drawings all about textures, why not? It is your artwork, you can do whatever you want!
Negative Space

When I was a small child and drawing just for fun, I used to have this pressure of “not leaving any empty space” in my drawings, because that’s what the art teachers in school used to say. That always had a mood-killer effect on me, and I didn’t enjoy filling out a paper just because I had to.
Now that I draw as a way to make a living, I’m understanding that the use of negative space also has a value in art. The trick is knowing how to use it and understanding the balance and proportions of your composition.
As you can see in these images, even though they have different styles, they are still examples of good use of negative space. In 2024, you may want to master your skills of negative space usage, because it is getting widely common in commercial use.
You can not only design posters or editorial pieces this way, but you can also turn your drawings into stickers. Moreover, the more you master this skill, the more you can learn to combine it with maximalism and find balance in your illustrations.
According to the Oxford Dictionary, a trend is “a general direction in which something is developing or changing.” So these trends I’ve talked about in this article are not rules set in stone, but just some opportunities to elevate your artwork, if you’re looking for some inspiration.
And if you are now feeling inspired and looking for some digital tools to create more artwork, why not check out Wacom’s pen tablets and pen displays that make life easier for illustrators? Wacom offers many options with the best pen technology, so the only thing left for you is to practice and start creating.
Hopefully 2025 will be another great year for illustration!
About the author:
Zeynep Alpay is a freelance multidisciplinary artist and illustrator based in Köln, Germany. Their work encompasses illustrations, animations, paper cut-outs, and traditional artwork.
For more information or to see more of Zeynep’s works, check out their portfolio, their Instagram, or their Linkedin.
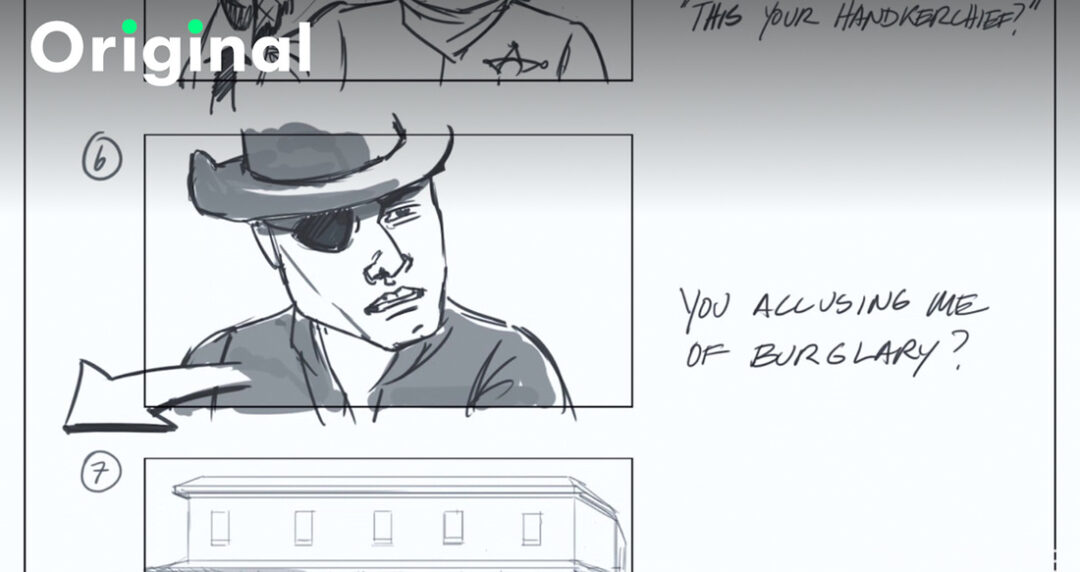
Prepare your notebooks! You’re starting to learn one of the most important skills in the world of filmmaking and animation.
Storyboarding for Film or Animation by Siobhan Twomey
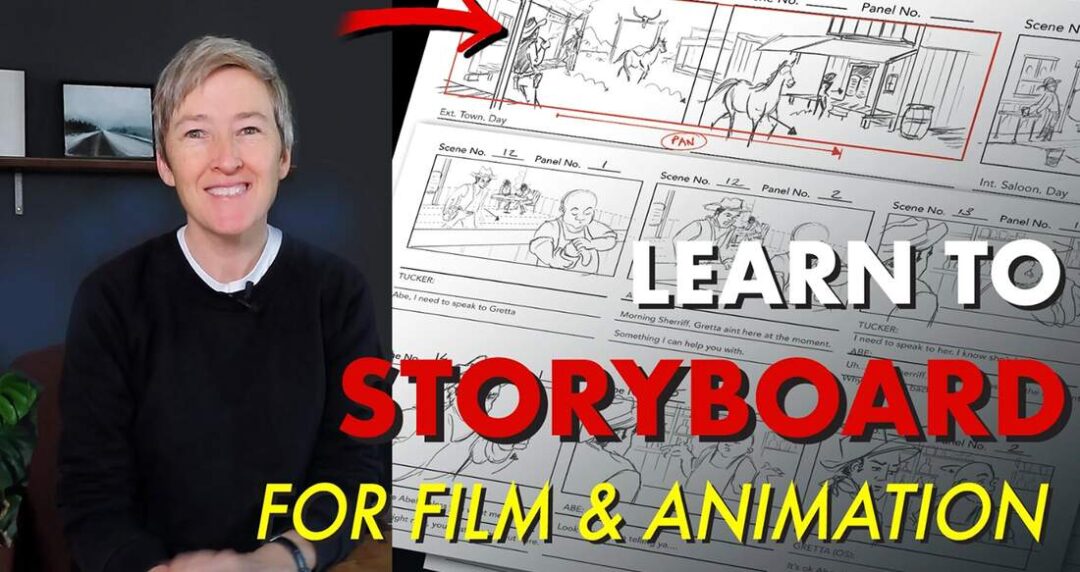
Siobhan Twomey’s course on storyboarding for film, TV, or animation is a comprehensive guide for the artists who want to master the skill of storyboarding. With over 15 years of experience in animation, Twomey is your guide to learn storytelling through drawings. Throughout the course, you’ll dive into fun topics like drawing characters, playing with perspective, and crafting awesome camera shots. Whether you’re dreaming of creating your own animated series or designing epic comic book adventures, this course has got you covered.
But of course, there is more. The class project is your chance to unleash your imagination and bring your ideas to life. Grab the script provided and let your creativity run wild as you sketch out thumbnails and craft your very own storyboard. With Twomey’s encouragement, you’ll add your own special touch, including cool camera moves and helpful notes. By the end, you’ll have a fantastic storyboard ready to amaze the world with your storytelling skills.
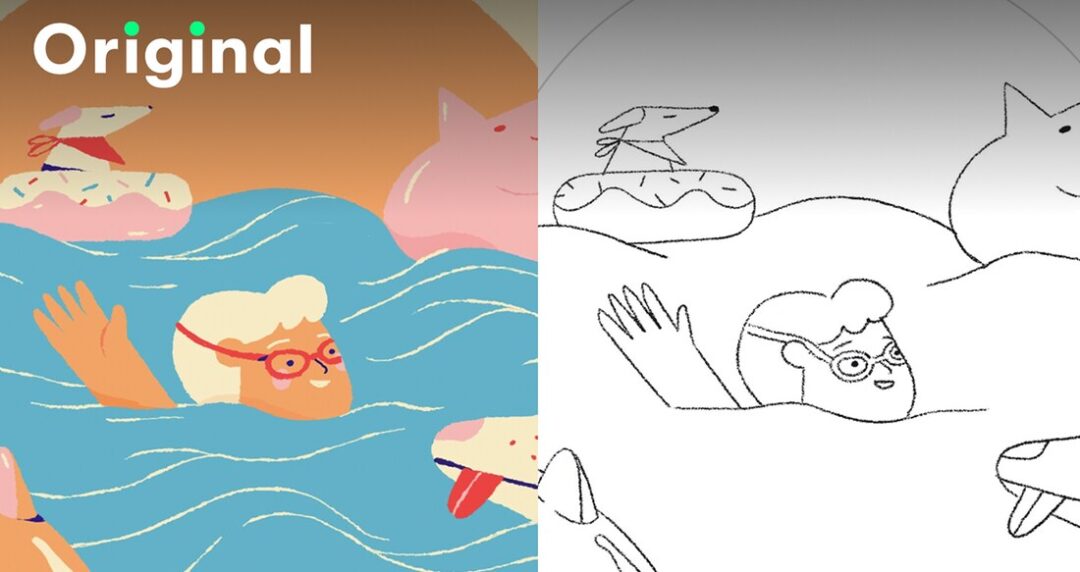
Creating Storyboard Animations in Photoshop by Michelle Tran

Are you excited to dive into the world of animation and storytelling? Then this course is just what you need! With a simple story idea, Photoshop, and a tablet, you’ll be on your way to creating your very first storyboard animation. Perfect for beginners and seasoned artists alike, this class focuses on storytelling rather than technical skills. You’ll learn everything from setting up your Photoshop document to adding sound effects and music, all while expressing your unique vision.
Plus, with a practice project to get you started and plenty of support along the way, you’ll feel confident and inspired to unleash your creativity. Join a welcoming community of fellow storytellers and share your progress in the Class Project Gallery – like Tran says, “we’re all in this together!”
Storyboarding for Filmmakers and Content Creators: For Non-Drawers by Carl Marchant
You are a filmmaker or a content creator, you don’t draw, but are looking to streamline your pre-production process and bring your film or video project to life? Look no further than Carl Marchant’s engaging course on storyboarding. Whether you’re a seasoned filmmaker or just starting out, this course will help you to learn the powerful tool of storyboarding for visualizing your vision and sharing it with your crew, cast, or clients.
Through this course, Carl demystifies the art of storyboarding and shares valuable insights gained from his own experiences in the film industry. From famous directors like Martin Scorsese to Carl himself, storyboarding has been a key component in bringing cinematic visions to reality. With Carl’s friendly and approachable teaching style, even those with limited drawing abilities can unlock the full potential of storyboarding and elevate their film and video production process.
Through practical project instructions, you’ll go on a journey of creativity and exploration, creating your own storyboard sequence tailored to your script or film project. From applying composition and staging to dynamic shot creation and camera movement, you’ll learn to harness the power of storytelling through drawing.
Storyboarding for Animation: How to Illustrate and Design for Successful Motion by Sarah Beth Morgan
If storyboarding for animation is what you’re looking for, you should check out Sarah Beth Morgan’s educational course on Skillshare. You may be an experienced freelancer or you may be a beginner, Sarah Beth’s lessons will elevate your creative briefs to the next level. Through her tried-and-true process, you’ll learn to develop beautiful mood boards, transform brainstormed ideas into great looking style frames, and choose the perfect colors to bring your animations to life. With each lesson building upon the last, you’ll go from concept to clear storyboard in no time, gaining essential skills for success in the world of creative planning.
No matter where you are in your freelance journey, Sarah Beth’s course offers valuable insights and practical demonstrations to help you maintain a competitive edge. From sharing inspiration and sketches to crafting complete briefs, you’ll have the opportunity to showcase your work and connect with a supportive community of fellow creatives.
Storyboarding For Motion Graphics: An Introduction to Main Titles by Maggie Tsao
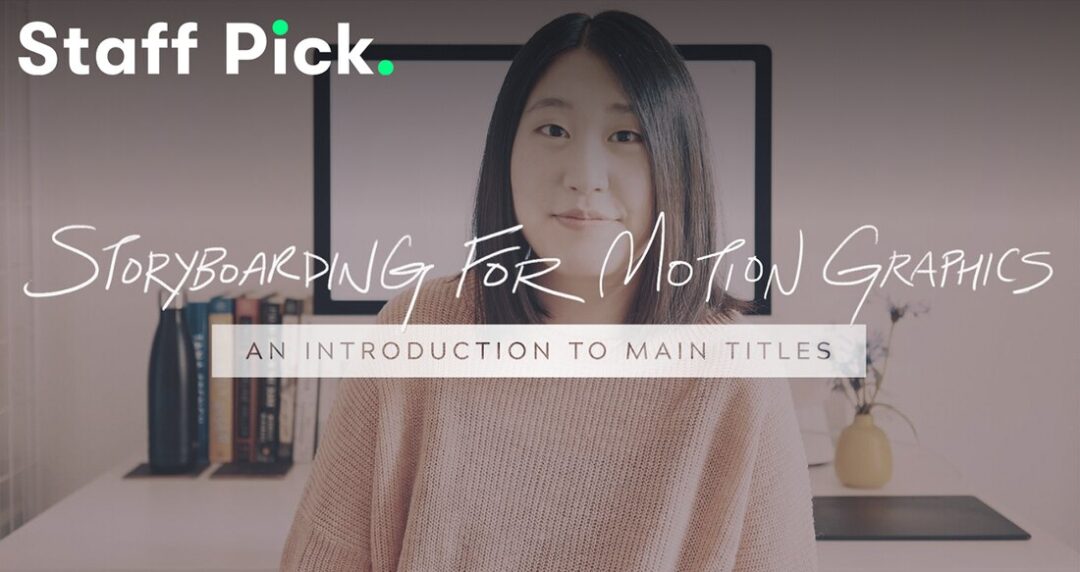
I really wanted to include this course on this list, because it is a bit different than movie making or animation. With Maggie Tsao’s insightful course, you will learn storyboarding for motion graphics.
As an art director and designer, Maggie brings a wealth of expertise to the table, offering a comprehensive introduction to animation foundation through design principles. This class is for everyone, beginner or experienced alike. With a focus on conveying style and tone through photography and typography, Maggie guides students through the process of building a strong storyboard using Adobe Photoshop CC. While basic knowledge of Photoshop is required, Maggie provides clear instructions and resources to help learners navigate the software effectively.
Designed for aspiring motion graphics enthusiasts, this class offers a hands-on opportunity to design a main title for the acclaimed film “Gone Girl.” Drawing inspiration from the movie poster, students will transform design concepts into captivating title sequences, honing their skills in visual storytelling along the way. With class resources readily available for download, including final PSDs and project instructions, students have everything they need to embark on an exciting journey of motion graphics exploration.
Storyboarding for Film: Illustrating Scripts and Stories by Ryan Falkner
Ryan Falkner’s course is perfect for artists, writers, filmmakers, and creative storytellers of any skill level, and this one-hour class offers valuable insights into the art of visual storytelling. Ryan covers essential concepts of cinematography and camera angles, demonstrating how storyboards and scripts play a crucial role in filmmaking. With a focus on thinking like a storyboard artist and “seeing like a camera,” students will learn to illustrate a short script from start to finish, gaining key insider tips along the way. With a treasure of downloadable additional resources, including warm-up exercises, annotated scripts, storyboarding templates, and helpful reference charts, this class provides a comprehensive toolkit for anyone who is passionate about storytelling.
For the project assignment, students are invited to storyboard a new ending to their favorite film, offering a creative opportunity to reimagine familiar narratives. Whether changing or keeping the plot intact, students will showcase their understanding of visual storytelling by selecting key scenes, drawing storyboards, and reflecting on their artistic choices. With practical guidance and inspiring exercises, Ryan empowers students to use their creativity and develop essential skills for success in the world of storyboarding.
Learn to Storyboard: The First Steps of Visual Storytelling by Leo Matsuda

In this introductory class, Leo Matsuda shares valuable insights and practical tips for anyone who is eager to explore the world of storyboarding. With a focus on understanding the fundamentals of storytelling and structuring your ideas, Leo guides students through the process of developing a compelling storyboard from start to finish. Drawing from his extensive experience in the industry, Leo’s approachable teaching style and relatable anecdotes make learning both enjoyable and informative. He makes sure that this class is open to anyone of any skill level.
Through engaging project instructions, learners are welcome to storyboard a favorite story from their own lives, offering a personal and unique twist to their narratives. From setting up tools and brainstorming story ideas to executing final passes of the storyboard, Leo provides step-by-step guidance to ensure success. With practical exercises and insightful reflections, students will gain valuable skills in visual storytelling and leave the class equipped to tackle their own storytelling projects with confidence.
As you can see through the list of these courses, you can be at any skill level and start sketching your ideas and set off your journey of becoming a storyboard artist any time. If you want a change of career, or just starting on your freelancer life, at least one of these courses can offer you a lot.
While we’re on the topic, have you checked our pen displays and pen tablets? Our products are exactly what you need when it comes to storyboarding. Check out what we have in for you and choose the best tablet that would suit your needs!
About the author:
Zeynep Alpay is a freelance multidisciplinary artist and illustrator based in Köln, Germany. Their work encompasses illustrations, animations, paper cut-outs, and traditional artwork.
For more information or to see more of Zeynep’s works, check out their portfolio, their Instagram, or their Linkedin.
Not all poster designs include illustrations, either; there can also be many examples that present fusion of different techniques, such as photography, using handmade details, or typography. However in this article, I will be focusing only on digitally illustrated poster designs, since it is one of the most commonly used techniques.
Without further ado, I will start presenting you with some examples and then discuss what makes them worth so inspiring and worth spending some time considering.
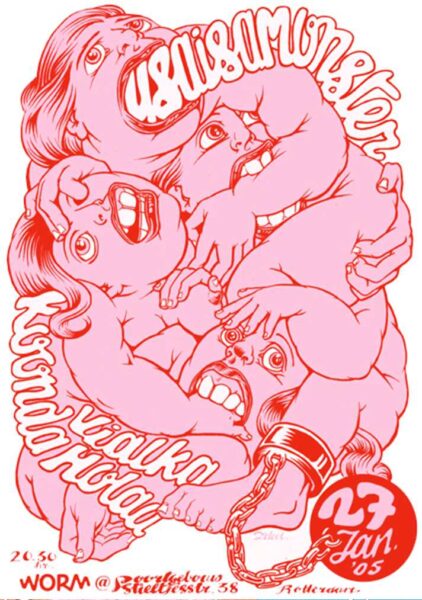
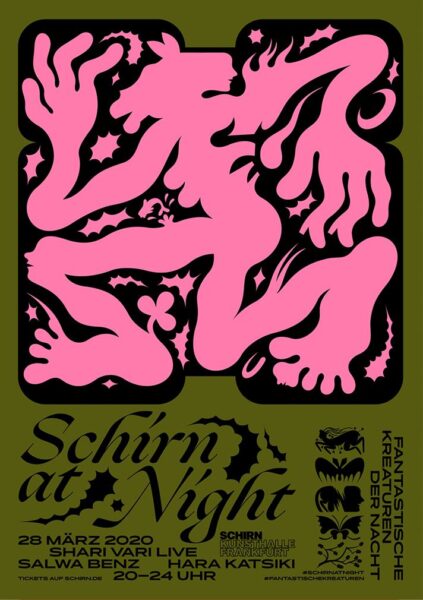
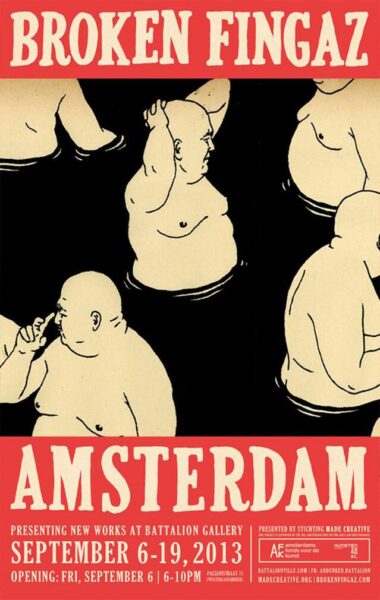
I can’t help but think: “How can a design from 2005 still be so relevant?” This piece is definitely a classic, and the artist made sure to design it in a way that could speak to generations to come.
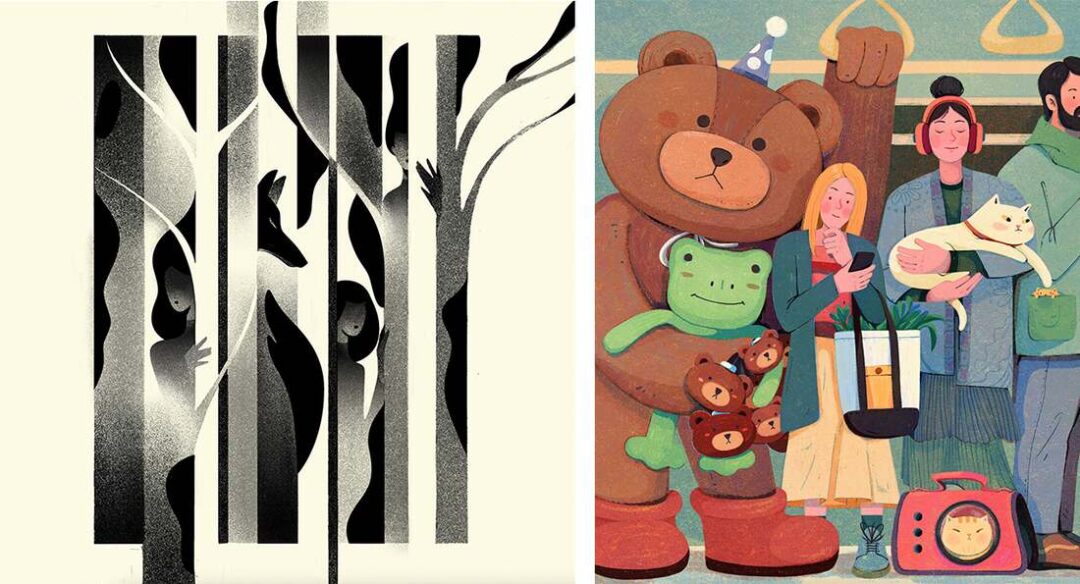
The best thing that makes this poster stand out to me is how Zeloot used all of the space and drew the characters that look like they are squeezed tightly in the frame of the poster, but still managed to leave some negative space and used a bright color combination so that it’s eye-pleasing. The comedic characters help with the light-hearted feeling of the poster, and the combination of fun and grunge helps with the cool vibe that this poster has.
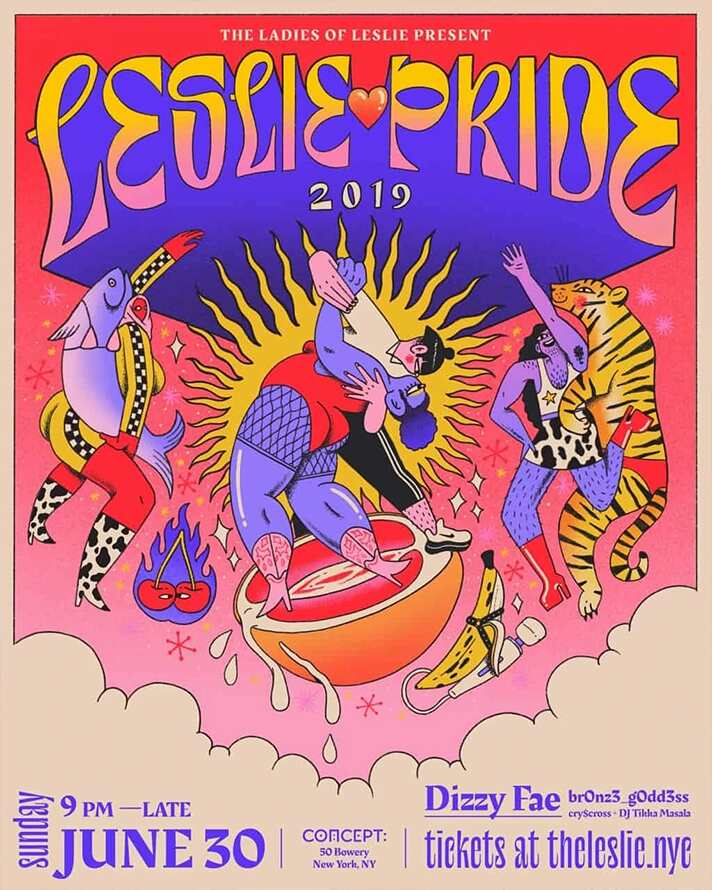
These examples are great to show how sometimes crowded designs can make good posters. When the poster is being designed for a party or for an event, it is good to show some motion, and many characters and details with popping colors and abstract compositions.
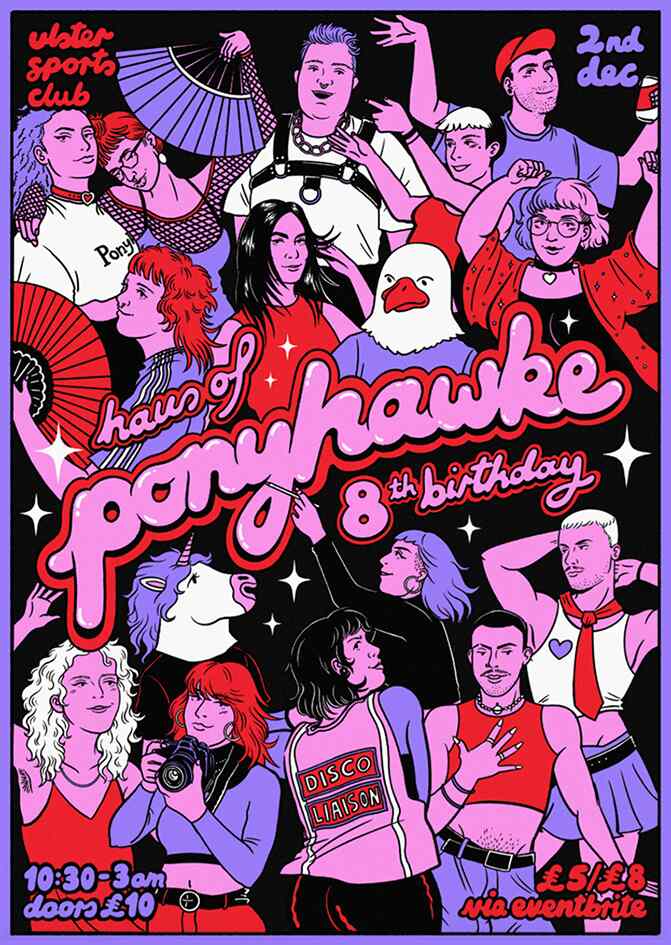
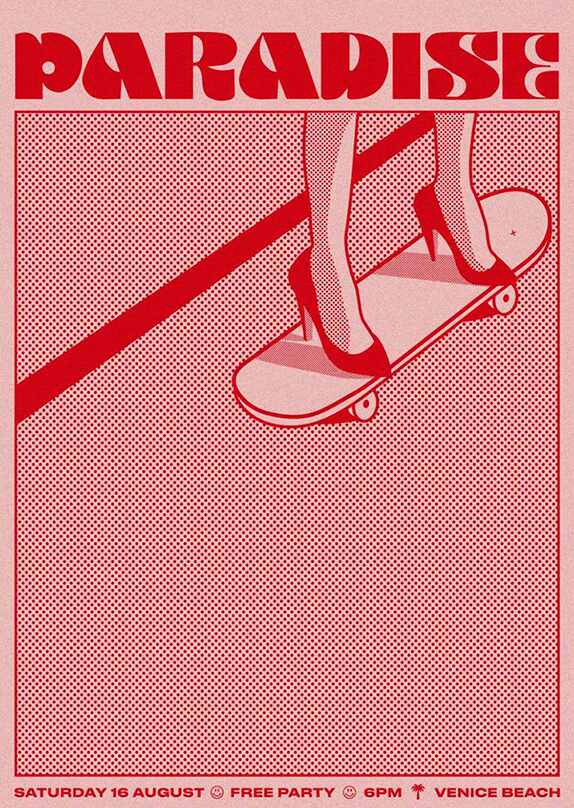
This example shows that even when the illustration is simple, when used with vibrant colors and easy-to-read typography that goes in harmony with the overall feeling, the design can be striking.
When designing a poster for an event, the most important thing is to make the image eye-catching. Imagine where you see event posters — usually on the streets in a place the city allows ads to be put up. And there are often just so many of them, one next to each other. If you want your event to be seen among all the others, good color combination and attention grabbing design should be your way to go.
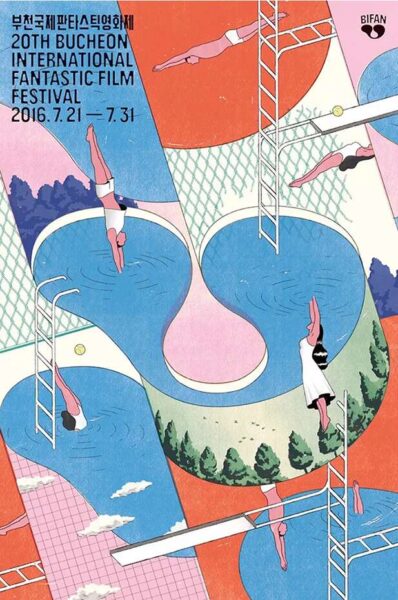
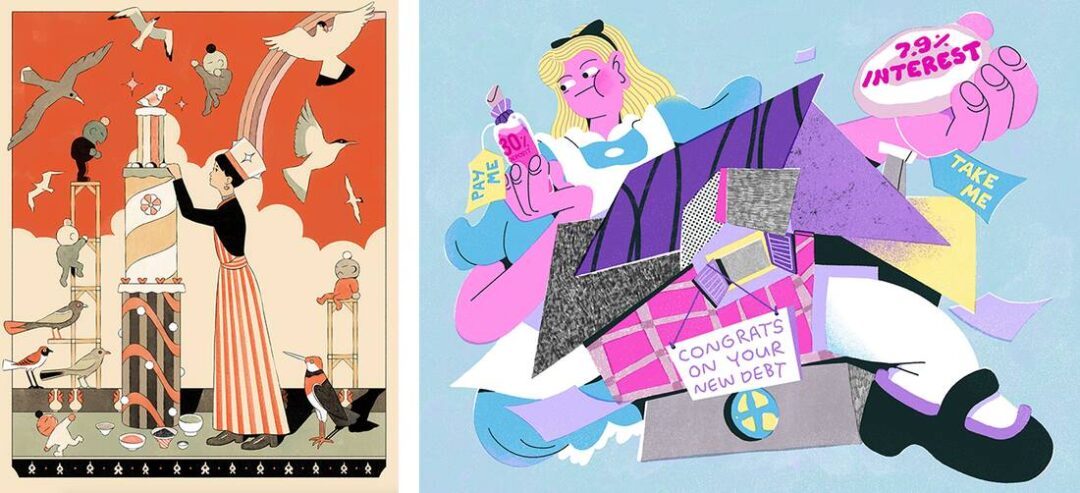
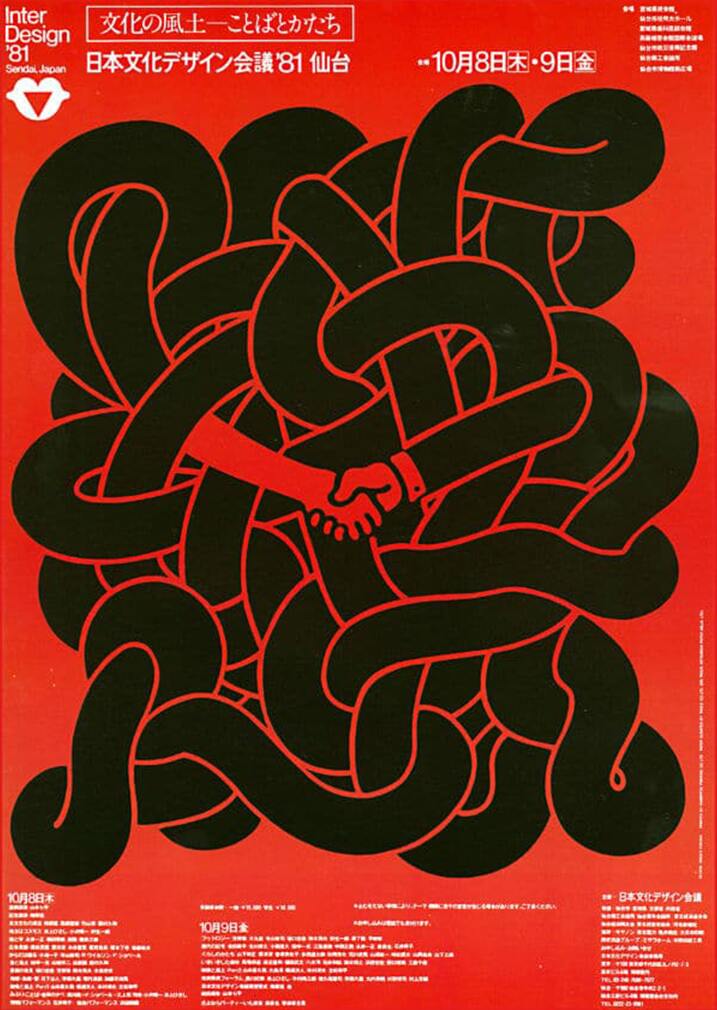
This poster also does its job successfully in the sense that it shows us sometimes you don’t need popping colors to be attention-grabbing, but a balance. With the abstract composition and details that the viewer will definitely try to understand, it is inevitable that people will want to look at this design longer than others and will try to figure out what it is about.
It is a design for a film festival, so we would want this poster to stay in the minds of the audience a bit longer than, say, a poster for a party on a weekend. The confusing but fun story telling in this image would probably help the viewers remember what it is about and it makes the festival look promising.
In my opinion, another thing that makes this design good is the usage of geometrical and neat lines, and shading details only where they are necessary (on the trees and clouds). Nothing else in the poster is colored that way; the human figures are painted in a plain way. So normally this could create a chaos if not made properly, but in this illustration, the opposite happened because there is a well balanced, yet still striking order.
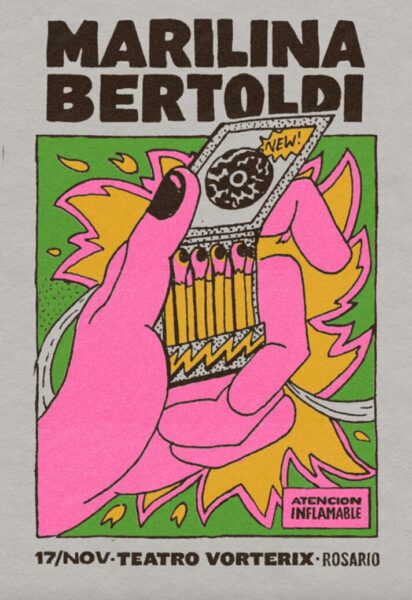
This poster has been on my inspiration lists since the first time I saw it. Benedikt Luft used only three colors, but he did it in such a way that the graphics, the contrast, and the artistry of it all came together in a perfect harmony.
Something else you can do when designing a poster is to use very simple illustrations. If you manage to combine them with good typography, you will have a striking poster design.
All the following examples are designed by using very few and basic colors. With simple illustrations made with a precise technique, these images successfully take their places in this article.
If you also want to master this technique, the notes to take from these designs would be to use typography in a limited space, to keep the image in the focal point and make it simple but unexpected. The other thing is, of course, like I already mentioned a few times before, to use a limited color palette which would still make sense.
Paying attention to contrasts and to keeping the texts as readable as possible would be another note for me to write down. Whether it be with the pattern use or precise drawing skills, simple illustrations make most of the memorable poster designs.

This last example is great to show how combining simple illustrations and crowded compositions can also work wonders. The key to making this kind of a design is to keep the balance with geometrical composition, a vibrant color palette, and enough space for the texts while keeping them easy to read.
To conclude, when designing posters, not only typography or the image, but also the colors and the composition matter a lot. Mastering these skills is not an easy task, but with the risk of sounding a bit nerdy, I will say that “practice makes perfect.”
Making different boards on Pinterest or practicing by trying to use the things you find inspiring in others’ artwork in your own style — I’m only suggesting to do it for practice reasons, I’m not saying copy other people’s artwork. Never do that. NEVER — would probably help you improve your own design style faster.
And speaking of posters, PosterSpy is a great platform if you’re a designer looking to find clients or if you are a business owner with the intention of finding an artist to design posters for you. “The showcase platform for poster artists,” PosterSpy is here for both clients and creatives. Just click here and see the magic with your own eyes. There, not only can you find inspiring work, but also you can work with many artists on a commission basis.
Are you an artist working digitally? You should check out Wacom’s pen displays and pen tablets that will make your work life easier and better.
Are you already working on your own Wacom tablet? Then don’t forget to tag us and use the hashtag #madewithwacom when you post your work on social media, so that we can repost it and our artist community can keep getting inspired from each other.
Looking forward to seeing your creations!
About the author:
Zeynep Alpay is a freelance multidisciplinary artist and illustrator based in Köln, Germany. Their work encompasses illustrations, animations, paper cut-outs, and traditional artwork.
For more information or to see more of Zeynep’s works, check out their portfolio, their Instagram, or their Linkedin.
Clip Studio Paint is one of the most commonly used drawing software, especially among Wacom users. So we wanted to gather the best free or affordable brushes for Clip Studio Paint, so that you can download them and enjoy elevating your manga or anime art.
1: Ink Brush by Aeridis
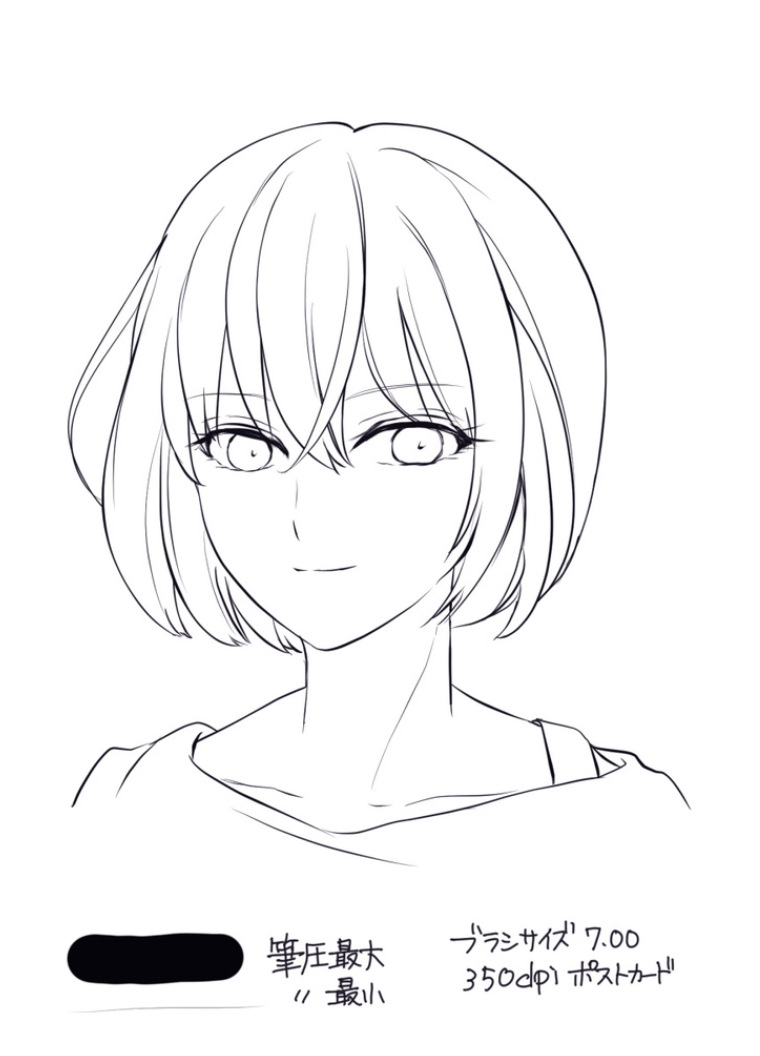
Available for free download through this link, this single brush that is designed by Aeridis offers a practical solution to the inking process. Just select a large brush size on a canvas with good resolution and let the pressure sensitivity do its job for you. Aeridis suggests using a light drawing with this brush, and not focusing on the effort to make the lines perfect. If you’re not happy with how a line turned out, you can always undo it and draw again. Once you get the hang of it, it will let you save a lot of time!
2: Over 100 Brushes in One Set by Brian Allen
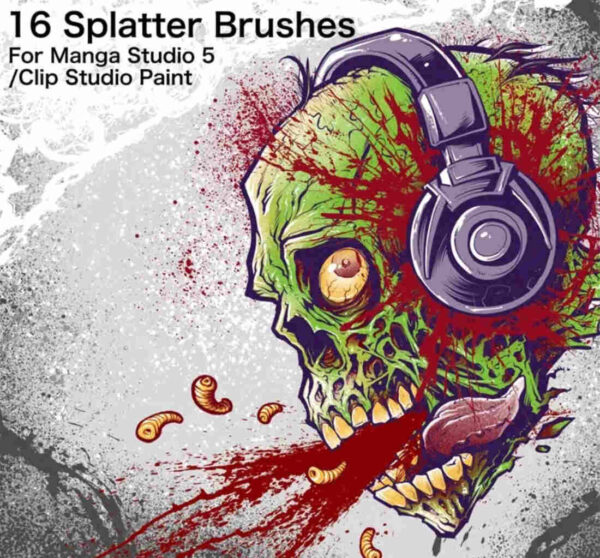
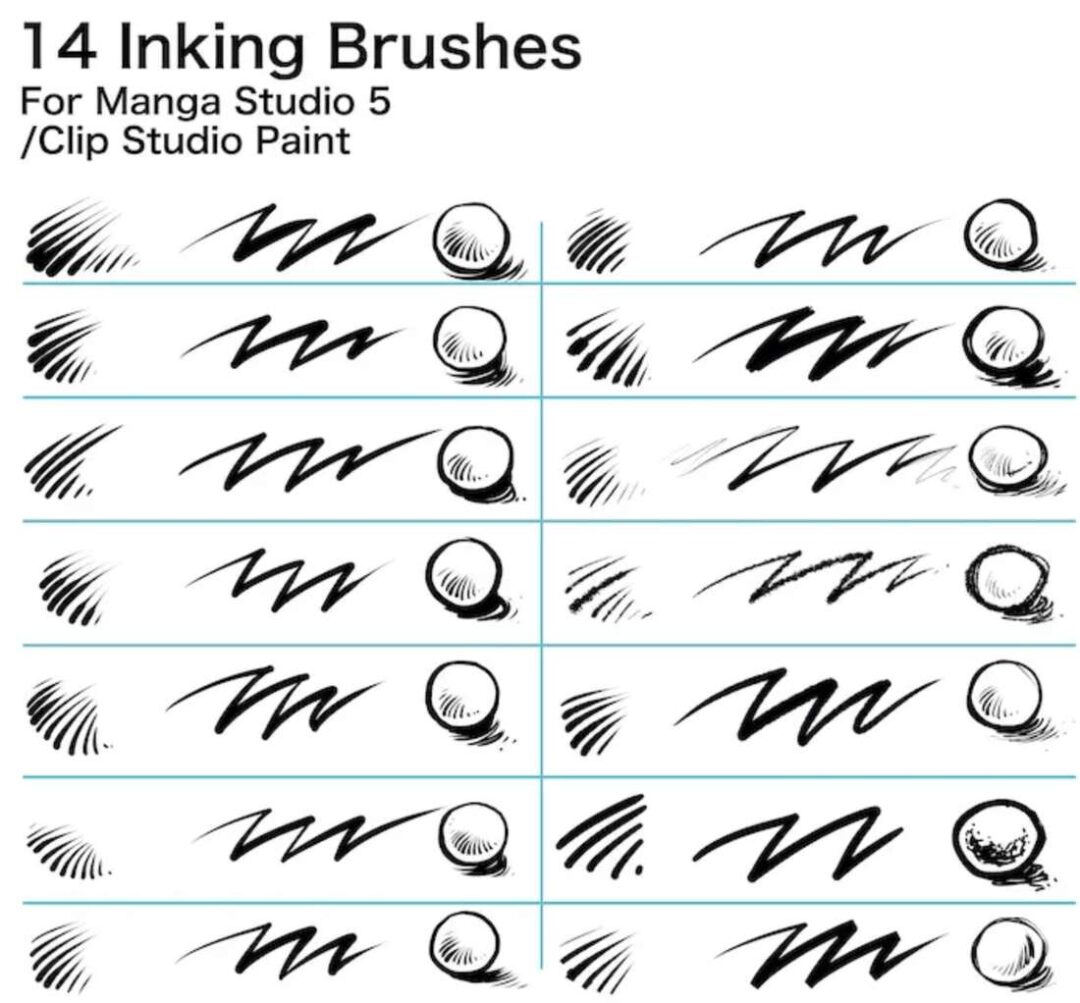
Created by the freelance illustrator Brian Allen, this set is a multi-pack that comes with an affordable price of $3.99. And what is included? 14 inking brushes, 18 paint brushes, 12 pencil brushes, 5 shading brushes, 16 splatter brushes, 20+ special pattern brushes and 22 texture brushes. At this price, I’m not sure if you can find such variety anywhere else! Looks like you won’t need anything else once you have this comprehensive set. From sketching to finalized painting, you can start and finish a whole artwork using only them.
You can purchase these brushes here.
3: Two brushes for Line Work and Painting by Kuon Marino
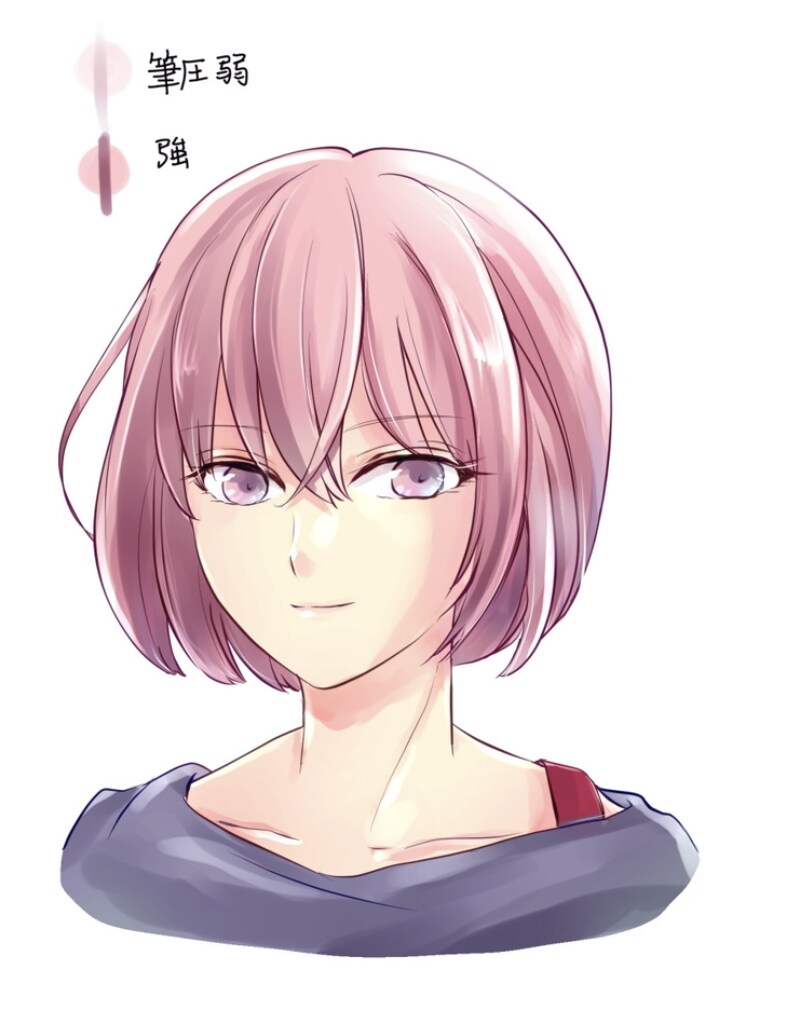
Do you like drawing clean illustrations and painting them with brushes that give the feeling of markers? Artist Kuon Marino has got your back. With two options of an inking and a painting brush, now you can achieve the cleanest looks so easily. I would imagine that, with some experience of using painting markers, you can turn your line art illustrations into smooth-looking Manga paintings.
Free of charge, you can download the linework brush here, and the painting brush here.
4: DAUB SuperBundle by Paolo Limoncelli
If you’re not familiar with the name DAUB, you will be after reading this. When it comes to brush sets for Clip studio Paint, DAUB by Paolo Limoncelli is the number one choice among many artists. In this bundle, you can get over 530 pro tools and 60 textures by only paying €15.99. What is so impressive is that this bundle includes all of Limoncelli’s Clip Studio Paint Brushes and exclusive sets. Considering how many sets you are buying, and how long you will be using them, this price puts you in a big advantage. Not to mention that free updates will follow!
You can purchase this extensive set here, and don’t forget to check out the other brush sets and bundles here.
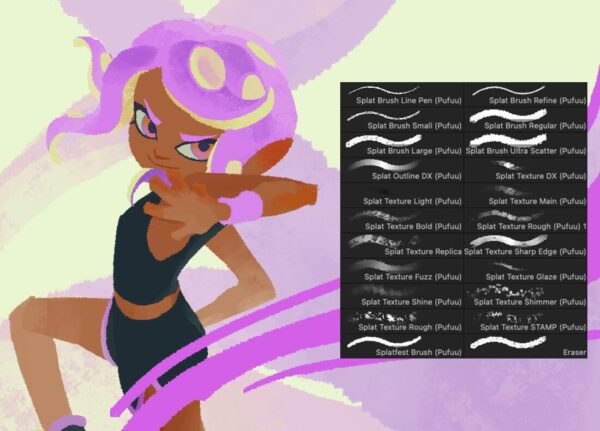
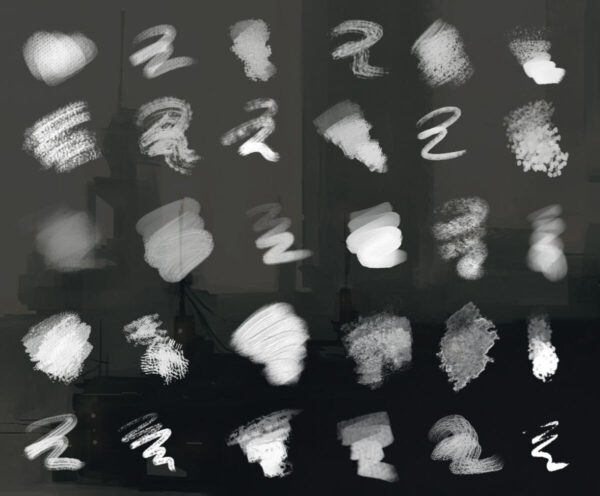
5: Splatoon Style Brush Set by Pufuu
If you like painting your drawings with markers, this set is for you. Inspired by the artistic style of the game Splatoon, these brushes are created by Pufuu, and are then transformed into CSP compatible versions by Hychlorions. The drawing is by Hychlorions to demonstrate how these brushes work. As you can see from the drawing, this set is perfect for painting, after the inking process. Thanks to their texture, you can achieve a marker painting effect with this set.
You can see the tweet that Hychlorions posted about them here, while being able to download them for free here.
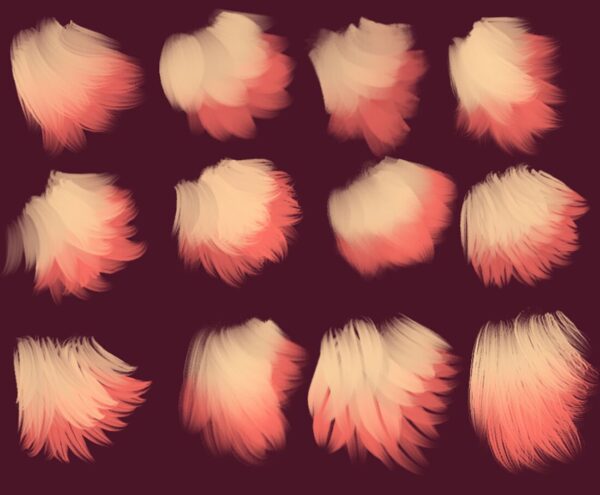
6: Painterly Fur Pack by Hannah Miller (Shrineheart)
When you’re painting realistic hair or fur with a traditional technique, you have to paint each hair with precision, one by one. But digital painting comes with its perks in moments like this. With this brush set, you will be able to paint realistic hair or fur easily, and so fast!
With over 5000 brushes she created so far exclusive for Clip Studio Paint, Hannah Miller has got the experience of a lifetime in designing custom brushes. You can get this set of 27 brushes for $4.2 here and you’ll never have to worry about painting realistic hair or fur again.
You can check out Miller’s other brush sets on this link.
What do you think of using a different range of brushes? Clip Studio Paint already offers a lot, but it’s always nice to add more tools to your collection and improve your style while saving some time. If you want to discover more brushes for Clip Studio Paint, I strongly suggest you check out this article on Concept Art Empire for more Clip Studio Paint brushes.
Are you just starting to draw manga or anime art? Check out Wacom’s pen tablets and pen displays which will take your creativity to the next level.
Do you already have a Wacom tablet? Why don’t you share your creations on social media using the hashtag #madewithwacom so that we can repost your artwork?
About the author:
Zeynep Alpay is a freelance multidisciplinary artist and illustrator based in Köln, Germany. Their work encompasses illustrations, animations, paper cut-outs, and traditional artwork.
For more information or to see more of Zeynep’s works, check out their portfolio, their Instagram, or their Linkedin.
Sneakers, boots, stilettos, flip-flops… There are so many shoe models that we can draw for each character we design. But how do we choose the right one? In this 2-part article series, I am guiding you through some examples while discussing why it’s important to have a fashion sense in character design. Here is the second part!
In Part 1, I talked about different types of sneakers after explaining why it is important to pick the correct shoe models for your character drawings and giving a summary of all the models we can choose from.
Today in the second part of the series, I will be talking about high heels and flats, and what visual indications they carry. Let’s start!
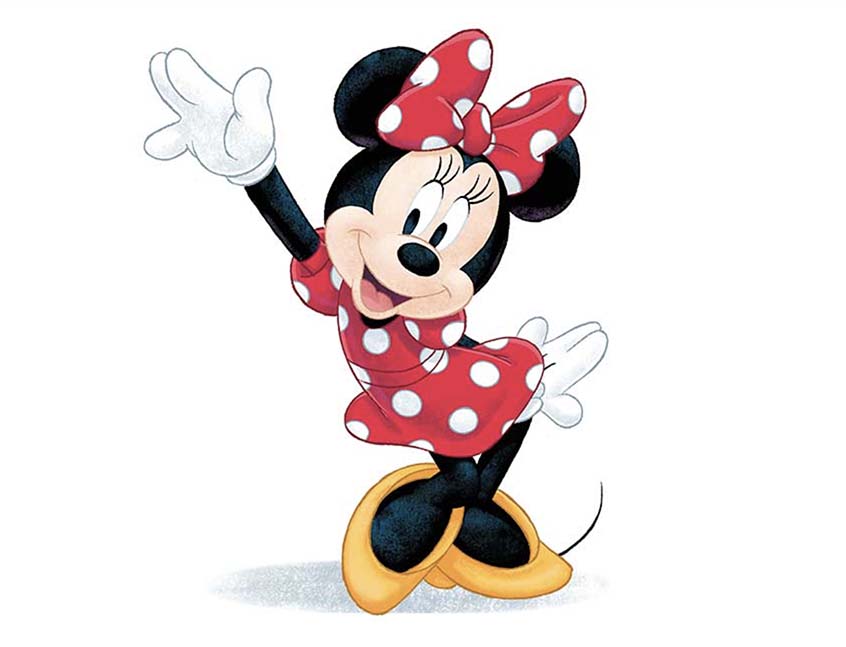
High heels
High heels are very important to show certain attributes of a character. They are mostly quickly tied to the gender of the character or how sexual a character is, but also, they also give hints of the environment the character is in.
Let’s take two imaginary businesswomen. They may wear stilettos under these outfits in the office:
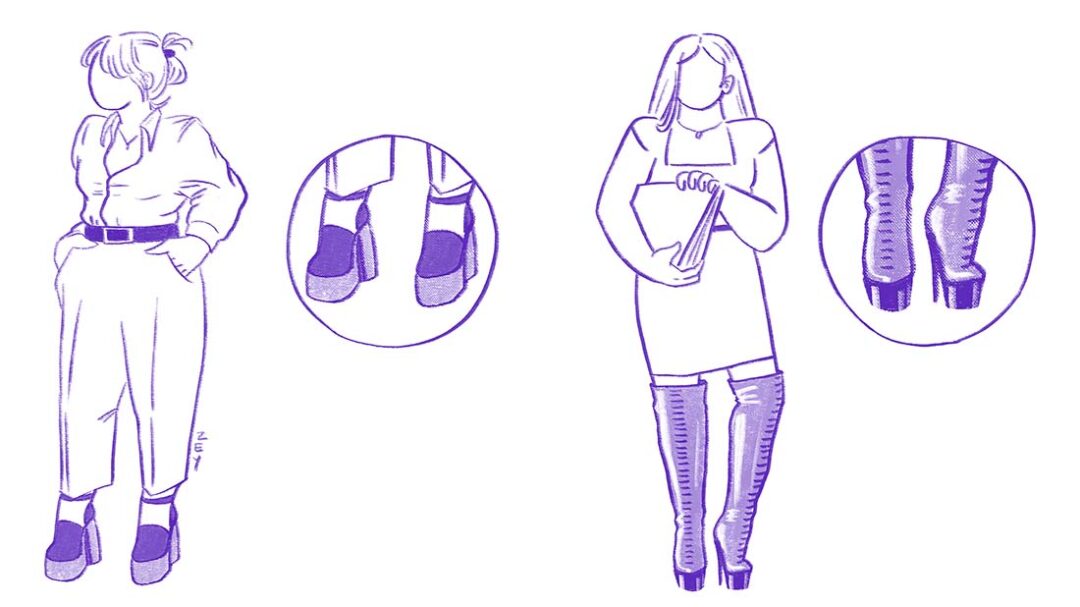
Now if we change the stilettos into high-heeled sandals, platform heels, or knee-high boots our perception of the characters changes. As you can see in the following example, just by changing the shoes, we take them out of the business feeling, or confuse the audience by paying too much attention to the footwear:
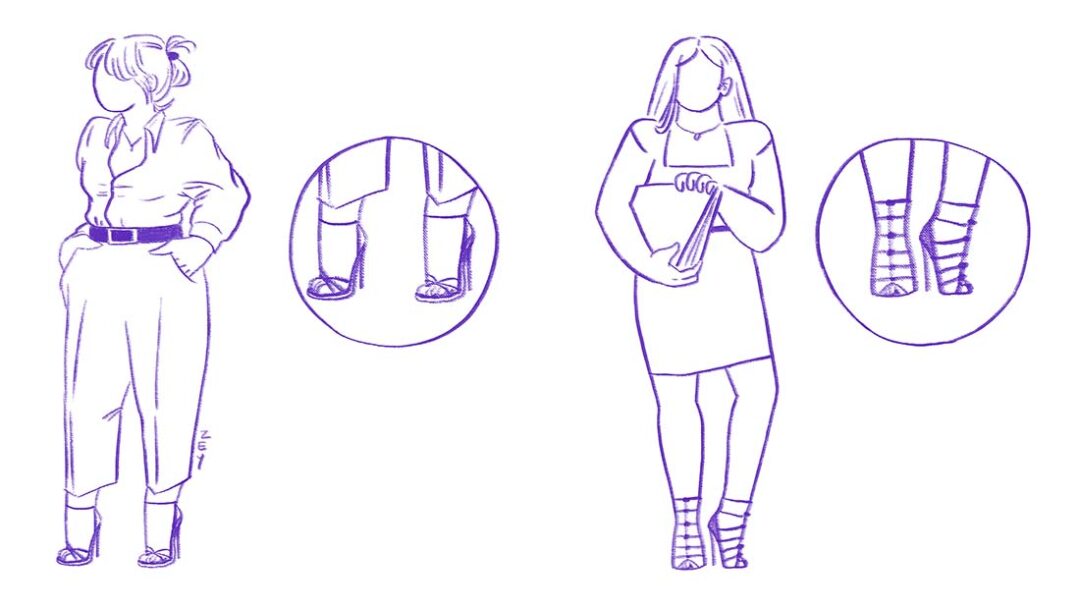
This is not because these shoe types are ugly or nobody should wear them, it’s simply because they don’t go with the atmosphere we are trying to create with these characters. Let’s remember the quote from the production designer of Walt Disney Animation Studios Cory Loftis, from Part 1;
“one of the key points of designing a character for film is to make your character not call attention to themselves. If you design something too cool or too remarkable, it will distract the audience and they won’t be able to follow the story.” So if we want the audience to see a businesswoman, we should draw details that are aligned with the visual expectations.
What Makes GOOD Character Design – Disney Animation Studio Artists Interviews
Therefore, I would say that these different shoes -the platforms, the knee-high boots, or the sandals- would go better when we are drawing a background person with slight differences in the outfits, for people who may be at a wedding, who are partying, or maybe we are trying to emphasize their fashion choices, like being in the show business.
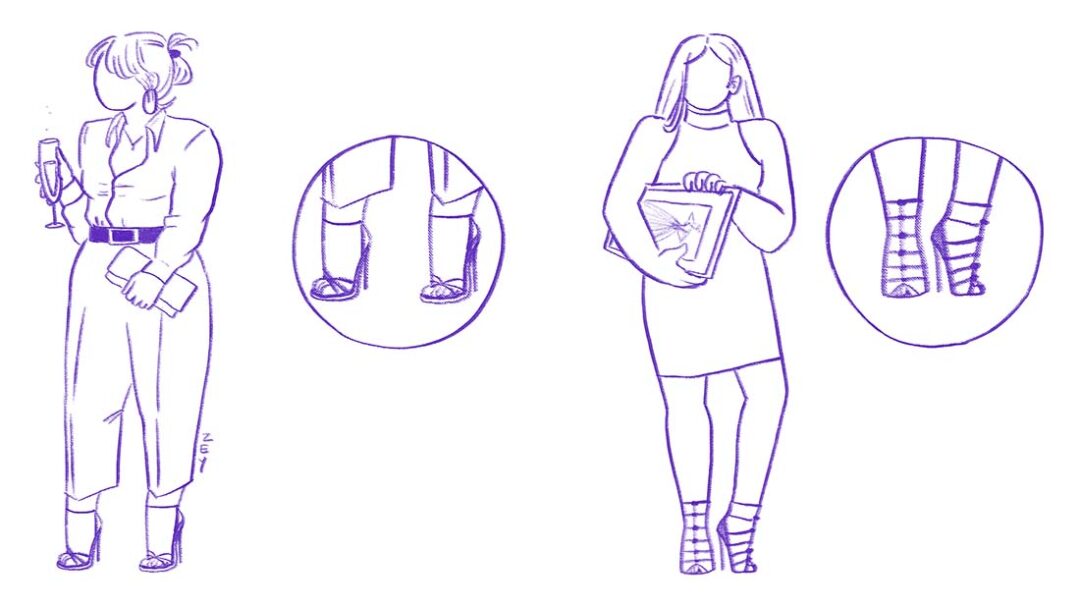
So, it is important to know what gives the feeling of a business atmosphere and what high heel and outfit combinations would create what kind of results. For example, here I‘m drawing the same people with better-suiting outfit combinations.

I must also add that negative stereotyping and misogyny are common in using high heels for visual hints. They can be used to imply that a woman is evil, or they can be used just to imply that a character is “female:”
As artists, it is important to know the stereotypes and use some of them to convey our message, but it is also crucial to not reproduce the negative stereotyping or to not contribute to any type of discrimination. It is challenging to not fall into the trap of harmful stereotypes when your main goal is to carry a visual message quickly, but in the end, it is worth it. Drawing a woman superhero or a doctor without high heels would be a good example of this.
Another example of creating diversity with the usage of high heels would be playing with the gender of the person who is wearing high heels. When the aim of the image is inclusivity, how artsy a character is, or when we want to draw characters that challenge gender norms, then it would be a good choice to consider this option.
Unlike high heels, dress shoes are seen as more gender-neutral. Shall we move on to talking about them?
Flats & Dress Shoes
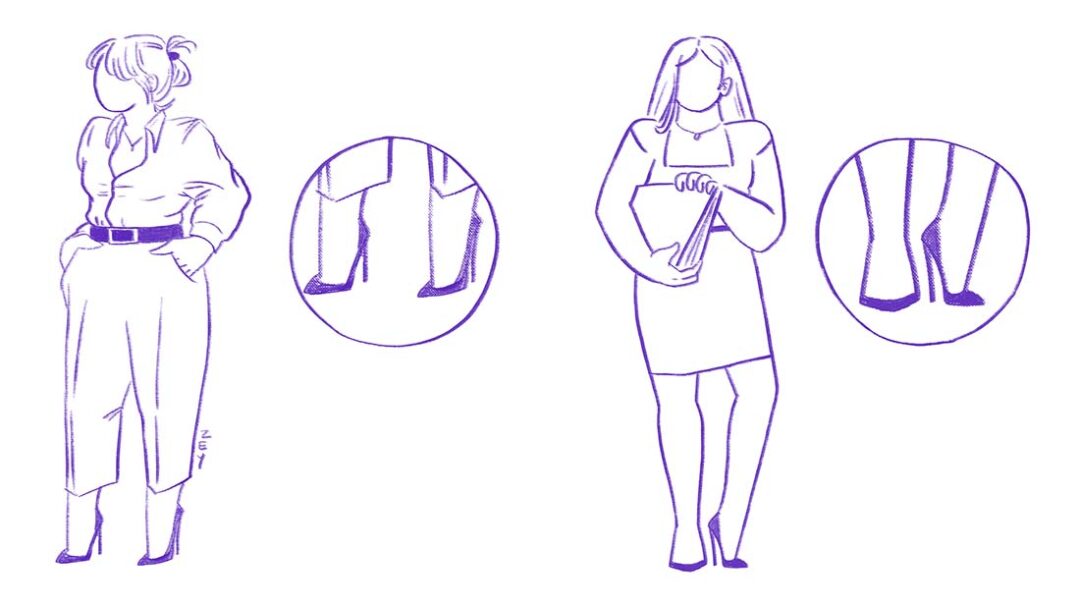
Remember this businesswoman that I mentioned above? What if she wore flats or dress shoes?

As you can see, when we draw dress shoes instead of high heels under the same outfit, it looks neutral in the sense that it can still preserve the understanding of a business setting. That is because these types of shoes are also attributed to formal settings. However, flat shoes with straps give a feeling of someone standing up a lot, therefore at first glance, it may imply that the person is a teacher, rather than a businessperson wearing high heels.
However, if we add glasses and maybe some books to the character, then there is no question that this person is a teacher.
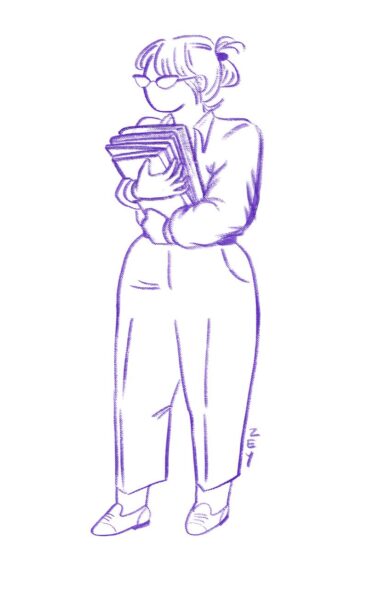
Stereotyping much? 🙂
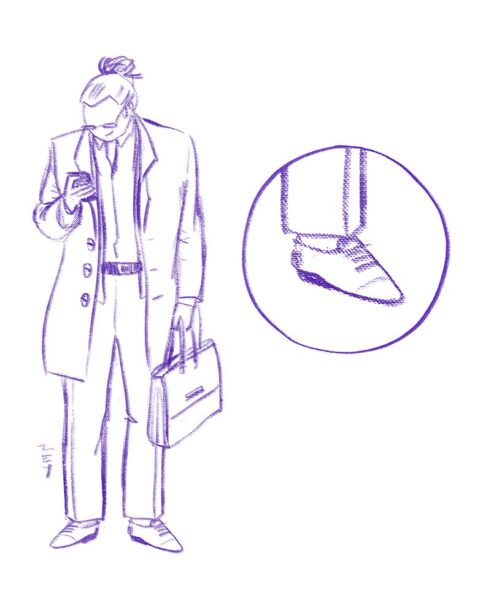
Let’s continue with dress shoes with straps: A businessman or a grandpa (yes, the one from Part 1) can also wear the exact same shoes:
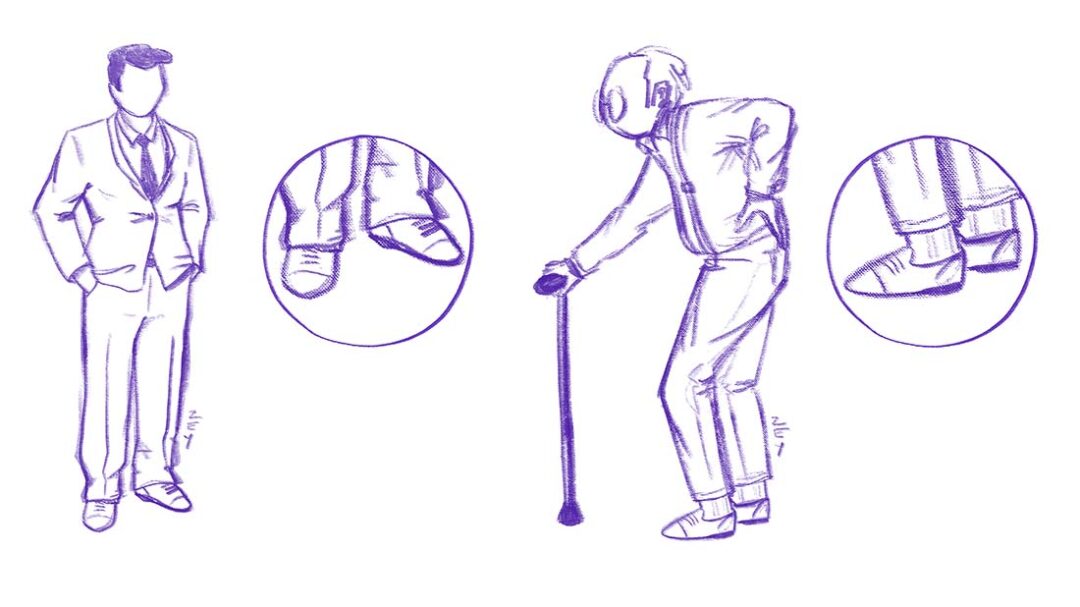
These shoes can also be used when drawing a background character that we are using as a filler and don’t want to draw much attention to:
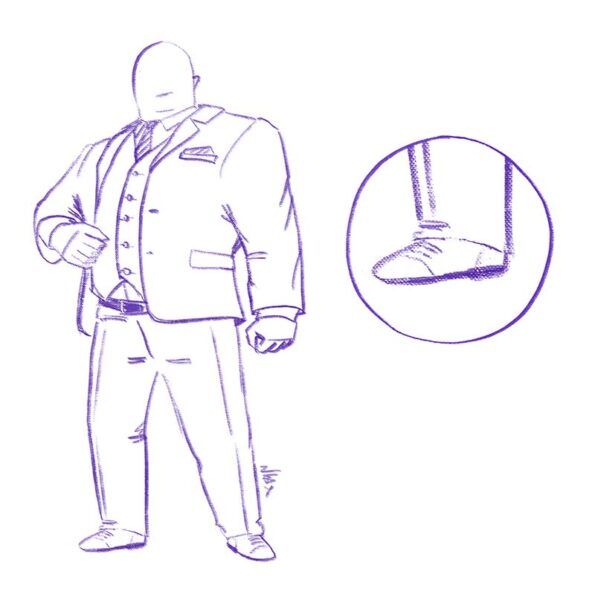
The villain of a story, however, would probably wear shinier and pointier dress shoes. Let’s take someone like Marvel’s Kingpin and imagine his dress shoes.
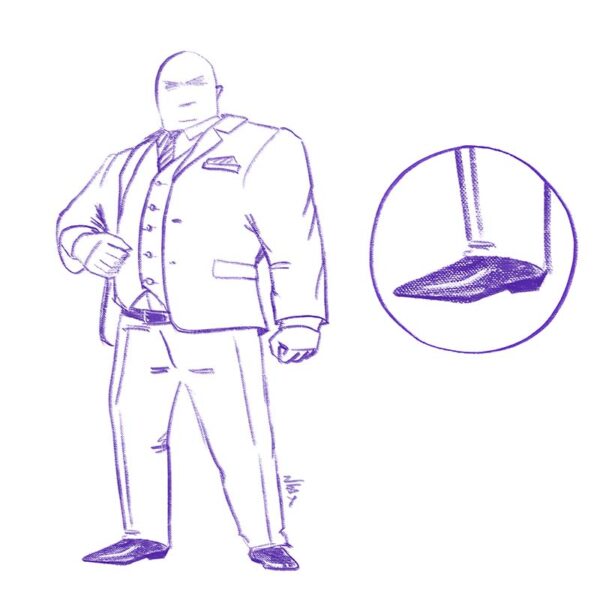
Just change the shoes and suddenly the character looks like he is a villain from a children’s animation film, an almost comedic one, rather than someone that really looks threatening:
I think I gave enough examples of the usage of dress shoes for men in suits. But how about using them with other type of outfits?
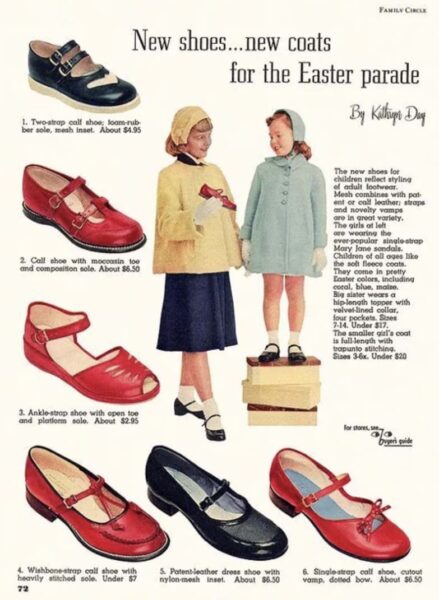
Flats or ballerinas can also be used as part of a 50s or 60s outfit or a vintage Audrey Hepburn-ish look:
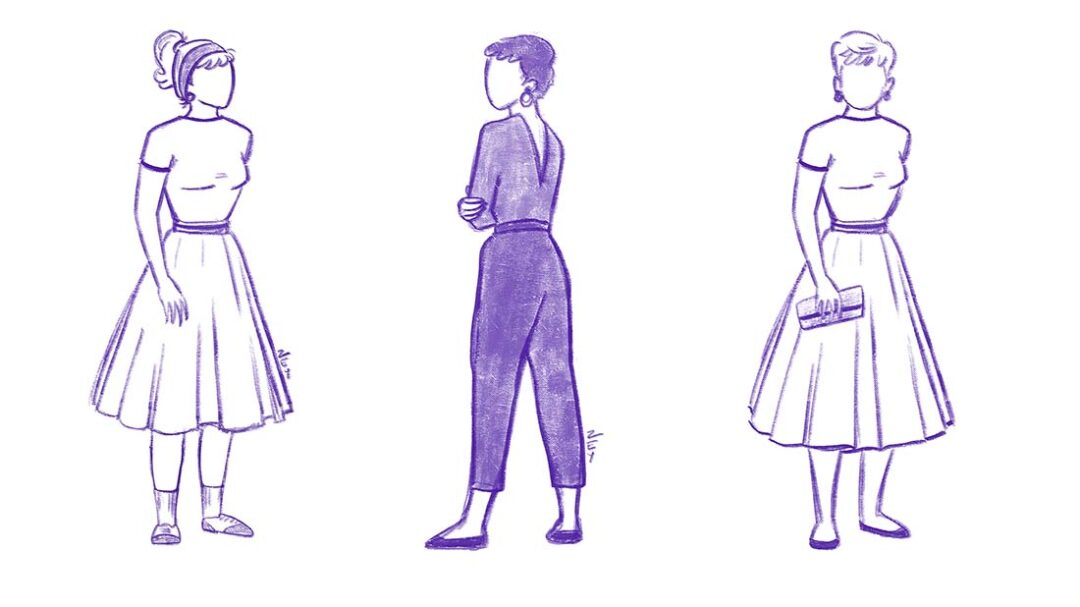
Ballerinas were used highly in some other eras too, but one can’t deny the effect of them when it comes to the beloved Audrey Hepburn’s iconic style.
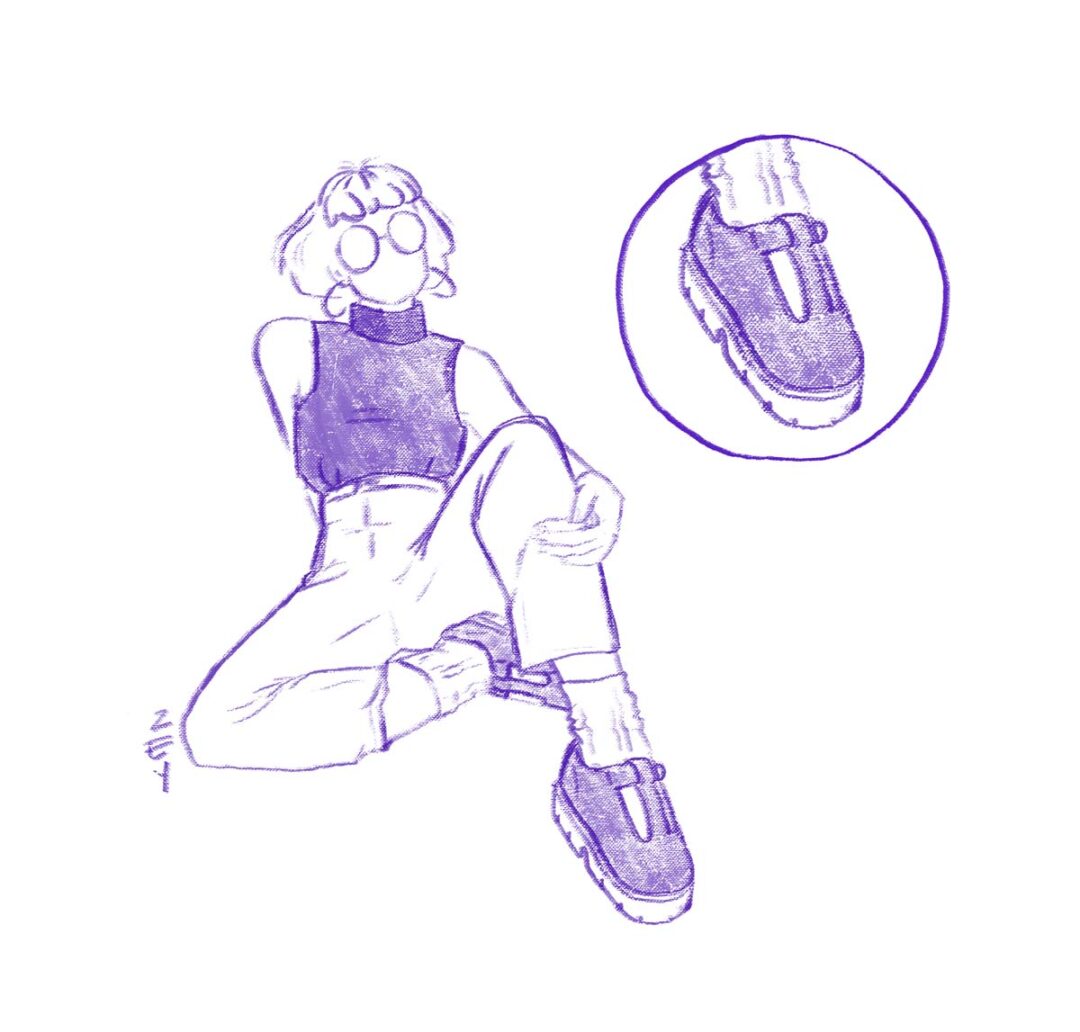
I’d like to finalize the flat shoe types with another iconic model: Mary Janes. I think it wouldn’t be fair to the history of dress shoes if we didn’t mention them, as they are one of the most classical shoe models ever:
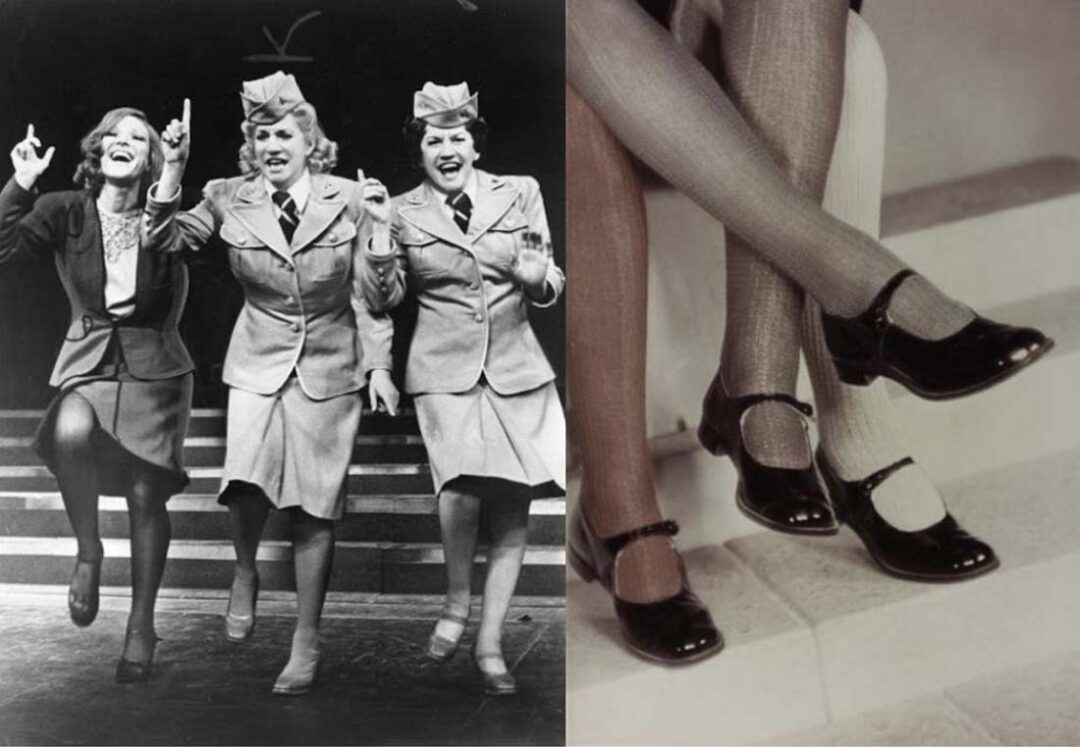
Mary Janes have been used in character design as a main component of children’s or women’s outfits, especially when designing vintage characters. We also see them often with characters who were designed in the 20th century.
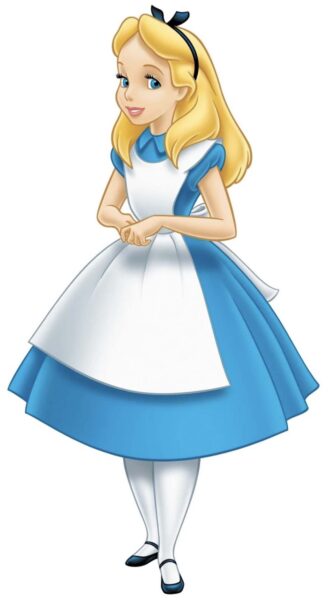
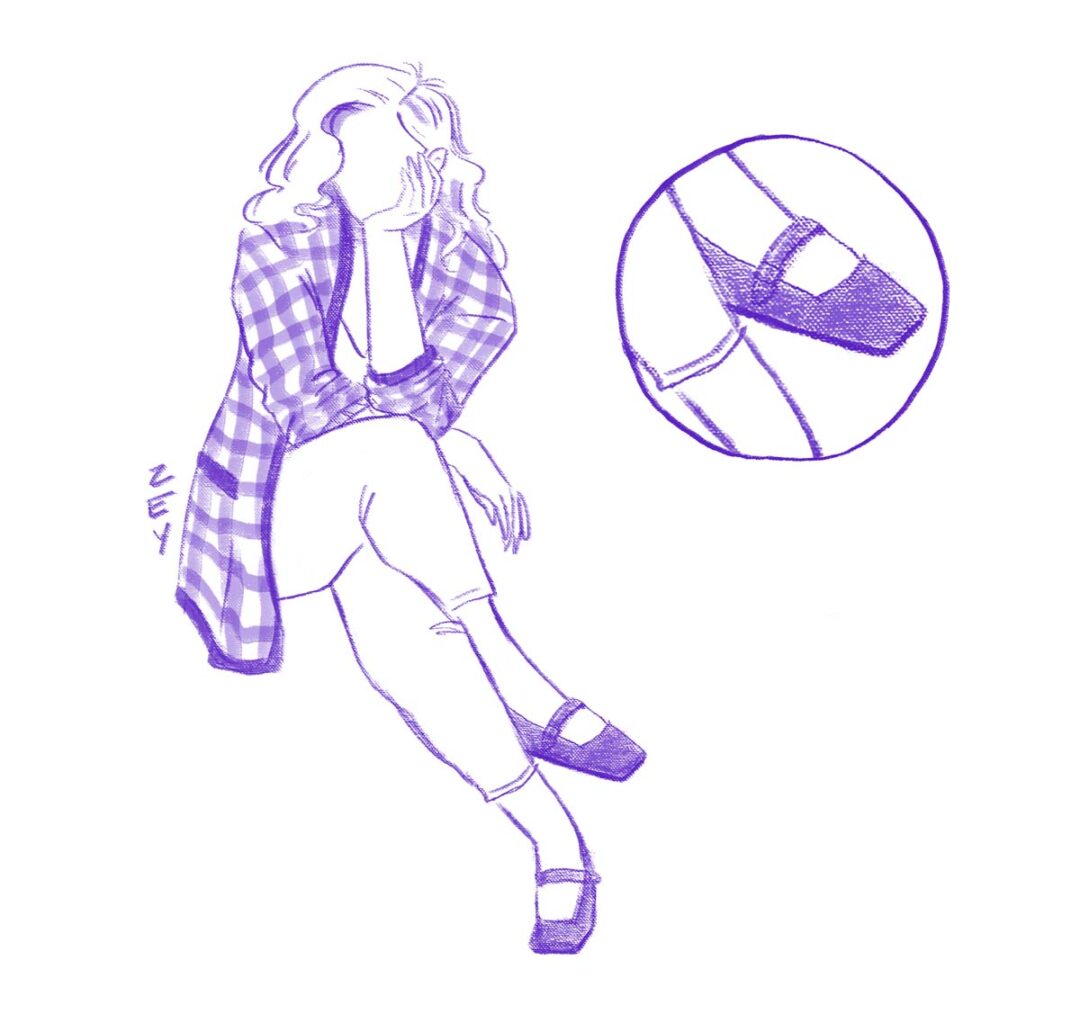
Mary Janes have recently become trendy again, both classic ones and those with slight updates on the shape such as a square toe or a thicker sole. These updated versions can be used for a fresh look to depict young fashionable women:
To sum up, various models of flat shoes can be drawn based on who your character is and what purpose they serve for your story. These shoes come in an endless number of models and styles, for all genders and ages.
Are you also interested in illustrating your own characters? With its light pen design and instant pen sensors, Wacom One offers a comfortable drawing experience for anyone who wants to join the world of digital drawing.
Do you already have a Wacom tablet? Post your drawings on Instagram with the hashtag #madewithwacom so that we can repost them!

About the author:
Zeynep Alpay is a freelance multidisciplinary artist and illustrator based in Düsseldorf, Germany. Their work encompasses illustrations, animations, paper cut-outs, and traditional artwork.
For more information or to see more of Zeynep’s works, check out their portfolio, their Instagram, or their Linkedin.
If you’re looking for adding some diversity and range to your character drawings, you’re in the right place! Let’s dive into what we can do to draw different types of bodies in a few quick steps. The world is full of various types of body, so why not show it in our artwork?
Step 1: Start with your signature style
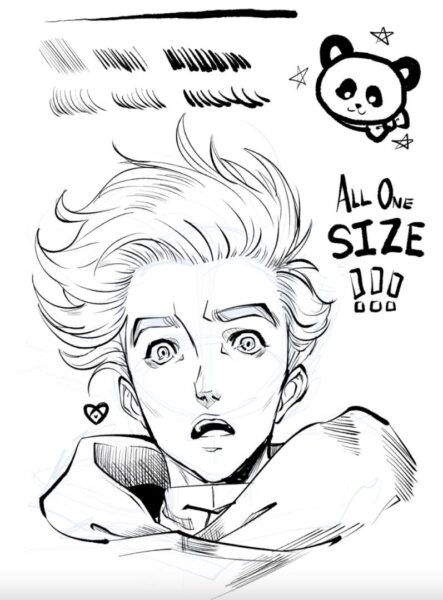
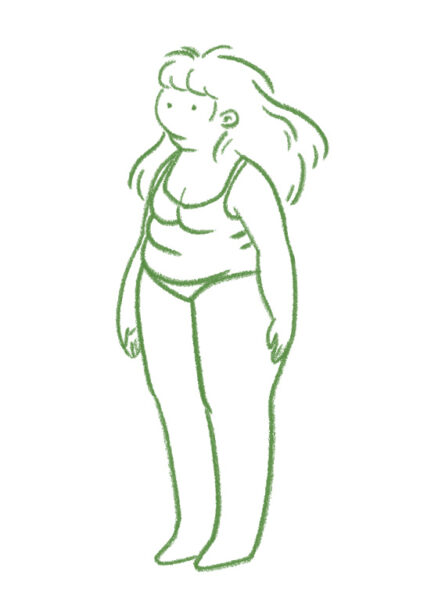
Before diving into diverse body shapes, begin by drawing a character in your existing style. This serves as your creative base, allowing you to keep the elements that make your art uniquely yours and build from there. Here, I am going to start with one of the character styles I find myself drawing over and over.
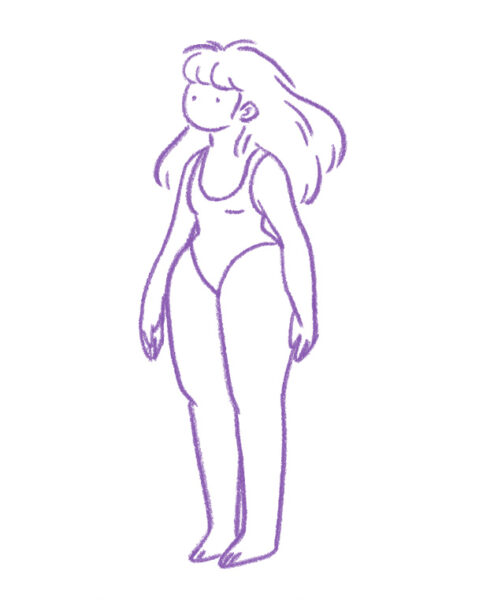
I wanted to draw this model since I draw it a lot, and I chose a swimsuit as an outfit, that will help us see the details better.
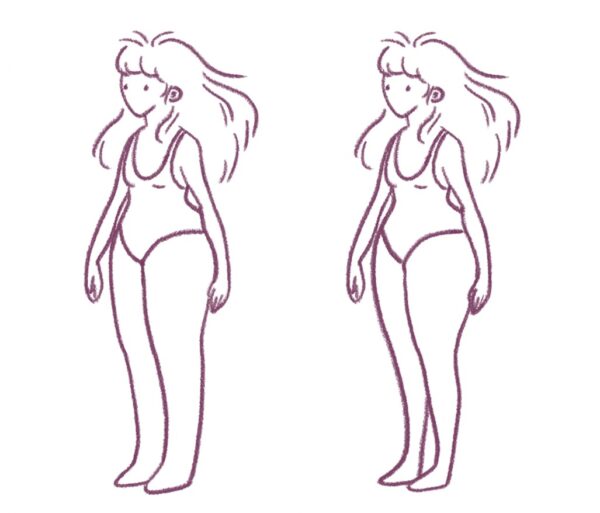
Step 2: Slim figures
Now, let’s introduce variety. Take your existing character drawing, decrease the opacity of the layer, and start experimenting with some adjustments on a new layer.
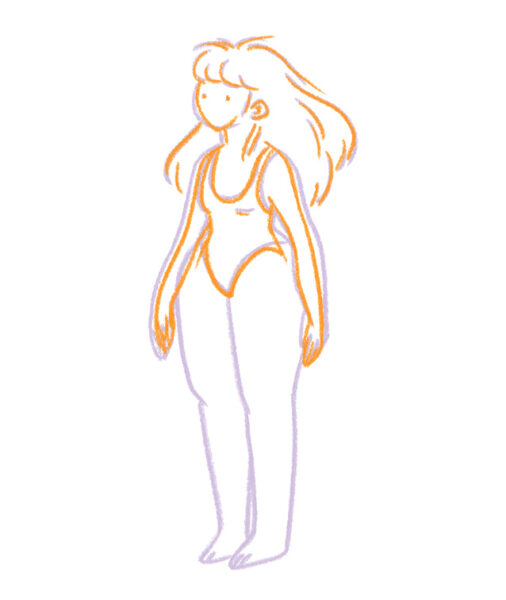
When drawing a skinny character, it is important to draw the limbs a bit thinner and the face with a more defined jawline. You should also draw the shoulders slightly narrower, and make the breasts and the waist smaller.
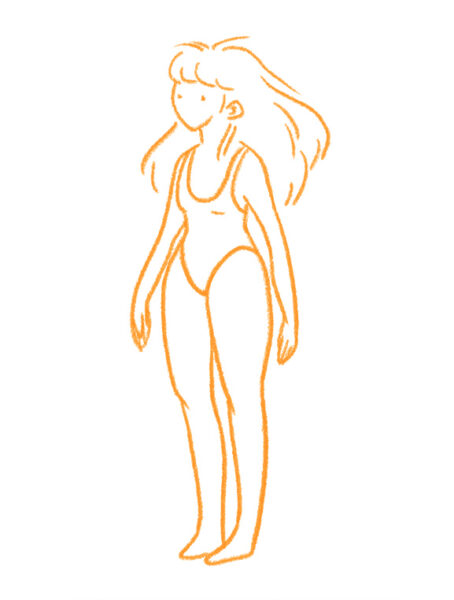
My first character has defined hips, so I wanted to keep it with this one and make them smaller. When drawing this type of a body, I like showing a little thigh gap so that it is easier to grasp that this character is skinny.
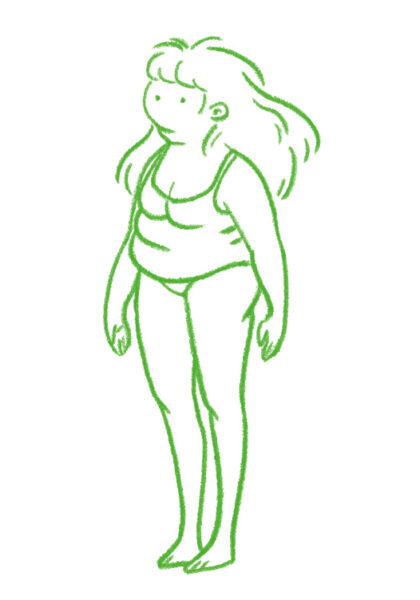
Step 3: Curvy silhouettes
When you finish drawing the slim character, just close that layer, and open a new layer over your first drawing again. Picking another color, now start drawing a full-figured body.
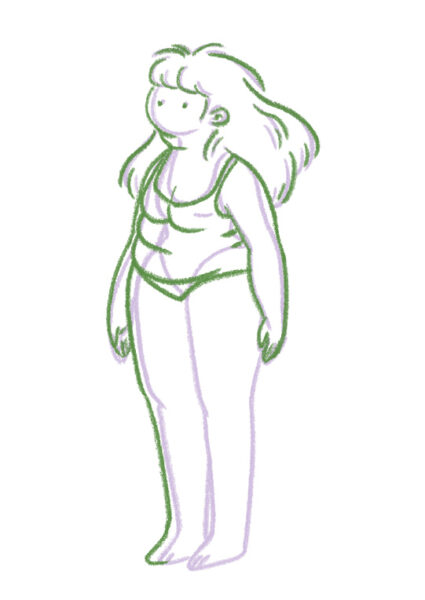
The first steps in this article, before moving on to more variety of body types, are based on accentuating your already existing character. Therefore, remember to keep the curves and your characteristic style in place, while drawing the new body shapes.
For example, with this one, I tried to make the breasts, the belly, and the arms bigger. Also, since my first character already had big hips, I wanted to exaggerate this character’s hips even more. And to stay in line with my style, I kept the ankles and the legs thick.
Step 4: It’s time to experiment further
Now that you’re getting the hang of it, let’s experiment further and incorporate more diverse bodies in our style.
For example, take your existing curvy figure and add skinny legs to it. When doing this, remember to keep the belly and the breasts big, and the hips small. Also, drawing the wrists a bit skinnier would be in line with the rest of the figure.
Another example would be drawing a shape with a slim upper body with small breasts and large hips. We can draw two people like this, by making the legs thin or thick.
There are also many people who are skinny who have slightly bigger bellies. We can represent them in our character drawings too.

Now let’s try drawing a taller, and a shorter person.
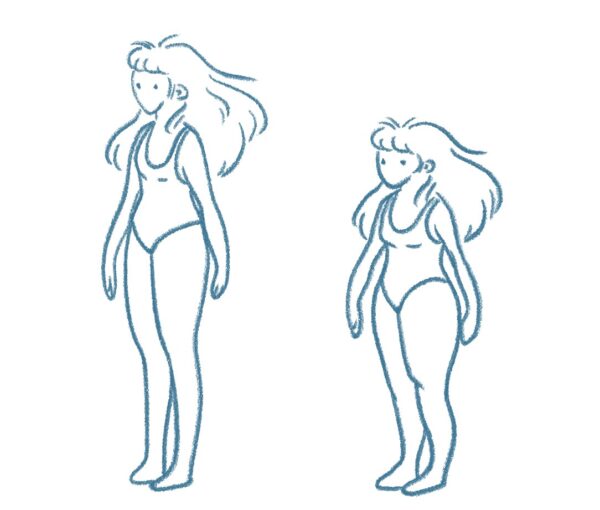
When drawing someone tall, the limbs can be elongated and the upper body can stay a bit shorter so that we understand that this person is taller at first glance. Similarly, when drawing a smaller person, we can keep the upper body size and just make the limbs shorter.
We can also play with the outfits and the hair of our characters, to add more diversity.

Now that you can draw diverse body shapes, think of these questions; is there any one of them that you enjoy drawing more? What did you learn when drawing these, and where did you experience difficulty? If there is a certain part in which you had difficulty drawing, it is an indicator for you to practice it more!
Do you enjoy drawing digitally? You should check Wacom’s pen tablets and pen displays that make life easier for illustrators.
Do you already have a Wacom tablet? Show us your creations of diverse body types! Post them on social media and use the hashtag #madewithwacom for us to see and repost them. Looking forward to seeing your diverse characters!
About the author:
Zeynep Alpay is a freelance multidisciplinary artist and illustrator based in Köln, Germany. Their work encompasses illustrations, animations, paper cut-outs, and traditional artwork.
For more information or to see more of Zeynep’s works, check out their portfolio, their Instagram, or their Linkedin.
Sneakers, boots, stilettos, flip-flops … There are so many shoe models that we can draw for each character. But how should we choose the right one? In this two-part series, I will lead you through some examples while talking about why it’s important to have a fashion sense while making a character design.
According to Animator Benson Shum, who works at Walt Disney Animation Studios, what makes a good character design is that when you look at it you immediately know what it is. And the production designer of Walt Disney Animation Studios, Cory Loftis, says that one of the key points of designing a character for film is to make your character not call attention to themselves. If you design something too cool or too remarkable, he goes on, it will distract the audience and they won’t be able to follow the story.
Shum and Loftis are talking about designing a character for film, but it is no different when drawing humans for a still image. Our aim in illustration is very simple: We want people to know what it is, as fast as possible. The feeling and the characters should be easily understandable, and one of the fastest ways to do it is to draw the right clothing.
Clothing is one of the elements that make or break a character. And believe it or not, the footwear that a character is wearing is key to drawing the correct outfit.
Even in the Barbie movie — spoiler alert! — Barbie must choose between high heels or Birkenstocks as a symbol for her red pill / blue pill moment. In real life, shoe models may not be as life changing as they are in Barbie Land, but when drawing a character, we artists should pay attention to details. If you don’t draw details right, the action you’re drawing or the story that you’re telling may not be conveyed quickly, or it may get lost completely. Shoes fall under this category. If we want the attention to stay on the action or the story, we should give the audience the details that they are already expecting to see.
To explain it thoroughly, I will be writing two different articles. In each article, I will talk about different footwear types in the following categories: Sneakers, high heels, flats, dress shoes, boots, sandals, and slippers. In this first part of the series, I will be focusing on sneakers. In Part Two, I will follow the categories while giving examples with my illustrations.
Let’s dive into our first category:
Sneakers!
When we think about sneakers in real life, we think of so many models. However, when it’s time to draw a character, most artists — including me — draw the same thing: Converse All Stars. Yes, they are easy and fun to draw, and yes, they literally go with any age, any gender, and any outfit.
But when our focus is on a feeling or an action, drawing suitable sneaker models for our characters would make them look more natural and it would add a certain variety to our work:
In this part of the series where I will be talking about Sneakers, I will give you some ideas as to which alternatives you can draw for your sketches other than classic Chuck Taylors.
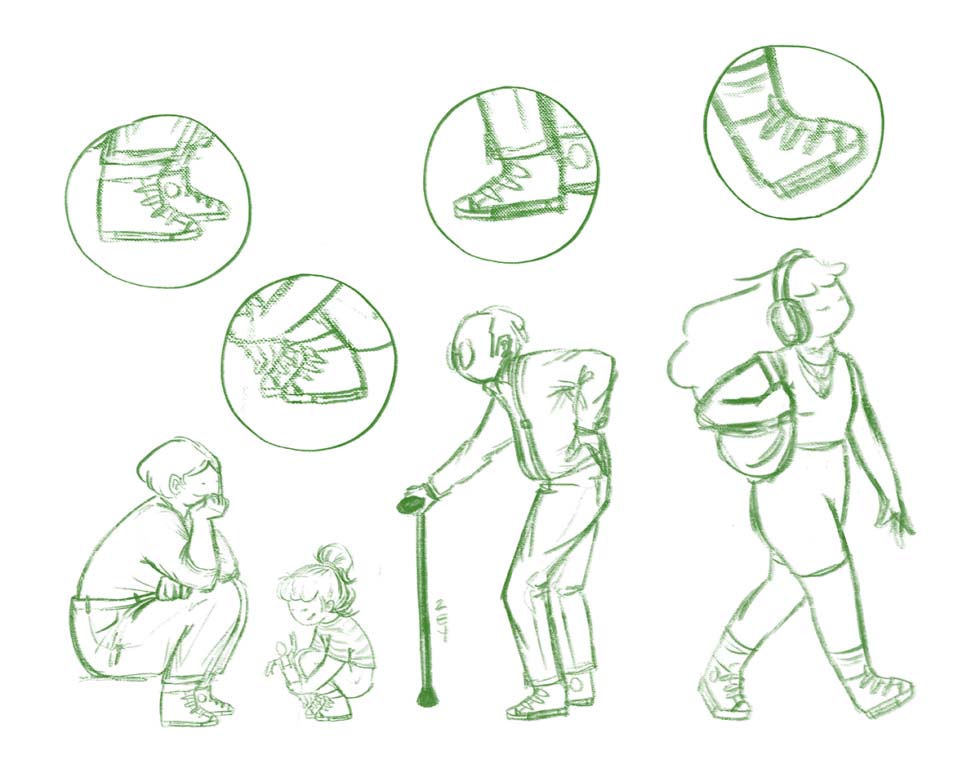
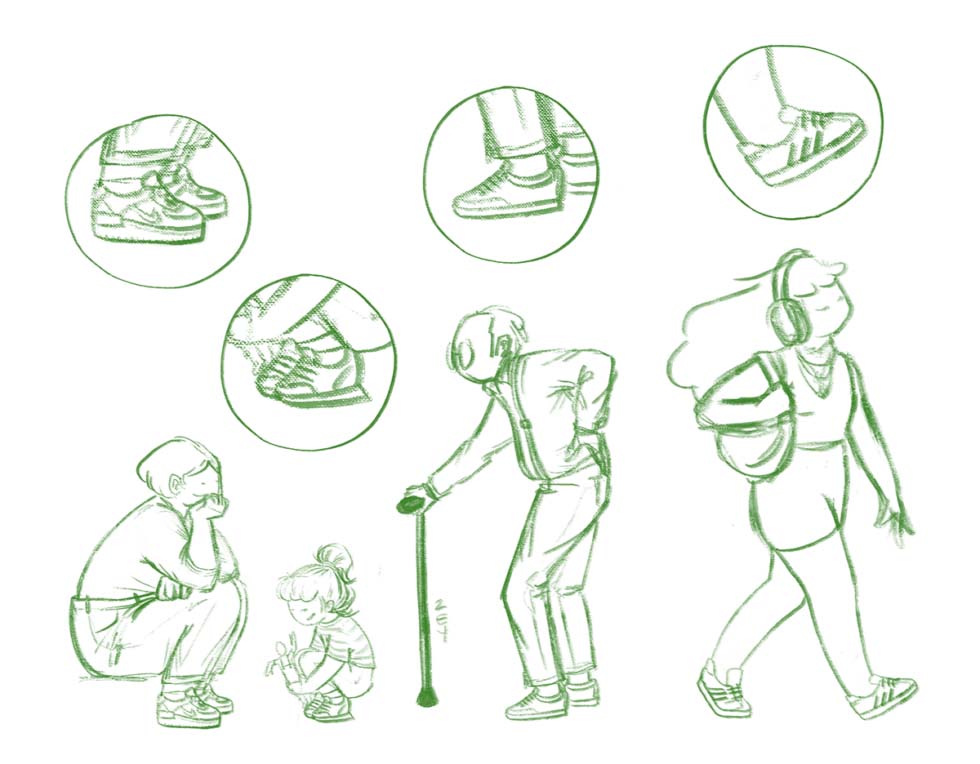
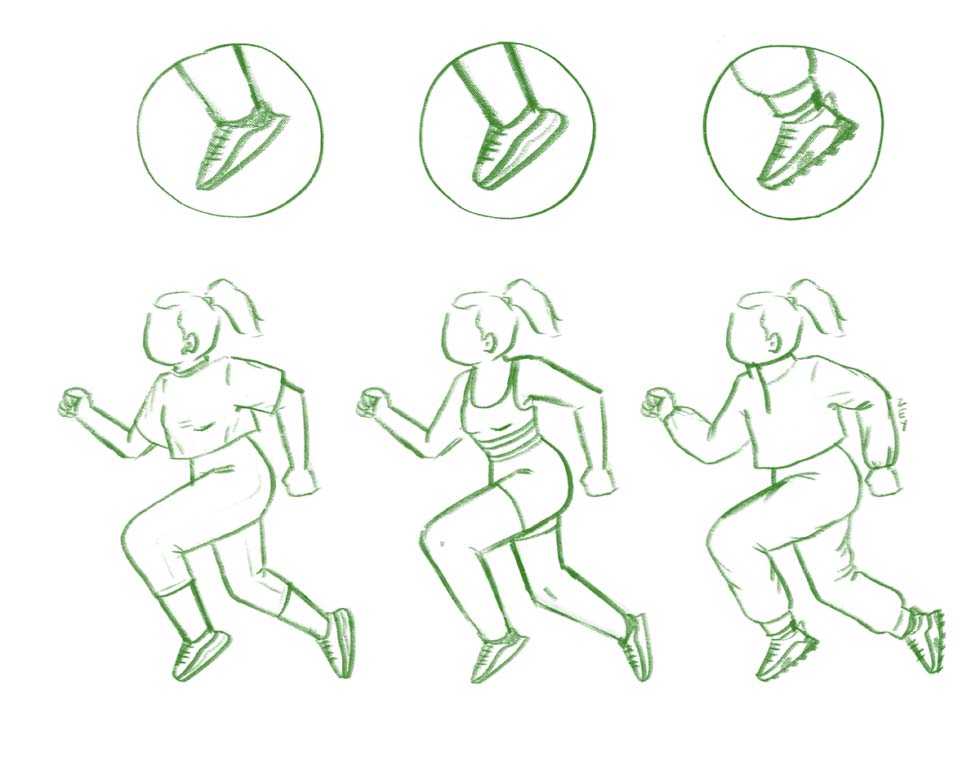
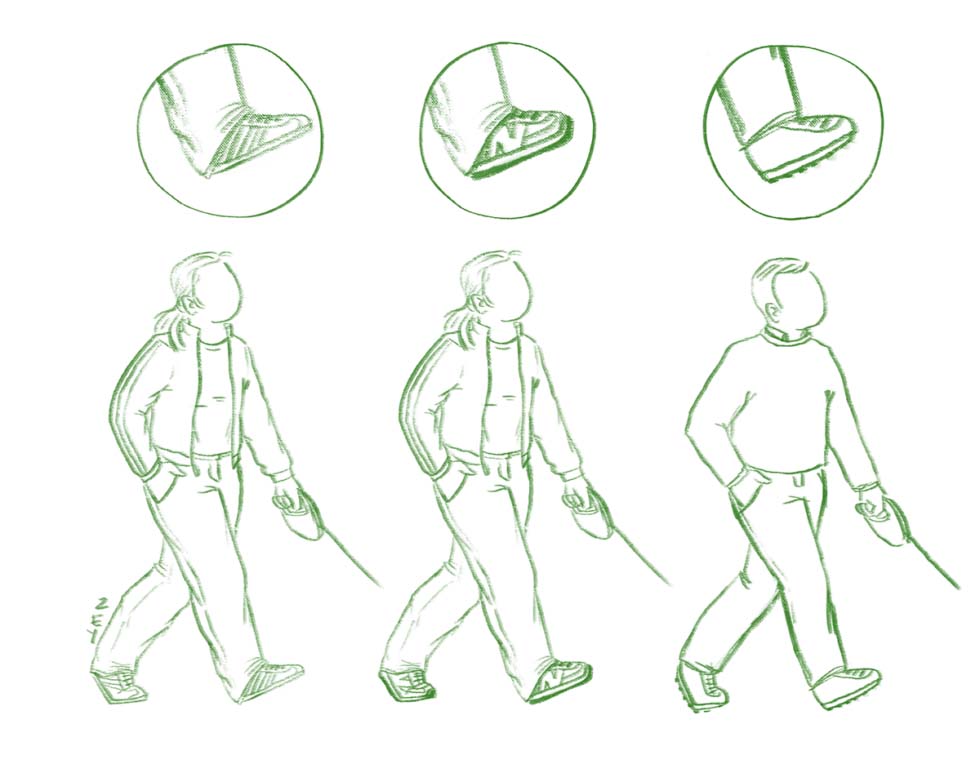
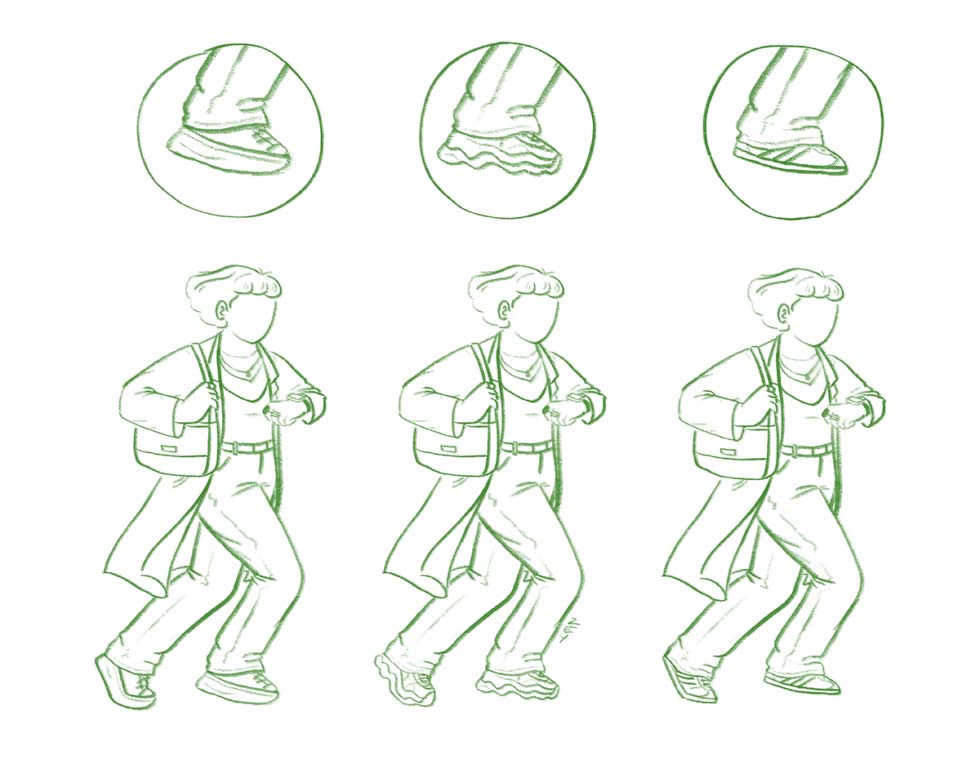
For example, if we were to draw a person who is jogging, I would assume that their outfit and their sneakers would show some simple differences based on where they are jogging; in a gym, on the street in a city, or outdoor in a park:
And when someone is walking their dog, we may think that they are wearing comfortable shoes, therefore sneakers would be a good fit. Let’s think of some examples other than Chucks. But also remember that a person’s age or taste would probably affect their choice of sneakers.
Stereotyping is not cool in many cases in life, but when we are drawing for the purpose of telling a story, they sometimes actually help us. Unless the goal is to make a fashion statement, or to imply something else about the character, sticking to stereotypes to a certain extent serves for the purpose. By doing this, we avoid distracting the audience and we keep the focus on the action.
Let’s take some other examples where a person may be wearing sneakers.
Here we have a cool teenager, leaning on a ledge, drinking juice. We can draw various sneakers for a teenager instead of Chucks:
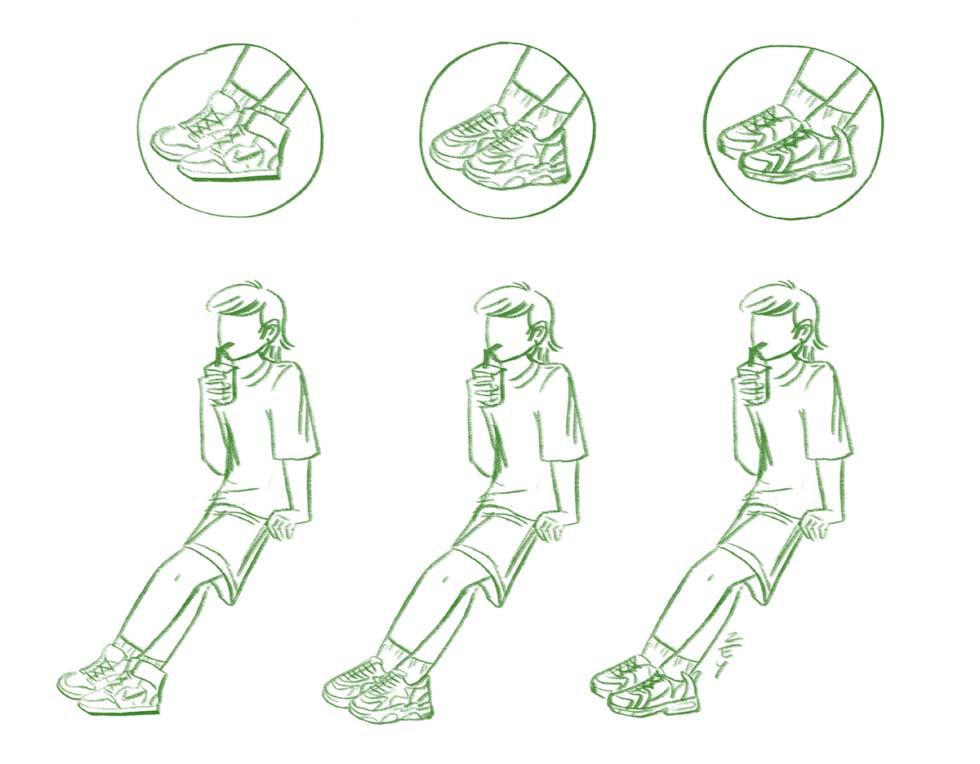
Let’s say our story focuses on a woman who’s in her late 20s and she’s late for work. We can draw stylish sneakers instead of the classic Chuck Taylors:
Long story short, keeping our sneaker library updated affects the variety of the characters that we can create. There are many sneaker models to draw for your character other than classic Converse All Stars.
Sneakers have been a big part of our daily outfits for the last few decades, and as you see in the examples above, which model someone wears can not only be an indicator of their character or their age, but also it is a strong indicator of the year that they live in. Stay tuned for the next post in this series, where I will be moving on to other type of shoe models to draw for your characters: high heels!
]]>I usually use refences for warm-up exercises, or for just having some practice time to speed up my lines. They are also great for inspiration when I’m starting a new illustration. No matter the purpose you want to use a pose reference for, you should check out these resources. Let’s go!
Sketch Daily
Sketch Daily is one of the first websites that come mind for practicing or getting some pose inspiration.
For practice it is one of the best resources because it comes with a nifty timer feature that lets you decide how long you want to spend sketching a given reference picture. The images on the screen switch up automatically when your time is up, where you can choose an image to stay on the screen for as short as 30 seconds or leave it there for an hour to really get the details right. Moreover, you can also choose an endless drawing session without the timer pressure.
It is perfect for warming up and getting the hang of drawing from references, just like you would do in art schools or drawing courses when you have a live model in front of you who switches up poses. And the best part of this website is that you’re in control – hit pause or stop the timer whenever you feel like. Plus, you get to pick and choose your reference pool from various options for body parts, gender, clothing, or pose type.
Jen (Jookpub Stock)
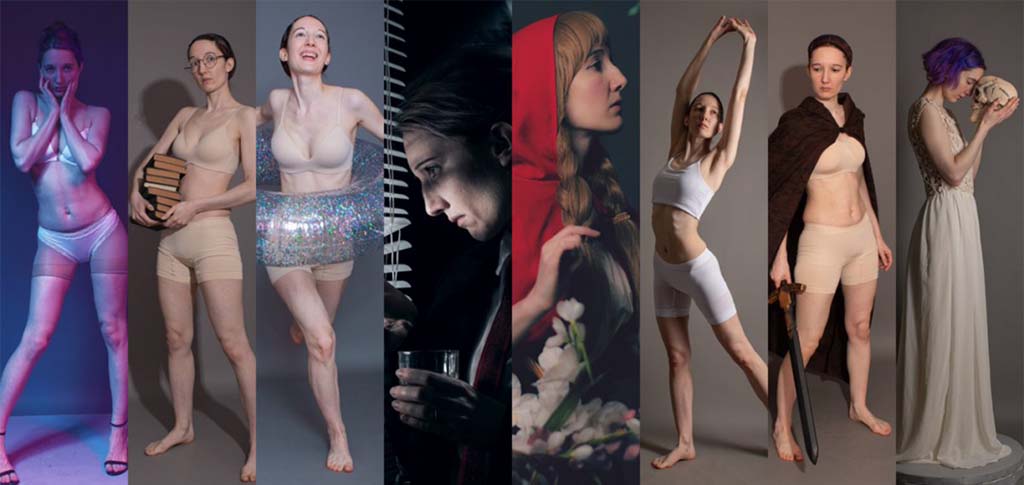
Meet Jen, the creative force behind JookpubStock, a big collection of reference images for artists. On their X (Twitter) profile, you’ll find many options showing them in dynamic action or striking stable poses. Jen’s got it all covered, using neutral-colored underwear to make it easy for artists to focus on and understand the anatomy of the human body in their reference shots. Moreover, in some of their shots, they use the perfect props or accessories for when you’re looking for a specific type of a feeling.
It is so inspiring to look into Jen’s diverse portfolio and choose the best pose for your need, although it may not be so easy to stick with just one of them!
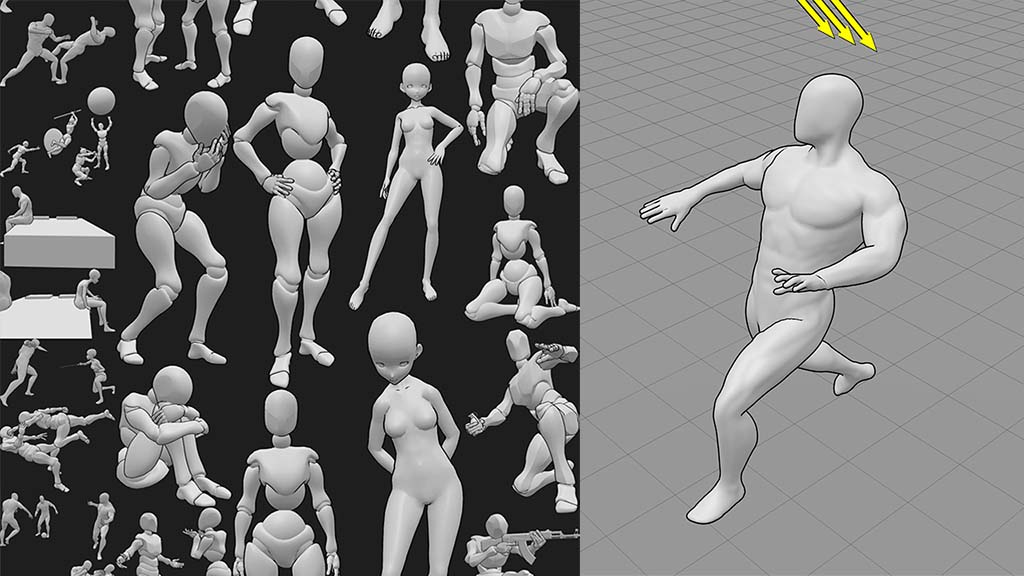
Pose My Art
My third choice is Pose My Art, where many 3D models are waiting for you. There is a world of options, with various body shapes available in unique styles like Anime Male, Chibi Female, Zombie/Alien, and more. You have the freedom to pose these models in any way imaginable, and to observe them in a 3D setting from every angle. You know how sometimes the pose you draw looks correct but the angle doesn’t feel right? Being able to see the models from different angles would really work in that type of a scenario. You can also arrange the lighting to your own liking and see which option is the best for you.
Another reason I find Pose My Art so convenient is because it also offers 3D models that are already in pose. When I first discovered it, I was amazed by all the things that artists can do here.
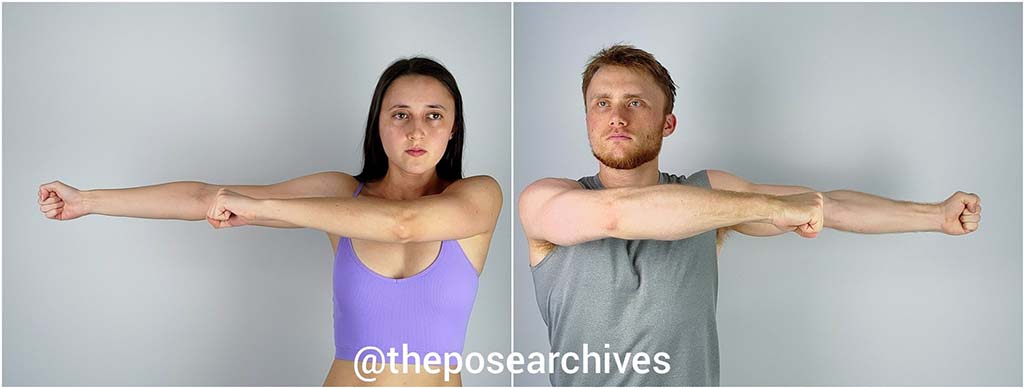
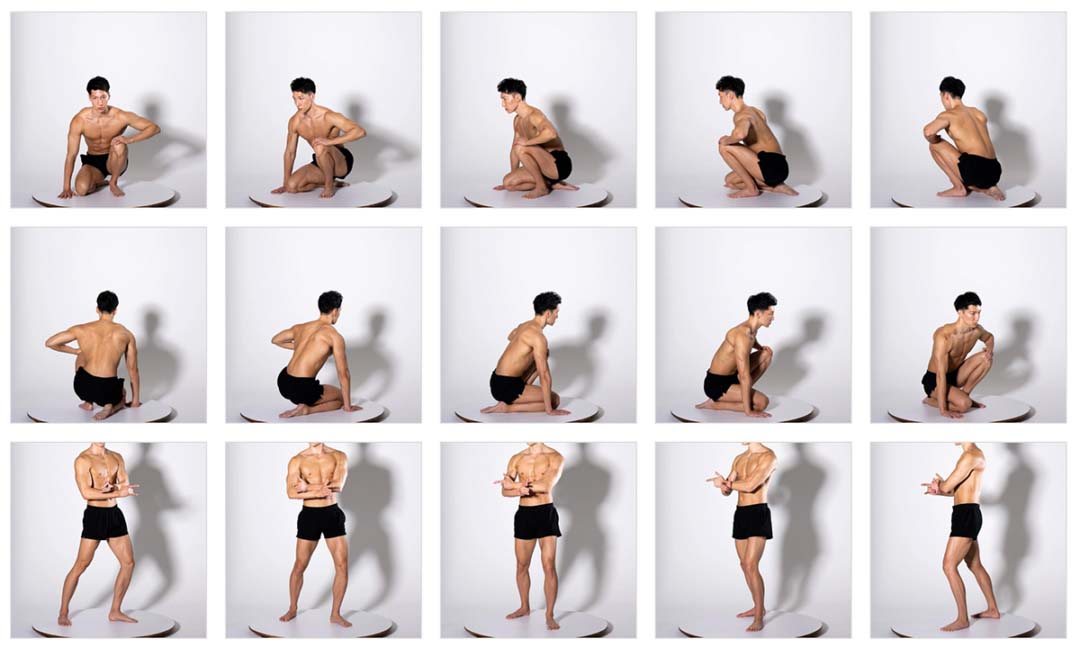
The Pose Archives
Meet the cool duo who are known as The Pose Archives. This power couple is on a mission to “create epic pose reference for artists” in their own words, and they are running the show together. You can catch their social media updates three times a week, featuring a large range of poses varying from warriors to more daring NSFW shots. When you investigate their archives, you will see that sometimes they are posting individual poses and other times it is all about harmonizing together.
What is so striking to me about The Pose Archives is that they present the same pose from various angles, sometimes interchanging the roles in the poses. Plus, they wear minimal clothing to make it easy for artists to observe muscles and details of their anatomy.
While most of their content is free access, they also have a Patreon page for those who want to lend a supporting hand.
Pose Maniacs
Pose Maniacs is a fantastic resource offering free pose references for artists of all levels. With a mission to provide free learning materials for aspiring artists, this small but passionate team is all about sparking creativity.
Not only can you find a surprise pose every day under “today’s pose”, but also you can explore the large pool of poses through an anatomically designed 3D model showcasing the muscles on a human body. With over 50 categories like “kicking,” “on stomach,” “crossing legs,” or “fashion,” the options are endless.
You can also check the 3D hand viewer, allowing you to examine a hand model from any angle. And if you’re up for some practice, activate the practice mode with slides of different model pictures, complete with a customizable timer ranging from 10 to 300 seconds. Great for a speedy practice session to learn drawing the human body faster.
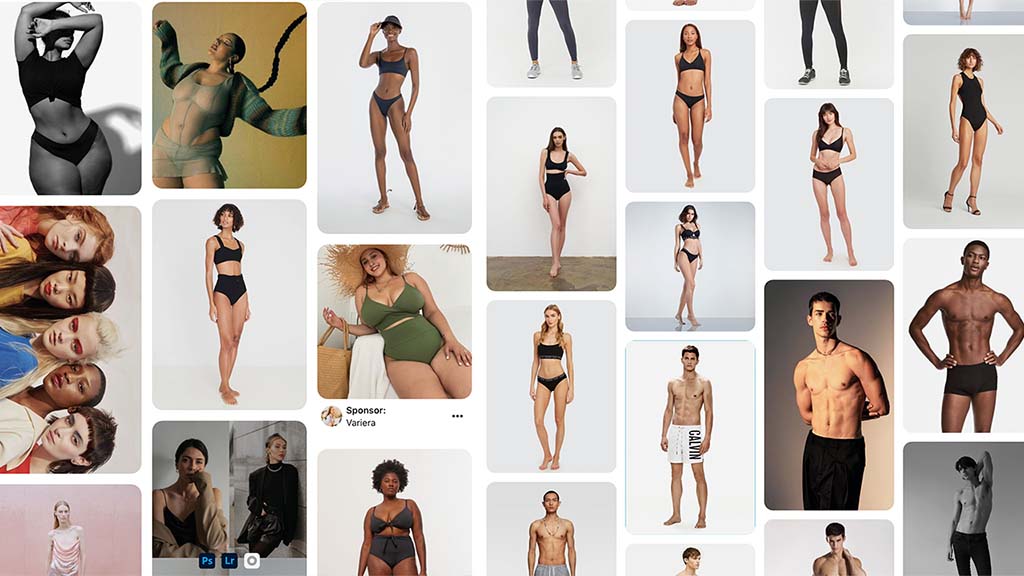
And this list wouldn’t have been complete without it; here is the good old Pinterest as my final suggestion. It’s the one resource that so many of us can’t live without, because it is like a treasure chest for pose inspiration. In my opinion, one of the reasons that makes Pinterest so indispensable for us is that it offers a vast collection of images, with direct links to the resources, including different body types and genders. So one can argue that the beauty of Pinterest lies in its diversity, giving you the freedom to go beyond the limits of a single website.
However, let’s keep it real. Because Pinterest is a go-to for so many artists, creating something truly unique might be a challenge. Mainly for this reason, I would stick with using it mainly for inspiration and casual practice, rather than for actual commissions.
Conclusion
I think with these six resources under your hand, there is no pose or anatomical drawing challenge that you can’t get over. And don’t forget to show some love to all these people making an effort for artists and go follow them on social media. It is also always nice to give credit to your resources 🙂
Wanna join the artist community? Grab a Wacom tablet and start a challenge for yourself. And use the hashtag #madewithwacom when you post your drawings on social media so that we can repost them for the whole world to see.
And before you go, if you wanna draw a figure but not sure which outfit to choose, don’t forget to check out this article series where I talk about picking the right shoe model for character design.
Happy doodling!
About the author:
Zeynep Alpay is a freelance multidisciplinary artist and illustrator based in Köln, Germany. Their work encompasses illustrations, animations, paper cut-outs, and traditional artwork.
For more information or to see more of Zeynep’s works, check out their portfolio, their Instagram, or their Linkedin.


Kirsten Rothbart
Berlin-based artist Kirsten Rothbart doesn’t define herself as a fashion illustrator, but she definitely has an incredible fashion sense, and it shows in her drawings. Her illustrations are usually cool and detailed with a subtle sense of humor. She says that she likes drawing everyday people in everyday moments because they deserve her attention.
To sum up her art in her own words: “my style embodies a reality that is visually reproduced through my personal filter and my highly stylized expression.” No need to add anything more here!


Amir Mrzae
Amir Mrzae, a skilled visual artist and animator based in Toronto, Canada. Amir’s artwork showcases his talent for a masterful command of dynamic poses, vibrant block colors, and clean, precise lines. His clever utilization of light is particularly noteworthy, as it beautifully enhances the realism while maintaining a touch of cartoony charm. His style seamlessly brings the real and the imaginative together, establishing him as a prominent figure among fashion illustrators.


Jose Ramon
Fashion marketing and design student Jose Ramon, based in Veracruz, Mexico has a mixed media portfolio on Behance. Their artistic abilities Show themselves in the distinctive nature of their work. Employing a captivating blend of mixed media and collage techniques, Jose Ramon crafts illustrations that has a touch of analog charm.
Their fearless exploration of altered body shapes offers a fresh and unconventional perspective within the realm of fashion. Jose’s illustrations are not only quirky and stylish but also a testament to their unique artistic vision, making Jose Ramon a promising artist.


Cathal Duane
Illustration artist Cathal Duane, based in Ireland, creates eye-catching and lively artwork. Her colorful illustrations are beautifully stylized and make clever use of space, which adds depth and interest to her work. Cool and funky outfits can be seen often in Cathal’s art, which captures your attention with its vibrant colors and clever composition.


Meraki
Meraki, the fashion illustrator from Pereira, Colombia, has a style that is both simple yet striking. You can see her incredible attention to detail in every illustration, capturing the essence of her subjects with precision. While the outfits in Meraki’s illustrations look like they are taken from a Netflix show about stylish teenagers, her choice of a pastel color scheme adds an elegant and soft touch to her illustrations.


Viktoria Ci / Vikunia Illustration
Illustration artist Viktoria Ci, based in Berlin, Germany, presents mind-bending perspective plays and a keen sense of humor in her work. Her illustrations feature stylish characters brought to life with a playful twist, and she adds an extra layer of fun by animating her illustrations in a funky way. Viktoria’s imaginative approach makes her a standout artist worth exploring.


Jose Elgueta
Jose Elgueta, a graphic artist from Santiago, Chile, brings a unique blend of realism and illustration to his work. His creations transport you to imaginative places, blending reality and creativity. What’s interesting is that Jose likes to experiment with different techniques, like painting murals or designing characters for 3D printing. His ability to work in various artistic styles and mediums makes Jose Elgueta a versatile and talented graphic artist worth following.


Olga Krivova
Olga Krivova, an artist and illustrator from Russia, has a special style that feels like a blast from the past. She’s really good at using patterns and textures to make her art interesting. What’s even more impressive is how she uses light and shadow to make her pictures look real and eye-catching. Olga’s artwork is unique, and her talent for making cool illustrations is easy to see.
About the author:
Zeynep Alpay is a freelance multidisciplinary artist and illustrator based in Düsseldorf, Germany. Their work encompasses illustrations, animations, paper cut-outs, and traditional artwork.
For more information or to see more of Zeynep’s works, check them out on their website, LinkedIn, their portfolio on Behance, their Instagram, or their Twitter.


Storyteller of the darkest fairytales: Polina Washington
My first pick for this list, Polina Washington, takes us on a journey into the enchanting world of dark fairytales through her photography. Based in Saint Petersburg, Russia, she is not only a photographer but also a cinematographer, being featured many times on Behance as well. Her marvelous work blends elegance and quirkiness, creating a unique narrative that unfolds as a portal into a realm of magic and wonder.
As an illustrator myself, I drive so much inspiration from Polina’s captivating color palettes that she is one of my favourite artists that I’m following on Behance. Her photography with an irresistible charm makes her a true standout in the art of visual storytelling.


I can’t take my eyes away: Carlos Jiménez Varela
Carlos Jiménez Varela is a photo compositor and high-end retoucher based in San José, Costa Rica. He’s known for his masterfully edited photos depicting giant sneakers in urban or natural settings. He always manages to come up with interesting ideas and his work is constantly creative. He’s also skilled with Photoshop, using it to enhance and perfect pictures. His art is making him stand out as a talented artist in his field and showing to the rest of the world what is possible in the world of digital composition and retouching.


Creative expression of cultural heritage: Osborne Macharia
Osborne Macharia, a Kenyan-Canadian photographer and director, brings a refreshing blend of photography, motion, and art direction to his work. His use of color and light surprises the audience, adding a unique touch to his creations. He creatively draws inspiration from his cultural background, filling his projects with truth and empowerment. What’s remarkable is that even in commercial photography, you can still feel his distinctive style. In my opinion, this makes him an artist worth following and admiring.


When great make-up meets flawless editing: Flora Borsi
Ever wondered what happens when digital creativity, photography, and a touch of nature come together? Meet Flora Borsi, a digital creator and photographer based in Budapest, Hungary, who answers this question with her mesmerizing work. By skillfully employing makeup and retouching, she crafts unreal and magical looks that often incorporate elements like thorns, bugs, or butterflies onto faces. The result is a harmonious and crisp feeling that radiates through her pictures. Borsi’s unique talent lies in her ability to blend hand-painting and digital editing seamlessly, making her an exceptional visual storyteller and a true master of her craft. Personally, I drive so much inspiration from her!


Color palettes to get lost in: JUCO Photo
Next up on the list is a duo: JUCO Photo, the creative collaboration of Julia Galdo and Cody Cloud, serves as a journey into a world of visually captivating photography full of surreal details. Their portfolio showcases an impressive array of work, including collaborations with renowned figures like Lizzo, Billie Eilish, and Reese Witherspoon.
What truly sets them apart is their remarkable attention to detail, infusing each image with surreal elements that engage and enthrall the viewer. The vibrant and diverse spectrum of colors that grace their photographs are so satisfying. Furthermore, their work captures a diverse selection of models, adding an inclusive and dynamic dimension to their skills. JUCO Photo’s friendly yet formal approach to their craft resonates with those who appreciate the magic of photography at its most imaginative and colorful best.

Uneasy in the best way possible: Ben Zank
Interested in a ride into the enigmatic and the unexpected? Hop on and take a look at Ben Zank’s amazing portfolio! It is filled with mysterious photographs that challenge conventional norms. Through surprising and creative settings, he constructs unsettling yet intensely curiosity-inducing compositions. Concealing faces, he allows human bodies to seamlessly merge into the organic fabric of each composition, blurring the lines between reality and imagination. Zank’s art invites viewers to ponder the intriguing narratives that lie beneath the surface, making his work a captivating and thought-provoking exploration of the human form and psyche.


A force to be reckoned with: Aleksandra Kingo
Our last artist in the list, Aleksandra Kingo, is a photographer and director based in London, UK. She is a force to be reckoned with, who is full of colors, inspiration, and boundless creativity. Her photographs have an uncanny ability to paint a smile on your face, evoking a sense of joy and wonder. She defines her work as a “playful, quirky style realized with the use of bold colors and wit,” a description that couldn’t be more accurate, in my opinion. Kingo’s art is a delightful journey into a world where imagination knows no bounds, leaving viewers both mesmerized and uplifted by her exceptional talent for combining bold colors and whimsical narratives in a truly enchanting way.
About the author:
Zeynep Alpay is a freelance multidisciplinary artist and illustrator based in Düsseldorf, Germany. Their work encompasses illustrations, animations, paper cut-outs, and traditional artwork.
For more information or to see more of Zeynep’s works, check them out on their website, LinkedIn, their portfolio on Behance, their Instagram, or their Twitter.

Wacom for photo editing
Curious about which Wacom product might be best for your photo editing practice? Check out our guide to The Best Wacom Tablets for Photo Editing by clicking here.
]]>